Let’s be honest—opening your monthly bills feels like watching your hard-earned money vanish into thin air. Your electricity bill climbs higher each summer, that leaky faucet you’ve been ignoring is literally draining dollars down the drain, and don’t even get me started on what contractors charge for basic home repairs. But here’s the thing: you don’t need a fat wallet or a degree in engineering to take control of your expenses. With a little creativity, some elbow grease, and the right money-saving DIY hacks, you can transform your home into a cost-cutting machine that keeps more cash in your pocket where it belongs.
I remember the first time I realized how much money I was throwing away each month. My heating bill hit $300 in January, and I thought, “There has to be a better way.” That’s when I discovered the world of budget DIY projects—simple, practical solutions that anyone can tackle on a weekend afternoon. Fast forward to today, and I’ve slashed my utility bills by nearly 40%, repaired countless things I would’ve hired someone to fix, and created a home that looks magazine-worthy without the magazine-worthy price tag.
Whether you’re a complete beginner who’s never picked up a power drill or an intermediate DIYer looking for fresh inspiration, these 20 hacks will revolutionize how you think about home expenses. We’re talking about real, actionable cheap DIY home improvements that deliver immediate results—not pie-in-the-sky projects that require a workshop full of expensive tools. Ready to keep more of your paycheck? Let’s dive in.
1. Seal Air Leaks with Insulation Foam Spray
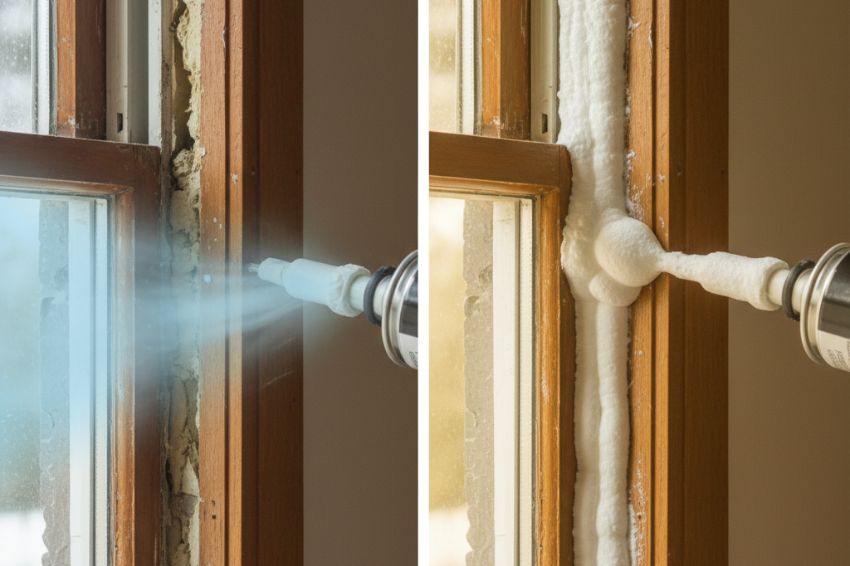
Your home is probably bleeding money through invisible air leaks around windows, doors, and outlets. It’s like leaving a window cracked open all winter long—your heating system works overtime while your cash flies out the gaps.
Grab some insulation foam spray from your local hardware store (usually under $10 a can) and spend an afternoon sealing those sneaky air leaks. Focus on window frames, door thresholds, pipe entries, and electrical outlets. This single afternoon project can reduce your heating and cooling costs by up to 20%. That’s real money back in your wallet every single month, and the foam pays for itself in just a few weeks.
2. Install a Smart Thermostat for Automated Savings
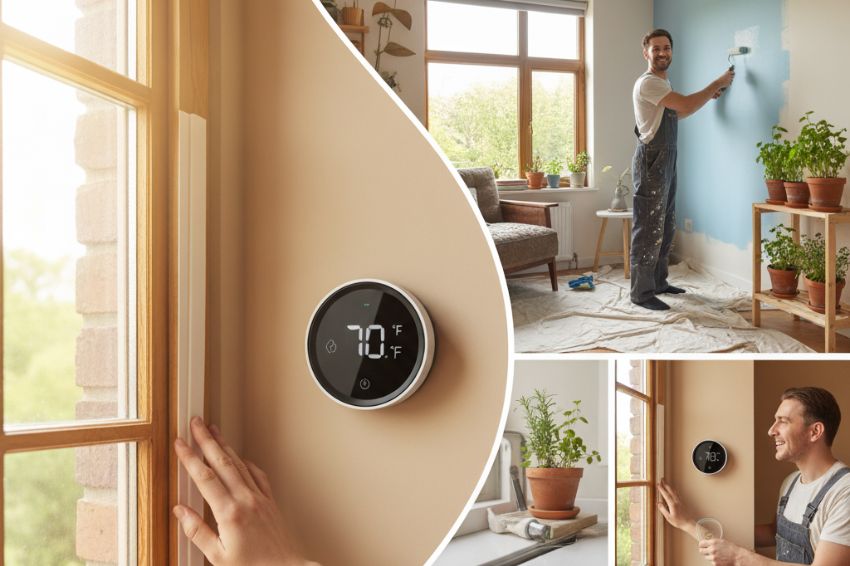
Here’s where technology becomes your budget’s best friend. A programmable LED smart thermostat like the Nest learns your schedule and automatically adjusts temperatures when you’re away or sleeping. No more heating an empty house or cooling bedrooms at 2 AM.
The installation is surprisingly straightforward—most models come with step-by-step video tutorials that walk you through the process in about 30 minutes. You’ll typically need just a screwdriver and your phone. These thermostats can slash your heating and cooling bills by 10-23% annually, which translates to $130-$145 in savings each year for the average American home. That’s a fancy dinner out every month, courtesy of being smarter with your temperature control.
3. Switch to Energy Star LED Light Bulbs
This hack is almost embarrassingly simple, yet countless people still haven’t made the switch. Traditional incandescent bulbs are little space heaters that happen to produce light—they waste about 90% of their energy as heat.
Energy Star LED light bulbs use at least 75% less energy and last 25 times longer than traditional bulbs. Yes, they cost more upfront (usually $2-4 per bulb), but here’s the beautiful math: a single LED bulb can save you $55 in electricity costs over its lifetime. Multiply that by every bulb in your house, and you’re looking at hundreds of dollars in savings. Plus, you’ll stop playing that annoying game of “replace the burnt-out bulb” every few months.
4. Create Homemade DIY Cleaning Supplies
Why pay $5-8 for each specialized cleaning product when you can make equally effective versions for pennies? Your grandparents knew this secret, and it’s time we brought it back.
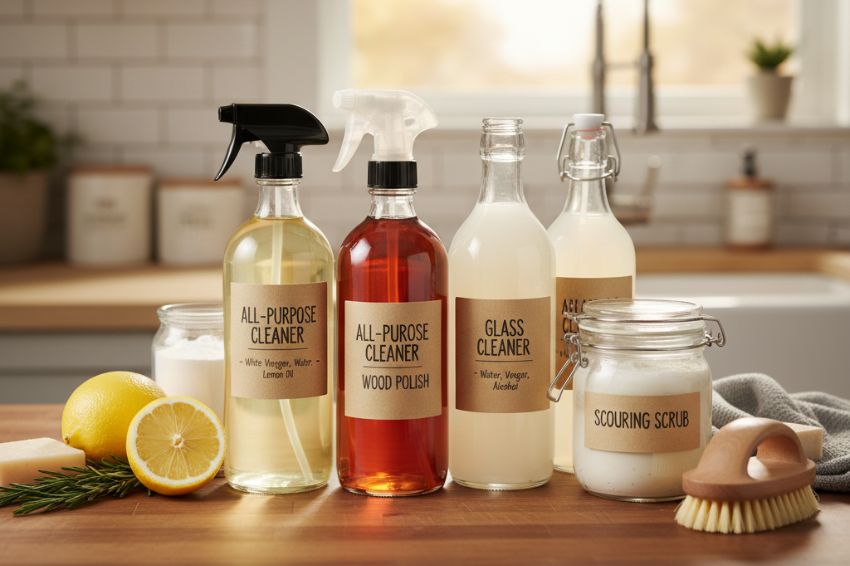
A basic DIY cleaning supplies starter set includes white vinegar, baking soda, castile soap, essential oils, and a few spray bottles. Here’s what you can make:
- All-Purpose Cleaner: Mix equal parts water and white vinegar, add 10-15 drops of lemon essential oil. Total cost per bottle: about $0.50.
- Glass Cleaner: Combine 2 cups water, ½ cup white vinegar, and ¼ cup rubbing alcohol. Crystal-clear windows for roughly $0.30 per batch.
- Scouring Powder: Mix baking soda with a few drops of dish soap. Tackles tough stains for about $0.15 per use.
I make a month’s worth of cleaning products in about 20 minutes, spending maybe $10 total. Compare that to the $40-50 I used to drop on commercial cleaners, and it’s a no-brainer. Plus, you know exactly what chemicals you’re bringing into your home—no mysterious ingredients or harsh fumes.
This is just the beginning. While these three recipes cover the basics, they are only a fraction of what you can create.
To discover the full list of essential ingredients, get advanced recipes for every room (from laundry detergent to tub scrubs), and learn the critical safety guidelines to protect your pets and surfaces, dive into our complete guide.
Read More: Create Homemade DIY Cleaning Supplies: Your Complete Guide to Natural, Eco-Friendly Cleaners
5. Fix Leaky Faucets with Basic Plumbing Skills
That constant drip-drip-drip isn’t just annoying—it’s expensive. A faucet leaking one drip per second wastes over 3,000 gallons of water annually. If you’re paying for water and sewer, that’s roughly $35 down the drain each year, per faucet.
Most leaky faucets need a simple washer or O-ring replacement, which costs under $5 and takes about 15 minutes. A basic plumbing repair kit includes everything you need: wrenches, washers, O-rings, and plumber’s tape. YouTube has thousands of tutorials for every faucet type imaginable, walking you through the process step by step.
I was terrified of plumbing repairs until I fixed my first leaky faucet. Now I tackle them confidently, saving the $150-200 a plumber would charge for a house call. That’s money better spent on literally anything else.
6. Repurpose Old Furniture for Fresh Looks
Before you haul that worn-out dresser to the curb, consider this: with a little creativity and minimal investment, you can transform tired furniture into stunning conversation pieces. Welcome to the world of DIY thrift flip projects.
Sand down that scratched table, apply a coat of chalk paint ($8-12 per can), and add new hardware. Suddenly, you’ve got a piece that could pass for something from a boutique furniture store. Old ladders become shelving units, wooden crates transform into rustic storage, and dated nightstands get new life with contact paper and paint.
I recently turned a $15 thrift store dresser into a bathroom vanity that looks like it cost $400. The transformation took one weekend, about $50 in supplies, and now I get compliments every time someone uses my bathroom. That’s the magic of repurpose old furniture DIY—giving new purpose to forgotten pieces while keeping your wallet happy.
7. Install Low-Flow Showerheads and Faucet Aerators
Here’s a hack that pays for itself faster than almost any other: water-saving fixtures. A low-flow showerhead costs $15-30 and reduces water usage by 25-60% without sacrificing pressure. Most models simply screw on—no plumber required.
Faucet aerators are even simpler. These tiny mesh screens cost $3-5 each and screw onto your existing faucets, reducing flow while maintaining pressure. For a family of four, these fixtures can save 2,900 gallons of water annually—that’s $25-35 in water bills plus savings on heating that water.
The installation literally takes five minutes with just your hands (maybe pliers for a stubborn connection). In less time than it takes to watch a sitcom, you’ve created passive savings that continue month after month, year after year.
8. Create Budget-Friendly Wall Art
Blank walls are missed opportunities for personality, but professional art can cost hundreds or thousands of dollars. Instead, embrace budget-friendly DIY wall art that looks expensive but costs next to nothing.
Frame fabric samples from the clearance bin ($2-5 per yard provides multiple frames). Print oversized photos at your local print shop (often under $10). Create abstract art with canvas panels and acrylic paint. Use washi tape to make geometric designs directly on walls. Mount pages from old books or vintage maps.
My favorite hack? Thrift store frames (usually $2-5 each) get spray-painted to match, then filled with botanical prints downloaded free from museum websites. I created a gallery wall for under $40 that guests assume cost ten times that amount. The secret is cohesive framing and thoughtful arrangement—not expensive art.
Ready to transform your own space? We’ve compiled even more budget-friendly wall art ideas specifically for your living room.
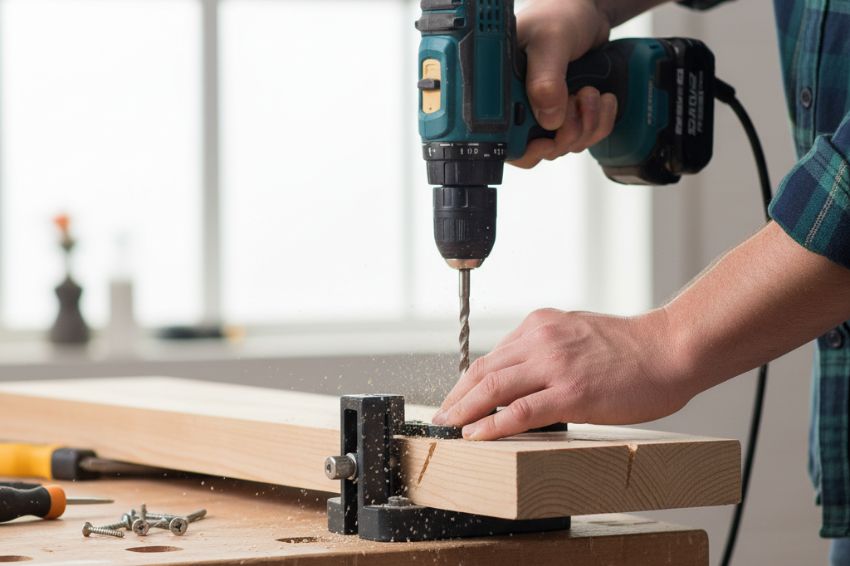
9. Build Simple Furniture with Pocket Hole Joinery
Here’s where we separate the casual DIYers from those ready to level up. The Kreg Jig K4 Pocket Hole System (around $100) opens up a world of furniture building that saves you thousands over time.
Pocket hole joinery lets you build sturdy furniture using just a drill, the jig, and some lumber. No complicated joints or expensive tools required. You can build a farmhouse dining table for $150 in materials that would retail for $800-1,000. A bookshelf that costs $60 to make would cost $300 at the store.
I was skeptical until I built my first bookshelf. The process took a Saturday afternoon, and I felt like a genius every time someone asked where I bought it. Now I build DIY cheap furniture regularly, saving money while creating custom pieces that perfectly fit my space and style.
10. Paint Like a Pro with Proper Prep
Nothing transforms a space faster than fresh paint, but hiring painters costs $2-6 per square foot. Doing it yourself costs a fraction of that—if you do it right. The secret is prep work and quality tools, not expensive paint.
Invest in a good project paint supplies kit with quality brushes, rollers, and 3M painter’s tape. Clean walls thoroughly, fill holes with spackling paste, sand smooth, and prime when needed. Take your time with taping—crisp lines make the difference between amateur and professional results.
I painted my entire living room for $80 in supplies (paint, primer, tape, supplies) over one weekend. A professional quote came in at $600. That’s $520 saved for maybe 10 hours of work—that’s $52 per hour I paid myself to do satisfying work that improved my home. And here’s the bonus: once you have the tools, every future room costs even less.
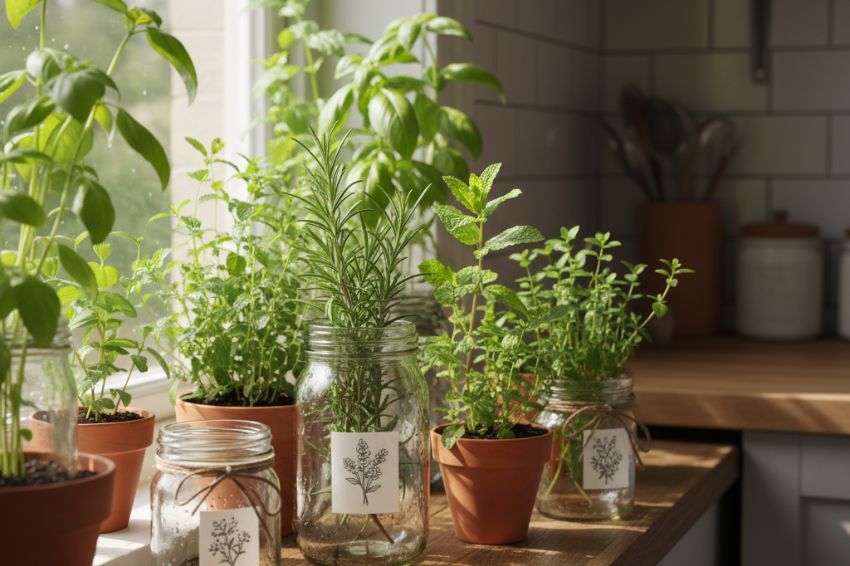
11. Grow Your Own Herbs for Kitchen Savings
Fresh herbs from the grocery store cost $3-5 per tiny package, and they go bad before you use them all. It’s one of those sneaky expenses that doesn’t seem like much until you realize you’re spending $15-20 monthly on herbs alone.
An aromatic herb seed starter kit costs $15-25 and produces herbs for years. Basil, cilantro, parsley, thyme, and rosemary thrive on sunny windowsills with minimal care. You’ll use more herbs because they’re free and abundant, elevating your cooking while slashing your grocery bill.
My kitchen windowsill herb garden provides $200+ worth of fresh herbs annually for about $20 in initial investment plus occasional potting soil. The plants are forgiving, even for those of us without green thumbs, and there’s something deeply satisfying about snipping fresh basil for tonight’s pasta.
12. Use LED Strip Lights for Ambiance
Lighting sets the mood, but traditional accent lighting involves expensive fixtures and electrical work. Wireless LED strip lights offer a brilliant shortcut—literally.
These affordable strips (starting around $15-30) stick directly to surfaces and plug into regular outlets. Install them under kitchen cabinets for task lighting, behind your TV for ambient glow, or along ceiling edges for soft illumination. They use minimal electricity, last for years, and transform spaces for a fraction of what recessed lighting or track lights would cost.
I added strip lighting to my kitchen cabinets in 30 minutes, creating a warm, inviting atmosphere that makes my kitchen feel twice as expensive as it is. Guests always comment on the lighting, and I just smile knowing the whole setup cost less than one restaurant meal.
13. Master Carpet Cleaning with DIY Solutions
Professional carpet cleaning runs $120-230 for an average home, and those rental machines are pricey and exhausting to use. Instead, try effective DIY carpet cleaning solutions for spot cleaning and refreshing.
For general freshening: Sprinkle baking soda liberally over carpets, let sit 15-30 minutes, then vacuum thoroughly. For stains: Mix equal parts white vinegar and water in a spray bottle, add a drop of dish soap, spray the stain, let sit 5-10 minutes, then blot with a clean cloth.
For deeper cleaning: Mix ¼ cup white vinegar, 1 tablespoon dish soap, and warm water in a bucket. Use a scrub brush to work into high-traffic areas, then blot dry with towels. This method costs pennies per cleaning and works remarkably well for refreshing carpets between professional cleanings (which you’ll need far less frequently).
14. Weatherstrip Doors for Instant Savings
If you can see daylight around your exterior doors when they’re closed, you’re literally burning money. Door weatherstripping costs $5-15 per door and takes about 20 minutes to install with just scissors and a screwdriver.
Weatherstripping comes in various types—foam tape, V-strip, door sweeps—so choose what fits your door gaps. This simple upgrade can reduce heating and cooling costs by 10-15% by preventing conditioned air from escaping and outdoor air from infiltrating.
I weatherstripped all my exterior doors one Saturday morning for about $50 total. The difference was immediately noticeable—no more cold drafts in winter or hot air sneaking in during summer. My next heating bill dropped by $25, meaning the materials paid for themselves in just two months.
15. Create Storage Solutions from Reclaimed Wood
Storage furniture is expensive, but reclaimed wood planks are affordable and gorgeous. Old barn wood, pallet wood, or clearance lumber becomes floating shelves, storage benches, or coat racks with basic tools and creativity.
A simple floating shelf project requires wood planks, L-brackets, screws, and a drill. Sand the wood, stain or paint if desired, attach brackets to studs, and mount the shelf. Total cost: $15-30 for a shelf that would retail for $80-150.
I built an entire mudroom organization system using reclaimed wood and basic hardware for under $100. A comparable system from a furniture store would’ve cost $600+. The rustic, customized look actually adds more character than factory-made options, and I can proudly say I made it myself.

16. Maintain Your HVAC System for Efficiency
Your heating and cooling system works hard, and neglecting it costs you money in two ways: higher energy bills and expensive repairs. Regular DIY maintenance keeps it running efficiently and extends its lifespan.
Every month, check and change your air filter ($5-15 each). Dirty filters force your system to work harder, increasing energy costs by 5-15%. Twice yearly, clean the outdoor condenser unit—turn off power, remove debris, spray with a garden hose from inside out. Check that vents aren’t blocked by furniture or curtains.
These simple tasks take 15 minutes but can save you $100-200 annually in energy costs plus prevent the $300-500 service calls that come from neglected maintenance. It’s preventive medicine for your home, and it’s remarkably easy once you establish the routine.
17. Use Peel and Stick Solutions for Renter-Friendly Updates
Renters face a frustrating dilemma: you want to personalize your space, but you can’t make permanent changes. Enter the world of temporary transformations with peel and stick wall decals, contact paper backsplashes, and removable wallpaper.
Transform dated kitchen cabinets with contact paper ($10-20 per roll). Add a faux tile backsplash with peel-and-stick tiles ($20-40). Cover rental-white walls with removable wallpaper that peels off cleanly when you move. These solutions cost a fraction of permanent renovations and require zero special skills—just patience and a smoothing tool.
I used peel-and-stick subway tiles to create a kitchen backsplash in my rental for $65. It took one evening and completely transformed the space from drab to magazine-worthy. When I moved, it peeled off in minutes without damaging the wall, and I took it with me to my next place.
18. Optimize Your Refrigerator for Energy Savings
Your refrigerator runs 24/7, consuming more energy than most other appliances. A few simple adjustments can reduce its energy appetite significantly without spending a dime.
Set the temperature to 37-40°F for the fridge and 0-5°F for the freezer—colder than this wastes energy. Clean the condenser coils (usually underneath or behind the unit) twice yearly—dust buildup makes the motor work harder. Check door seals by closing the door on a dollar bill; if it pulls out easily, the seals need replacing ($50-70 DIY vs. $150-200 professional replacement).
Keep the fridge reasonably full—cold items help maintain temperature when you open the door—but ensure air can circulate. These tweaks can reduce refrigerator energy consumption by 15-25%, saving $20-40 annually with basically no effort.
19. Install Your Own Bathroom Accessories
Those “minor” bathroom updates add up fast when you hire handymen. Installing towel bars, toilet paper holders, and shelving yourself saves $50-100 per item in labor costs.
Most bathroom accessories come with templates and installation hardware. You’ll need a drill, appropriate drill bits (often included), a level, and maybe wall anchors for drywall. Watch the included video or find tutorials online for your specific product.
The first time takes 30 minutes as you figure things out. The second time takes 10. I’ve outfitted two bathrooms with all new accessories for about $150 in materials—projects that would’ve cost $500+ with installation. Plus, there’s genuine satisfaction in using fixtures you installed yourself every single day.
20. Plan Strategic DIY Renovations with Phased Approaches
Low-cost DIY renovations don’t happen overnight—they happen in strategic phases that prevent overwhelm and overspending. Choose one area to focus on, complete it fully, then move to the next.
DIY budget bathroom remodels start with paint, new hardware, and updated lighting (under $200). Add new accessories and a shower curtain (another $100). If budget allows later, replace the vanity or add tile. DIY kitchen upgrades budget projects follow similar logic: paint cabinets first, update hardware and light fixtures, then consider a peel-and-stick backsplash.
This phased approach lets you cash-flow improvements without debt, gives you time to learn skills between projects, and allows you to live with changes before committing to the next phase. I renovated my bathroom over six months, spending $600 total instead of the $3,000+ a full renovation would’ve cost. The result looks completely professional because I took time to do each phase well.
Essential Tools for Money-Saving DIY Projects
Before you dive in, you’ll want a basic toolkit. Here’s what every DIYer needs to get started with beginner money-saving DIY projects:
| Tool | Approximate Cost | Why You Need It |
|---|---|---|
| DEWALT 20V MAX Cordless Drill | $80-120 | Versatile for hanging, repairs, furniture building |
| Basic screwdriver set | $15-25 | Hand-tightening and detailed work |
| Hammer | $10-20 | Hanging pictures, light demolition |
| Level | $10-25 | Ensuring straight installations |
| Tape measure | $8-15 | Accurate measurements for all projects |
| Adjustable wrench | $12-20 | Plumbing and hardware adjustments |
| Utility knife | $5-10 | Opening packages, cutting materials |
| Cordless hot glue gun | $15-25 | Quick repairs and craft projects |
You don’t need everything at once. Start with drill, screwdriver set, and hammer, then add tools as projects require them. Buy quality basics that last rather than cheap tools that frustrate and break. A good drill lasts decades; a cheap one dies in months.
Frequently Asked Questions About Money-Saving DIY Hacks
What are the best money-saving DIY hacks at home?
The highest-impact hacks target utility bills and preventive maintenance. Sealing air leaks, installing a smart thermostat, switching to LED bulbs, and fixing leaky faucets deliver immediate, measurable savings. These projects require minimal skill, cost little upfront, and save money every single month. Start here before moving to larger projects—the quick wins build confidence and fund future improvements.
How can I save on home repairs using DIY methods?
Learn to diagnose problems yourself before calling professionals. YouTube and home improvement blogs offer tutorials for most common repairs. Start with simple fixes like replacing faucet washers, patching drywall, or unclogging drains. Keep a basic plumbing repair kit and multi-purpose power tool combo kit on hand. When repairs do require professionals, having DIY knowledge helps you understand quotes and avoid being overcharged.
What are inexpensive DIY projects that look expensive?
Focus on paint, lighting, and accessories—these deliver the biggest visual impact for the least money. A painted accent wall costs $30-50 but looks custom. LED strip lighting adds ambiance for $20-40. Gallery walls with thrifted frames create designer vibes for under $50. Fresh hardware on cabinets and doors transforms spaces for $30-60. The key is cohesive style and careful execution, not expensive materials.
Which DIY energy-saving upgrades are worth trying?
Prioritize upgrades with the fastest payback: weatherstripping doors and windows (2-4 month payback), switching to LED bulbs (6-12 month payback), installing low-flow fixtures (3-6 month payback), and adding a smart thermostat (1-2 year payback). These require minimal investment and skill but deliver consistent, measurable savings. More intensive upgrades like insulation or window replacement offer long-term value but require careful cost-benefit analysis.
What are the safest DIY plumbing hacks to avoid costly repairs?
Stick to repairs above the shut-off valves: fixing leaky faucets, replacing washers and O-rings, installing new faucets or showerheads, and cleaning drain clogs with mechanical methods (not chemicals). Always turn off water before starting, keep towels handy, and work slowly. Know when to call a pro: main line clogs, water heater issues, and anything involving your home’s main water supply are worth professional expertise. The wrong DIY mistake with major plumbing creates disasters that cost thousands.
Your Path to Financial Freedom Through DIY
Here’s what nobody tells you about money-saving DIY hacks: they’re not just about saving money—they’re about reclaiming control. Every faucet you fix, every wall you paint, every piece of furniture you transform is a declaration that you’re capable, resourceful, and unwilling to throw money at problems you can solve yourself.
Start small. Pick one hack from this list that addresses your biggest expense or frustration. Maybe it’s those air leaks raising your heating bill, or perhaps it’s finally fixing that annoying drip that’s been wasting water for months. Complete that project, celebrate your success, and move to the next one.
You don’t need to tackle everything at once. Progress happens project by project, skill by skill, dollar saved by dollar saved. Before you know it, you’ll have transformed not just your home but your relationship with money itself. You’ll stop seeing problems as expensive obstacles requiring professional help and start seeing them as opportunities to learn, create, and save.
The tools and knowledge you gain compound over time. That drill you buy for one project serves you for decades. The painting skills you develop transform multiple rooms. The confidence you build fixing one thing empowers you to fix the next. These cheap DIY home improvements become your financial foundation—a buffer against unexpected expenses and a path to the life you actually want.
So grab your toolbox (or start building one), pick your first project, and join the growing community of people who refuse to let home expenses control their budgets. Your future self—the one with lower bills, a beautiful home, and more money for what truly matters—is waiting for you to take that first step.
What money-saving DIY hack will you tackle first? Share your plans in the comments below, and let’s inspire each other to build more, spend less, and live better!
This guide combines years of hands-on DIY experience with practical money-saving strategies tested in real homes. All product recommendations and cost estimates are based on current market research and personal testing. We believe in sustainable living, financial freedom, and the power of doing it yourself—not because you have to, but because you can.
Disclaimer: Always prioritize safety when tackling DIY projects. Wear appropriate protective equipment, follow manufacturer instructions, and know when to call professionals. Some projects may require permits or professional expertise. Cost savings are estimates based on average scenarios and may vary by location and specific circumstances.