The moment I realized my first wooden coin bank was a failure wasn’t when I dropped it. It was six months later, when the acrylic front had turned a faint, milky yellow and was rattling like a loose tooth every time my nephew added a coin.
That one disappointment sent me down a rabbit hole — and what came out the other side is the guide I wish I’d had from the start.
Why Most DIY Wooden Banks Disappoint (And What Actually Fixes It)
Here’s the truth nobody on YouTube tells you upfront: the design of a wooden coin bank is deceptively simple. Four sides, a slot, a clear front. Easy, right?
The failure usually happens in two places — the material choice and the acrylic attachment method. Cheap pine splinters under a router. Superglue off-gasses and clouds the acrylic from the inside. The whole thing ends up looking like a craft fair impulse buy rather than the heirloom piece you pictured.
We’re fixing both of those today.
The Wood That Changes Everything
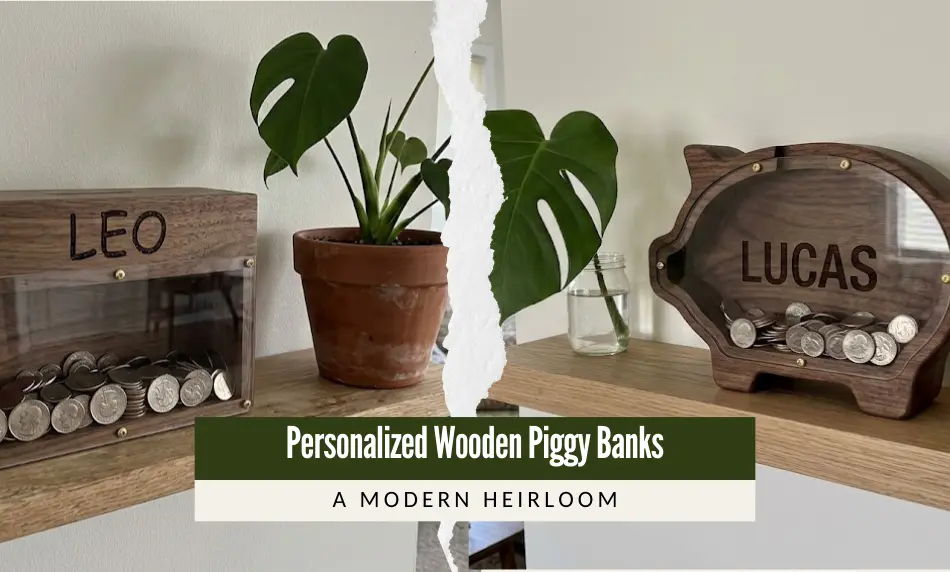
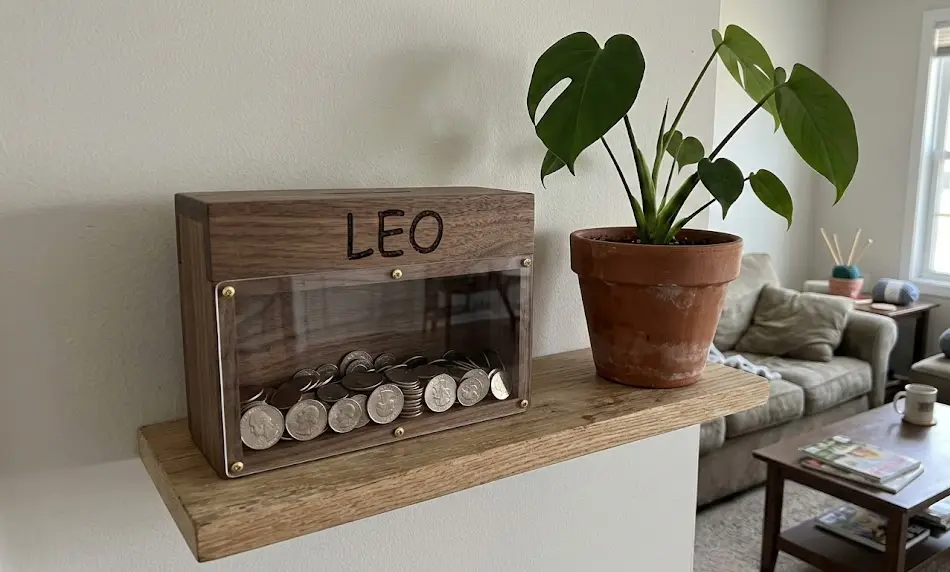
If you want this to look like a personalized wooden piggy bank worth keeping for thirty years, start with the right hardwood.
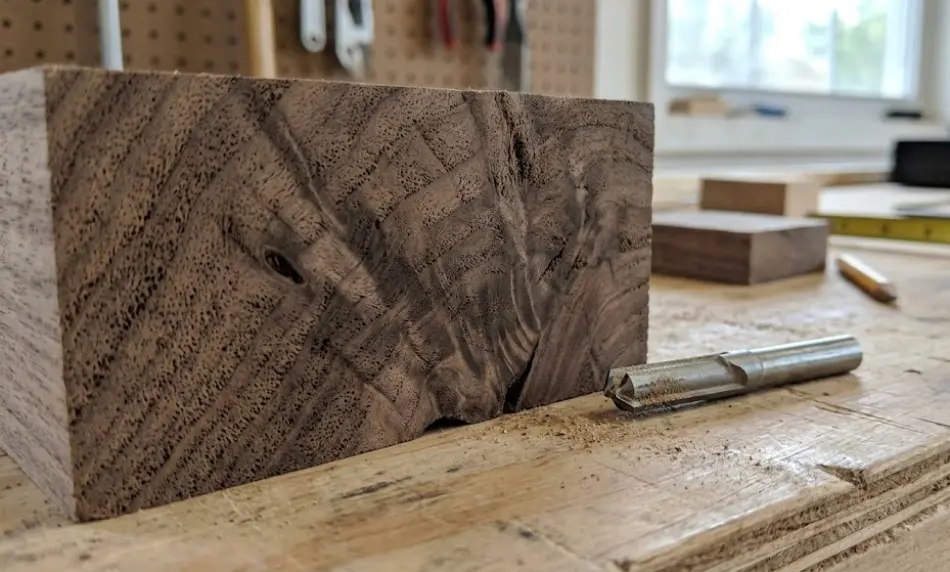
Black Walnut is my personal favourite for this project. It routes like a dream, holds crisp edges, and that deep chocolate grain does something visually stunning under a hard-wax oil finish. Yes, it costs more — roughly $12–$16 per board foot — but you’re buying one small board. The upgrade is worth every cent.
Quarter-Sawn White Oak is the other premium choice. The medullary rays (those beautiful silver flecks in the grain) make it perfect for a Scandinavian or modern minimalist aesthetic. It’s also exceptionally stable, which matters a lot for a project like this.
What to Skip: Standard pine ($2–$4/bd ft) sounds budget-friendly until the router tears out the dado channel and your “clean groove” looks like a dog chewed through it. MDF with veneer is even worse — routing the inner lip exposes a fuzzy, ugly core that no amount of finishing can save.
The Expert Fix: The “Drop-In” Dado Channel
This is the single technique that separates a beautiful wooden bank from a mediocre one. Instead of gluing the acrylic front in place, we’re routing a precision channel so it simply slides in.
No adhesive. No clouding. No rattle. Ever.
Here’s how it works:
Step 1. Set up a 1/8″ straight router bit in your router table.
Step 2. Cut a continuous dado groove exactly 1/4″ deep along the inside perimeter of the frame, stopping just short of the top edge. This is the “open top” that allows the acrylic to drop in.
Step 3. Cut your acrylic sheet 1/16″ smaller than the track dimensions on each side.
That tiny gap isn’t sloppiness — it’s engineering. Wood expands and contracts with seasonal humidity changes. That clearance prevents the frame from splitting in a dry winter and stops the acrylic from rattling in summer.
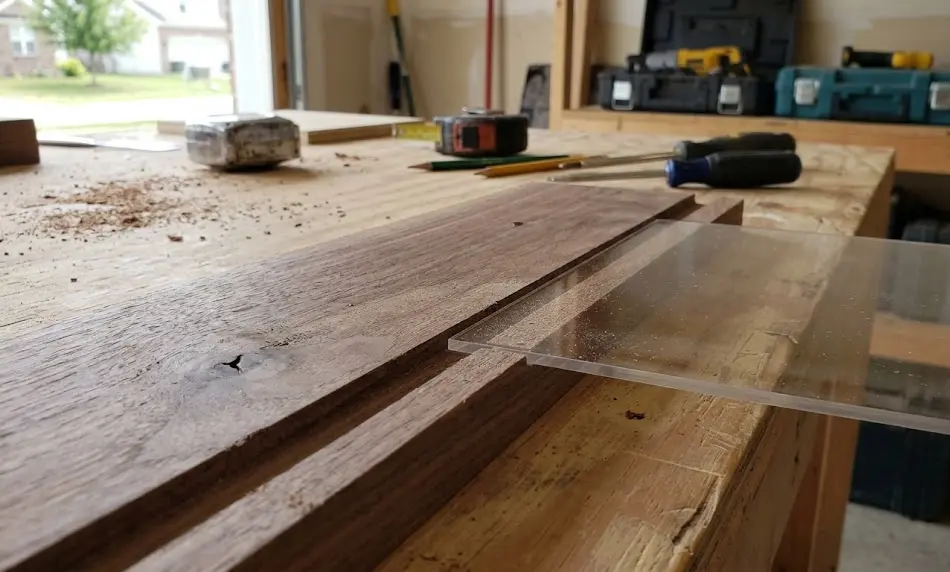
Pro Tip — Acrylic Matters Too: Always use 1/8″ (3mm) cast acrylic, not extruded. Extruded acrylic chips and cracks when you cut it. Cast acrylic scores and snaps cleanly, and the edge clarity is noticeably superior.
Cutting the Coin Slot (Without Burning the Wood)
A burned coin slot is the telltale sign of a rushed build. Here’s the clean method.
Use a brad-point bit to drill the two rounded ends of the slot. Connect them with a coping saw or scroll saw (slow, steady passes — don’t force it). Finish the interior edges with a needle file for that smooth, intentional look.
The slot should be wide enough for a standard coin stack but not so wide that folded notes slip through unintentionally. About 1.5″ long and 3/16″ wide is the sweet spot for most builds.
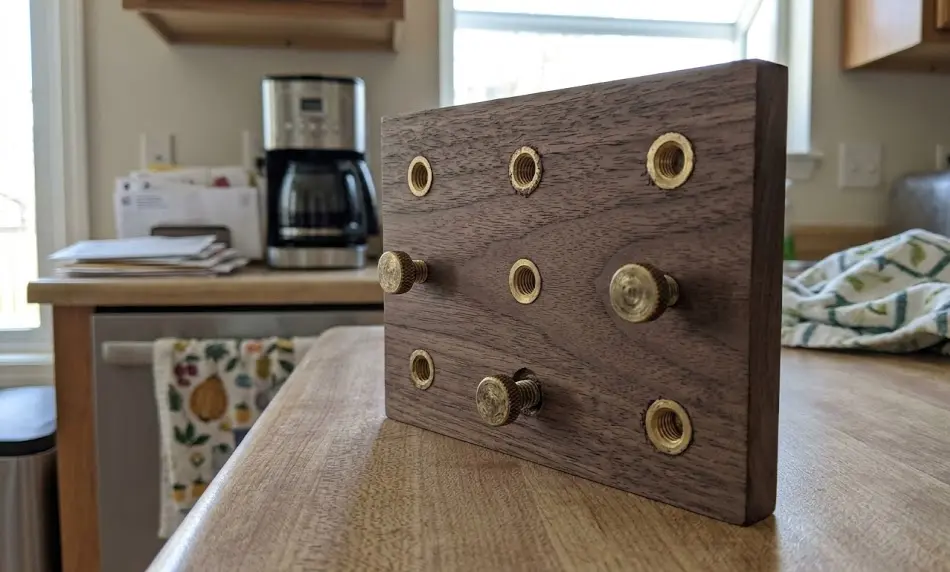
Hardware That Elevates the Whole Piece
This is where custom made piggy banks go from “nice” to remarkable.
Instead of nails or wood screws for the back panel, use solid brass threaded inserts paired with knurled Chicago screws. The brass hardware against walnut or white oak is a genuinely beautiful detail — and it means the bank can be opened, emptied, and re-closed without ever degrading the wood.
The Finish That Makes Grain Sing
For walnut and white oak, I reach for a hard-wax oil — something like Rubio Monocoat or a quality pure Tung Oil.
These finishes penetrate the wood rather than sitting on top, protecting against hand oils and moisture while keeping that matte, open-grain texture that makes premium hardwoods feel alive.
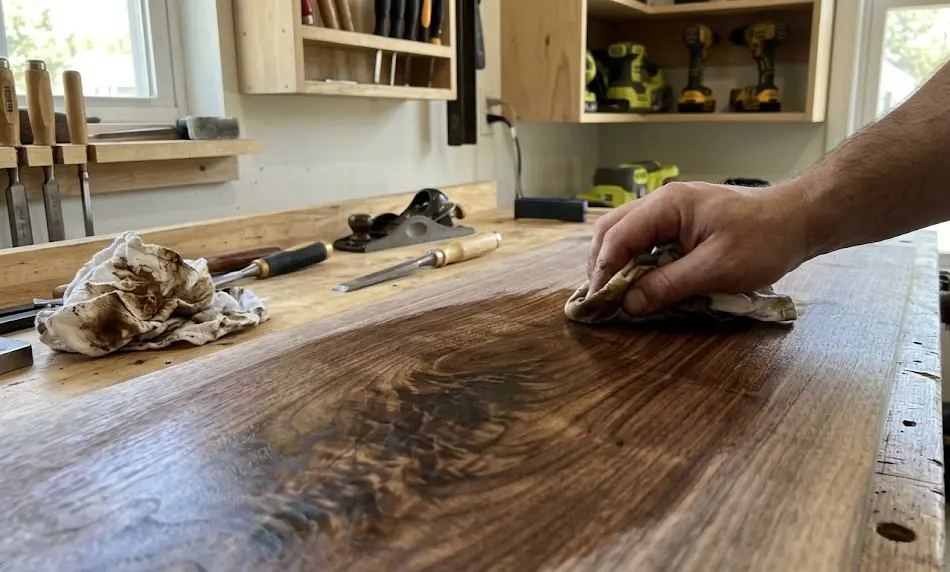
Did You Know? Hard-wax oils like Rubio Monocoat are single-coat products — they bond to the wood fibres rather than building a surface film. This means future generations can spot-repair the finish without stripping the whole piece. That’s what makes a wooden initial piggy bank a true heirloom object.
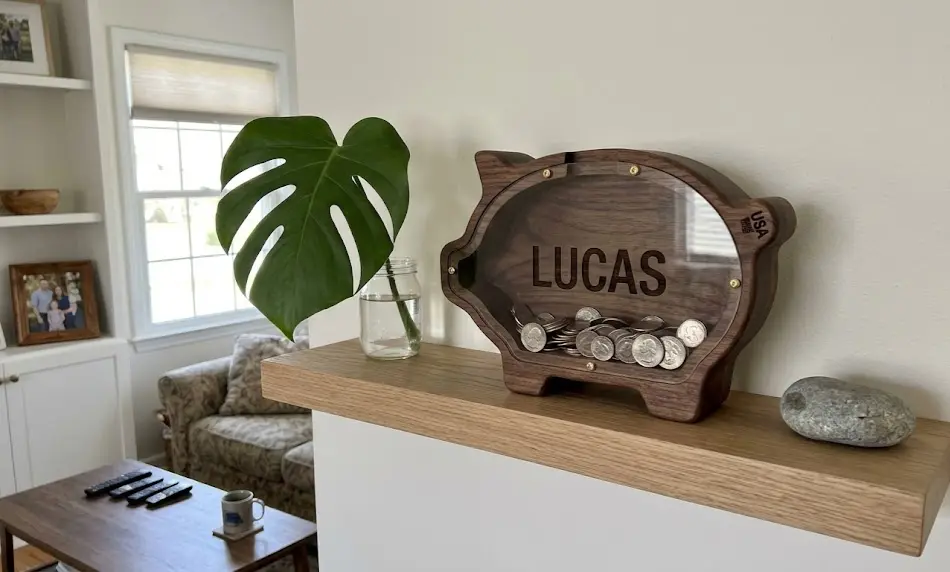
Personalisation: Making It Theirs
This is the part that turns a wooden bank into a gift.
A few approaches that look genuinely beautiful:
- Laser engraved initials on the front face (most local makerspaces offer this for a few dollars)
- Inlaid contrasting wood — a strip of maple set into a walnut body creates a stunning, clean initial
- Brass letter stamps applied before finishing, pressed into the grain permanently
For a wood initial piggy bank given as a christening or birthday gift, I love pairing the child’s initial with their birth year, pressed small and low on the front panel. Understated. Permanent. Perfect.
Material Comparison: What Your Choice Signals
| Material | Cost/Bd Ft | Routing Quality | Long-Term Aesthetic |
|---|---|---|---|
| Black Walnut | $12–$16 | Exceptional — crisp dado edges, zero tear-out | Deep chocolate tones; ages into something richer over decades |
| Quarter-Sawn White Oak | $10–$14 | Highly stable; very dent-resistant | Striking medullary rays; ideal for Scandinavian or modern interiors |
| Standard Pine | $2–$4 | Poor — soft grain crushes under router | Blotchy stain absorption; dents easily |
| MDF with Veneer | ~$3 (sheet) | Terrible — exposes ugly core at routed edges | Cannot be refinished; looks cheap on interior edges |
The gap in cost between pine and walnut is maybe $8–$10 for a project this size. The gap in result is generational.
Quick Build Checklist
- [ ] 1 small board of Black Walnut or Quarter-Sawn White Oak
- [ ] 1/8″ straight router bit + router table
- [ ] 1/8″ (3mm) cast acrylic sheet
- [ ] Brad-point bit + coping saw + needle file (for coin slot)
- [ ] Solid brass threaded inserts + knurled Chicago screws
- [ ] Hard-wax oil finish (Rubio Monocoat or Tung Oil)
- [ ] Sandpaper: 120 → 180 → 220 grit progression
There’s something quietly profound about making a place to hold someone’s savings by hand. It doesn’t need to be complicated. It just needs to be done right.
A personalized wooden piggy bank built this way won’t end up in a charity shop in five years. It’ll end up on a shelf, then passed down, with the original initials still sharp and the acrylic still crystal clear.
That’s the whole point.