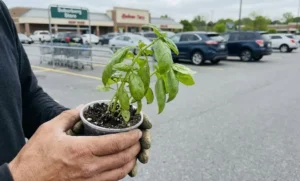
That $3.99 basil bunch from the supermarket doesn’t have to end up in the compost bin. You can turn one refrigerated grocery store pack into three thriving plants by rooting stems in water—no fancy equipment, no rooting powder, just a jar and patience.
Most store basil arrives stressed and wilted, but those nodes hiding under the leaves are packed with natural auxins that trigger root growth in plain water. This guide walks through the exact 7-day timeline, from selecting the right stems to troubleshooting the slime that kills 50% of first attempts.
Why Grocery Store Basil Roots Faster Than You Think
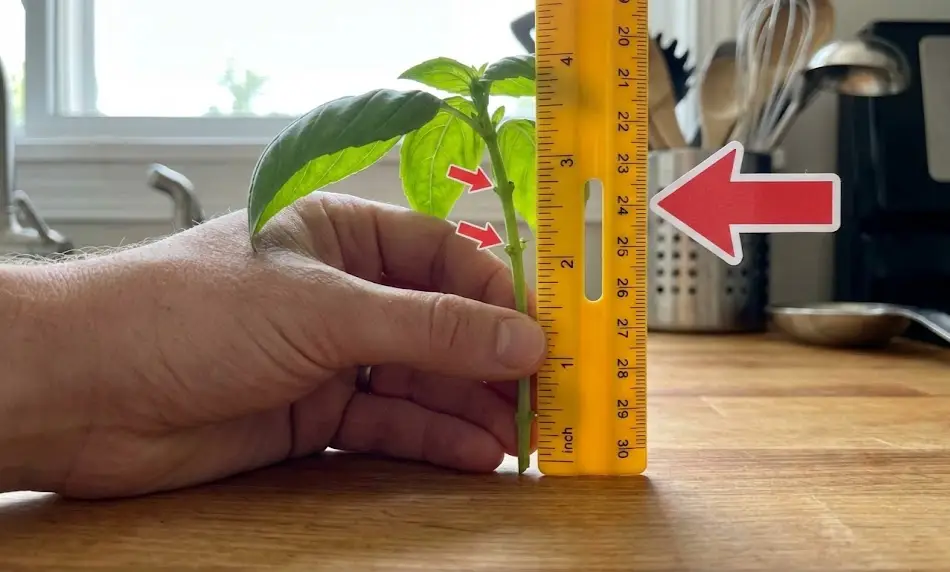
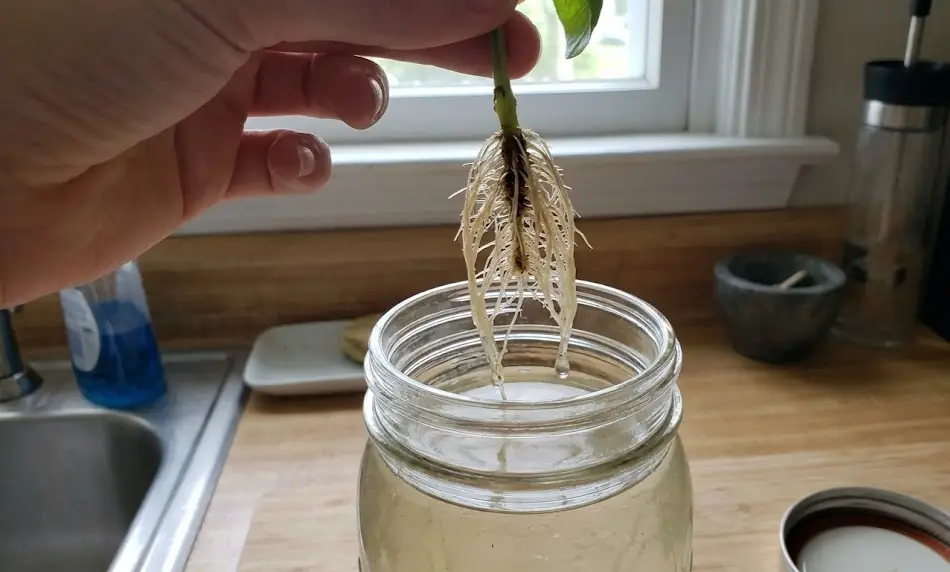
Basil cuttings generate roots in 7-14 days when cut below a node and kept in filtered water at 70-80°F. Those brown bumps along the stem—the nodes—are natural rooting zones that release auxins (plant hormones) the moment you submerge them.
Refrigerated basil from the produce aisle roots slower (6-10 days extra) because cold storage shocks the stem cells. But once the cutting warms to room temperature and nodes hit water, the process accelerates. One $3.99 pack yields 2-3 rooted plants, saving $10-20 per season compared to buying transplants.
The secret isn’t rooting hormone—it’s node exposure. Basil roots readily in plain water because it evolved in tropical wetlands where stem fragments naturally propagate after storms.
Day 1: Selecting & Prepping Supermarket Basil Cuttings
Inspect the pack before checkout. Look for stems with at least four sets of leaves and firm green tissue—avoid yellowing or black spots near the base. The best cuttings come from the outer stems of the bunch, which are younger and root 30% faster than thick woody centers.
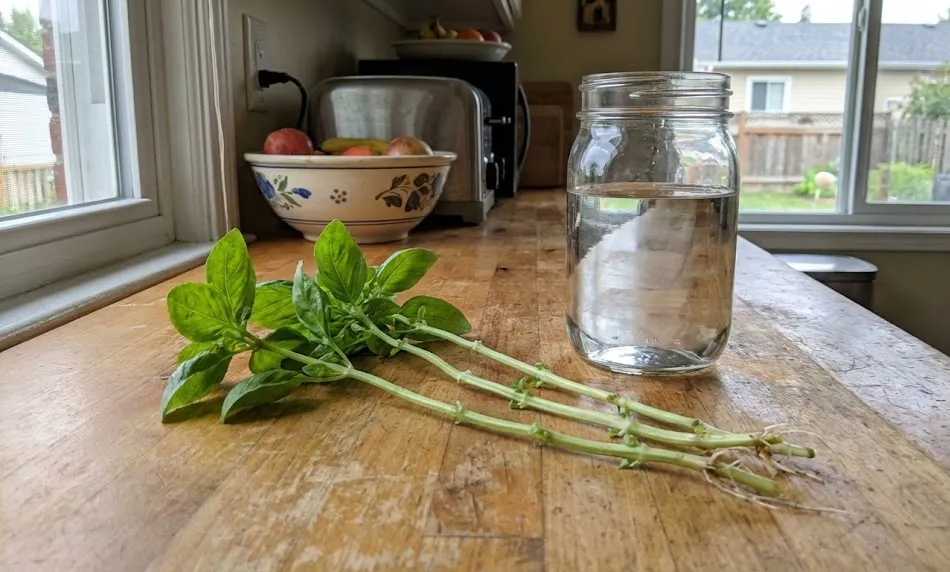
Cut 3-6 inches below a node using sharp scissors wiped with rubbing alcohol. The cut must be diagonal (45°) to maximize surface area for water absorption. Strip all leaves from the bottom two inches—submerged foliage rots and clouds the water within 48 hours.
Scrape the outer skin at the base. Use a fingernail or knife to gently remove a ¼-inch layer of stem tissue at the cut end. This exposes the cambium (growth layer) where roots emerge and prevents the waterlogged “cap” that blocks rooting in grocery basil.
The Zero-Waste Rooting Jar Setup
Use filtered or dechlorinated water. Tap water chlorine stunts root development in the first week—let it sit uncovered for 24 hours or use rainwater. Fill a clear glass jar (mason jars or recycled pasta sauce jars work) halfway, ensuring two nodes are submerged but leaves stay dry.
Position the jar in indirect light. A north-facing windowsill or 3 feet from a south window prevents scorching while maintaining 70-75°F. Direct sunlight heats the water above 80°F, which accelerates bacterial growth and slime buildup.
Change water every 2-3 days religiously. This is the #1 failure point. Stagnant water suffocates nodes and triggers the slimy biofilm that kills cuttings. Rinse the jar and stems under cool running water during each change—don’t skip this.
Days 3-7: The Root Emergence Window
Tiny white bumps appear at nodes by day 5-7. These are root primordia—the precursor cells that elongate into full roots. Don’t panic if nothing shows by day 7; winter cuttings or older stems can take up to 14 days.
Why won’t my basil cuttings root in water? The culprit is usually cloudy water or aerial roots (the fuzzy white hairs that aren’t true roots). True roots are smooth, branching, and emerge from nodes—not the stem surface. If water clouds, it means bacteria are outcompeting the cutting for oxygen.
Boost oxygen with an air stone (optional). Aquarium air pumps prevent anaerobic conditions that cause rot. If slime persists, try willow water—soak freshly cut willow twigs in water for 24 hours to extract natural IBA (indole-butyric acid), then use this as rooting liquid. Reddit propagators report 40% faster rooting with this hack.
Hormone-Free Propagation: Why Basil Doesn’t Need It
Do I need rooting hormone for basil cuttings? No—basil produces enough auxins naturally. Adding commercial powder (IBA or NAA) can burn soft herb stems and actually slow rooting in water propagation.
The nodes contain dormant adventitious root cells that activate when submerged. Synthetic hormones are designed for woody plants (roses, trees) that root slowly in soil. Basil’s tropical genetics make it one of the easiest herbs to propagate hormone-free.
Save your money for plants that struggle—lavender, rosemary, or sage.
Days 8-14: Root Lengthening & Transplant Timing
Roots should reach 2-3 inches by day 10-14. At this stage, they’re strong enough to anchor in soil or continue growing hydroponically. The optimal transplant window is when roots branch into secondary shoots—this indicates the cutting is actively feeding itself.
When to transplant basil from water to soil? The moment roots hit 2 inches and the cutting sprouts new top growth. Waiting longer (3+ weeks) causes roots to adapt to water-only conditions, making soil transition shock more severe.
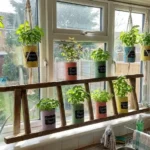
For endless indoor basil, skip soil entirely. Keep cuttings in water permanently by adding ¼-strength liquid fertilizer every 10 days. Change water weekly and top up as it evaporates. This hydroponic method works through winter on a kitchen windowsill.
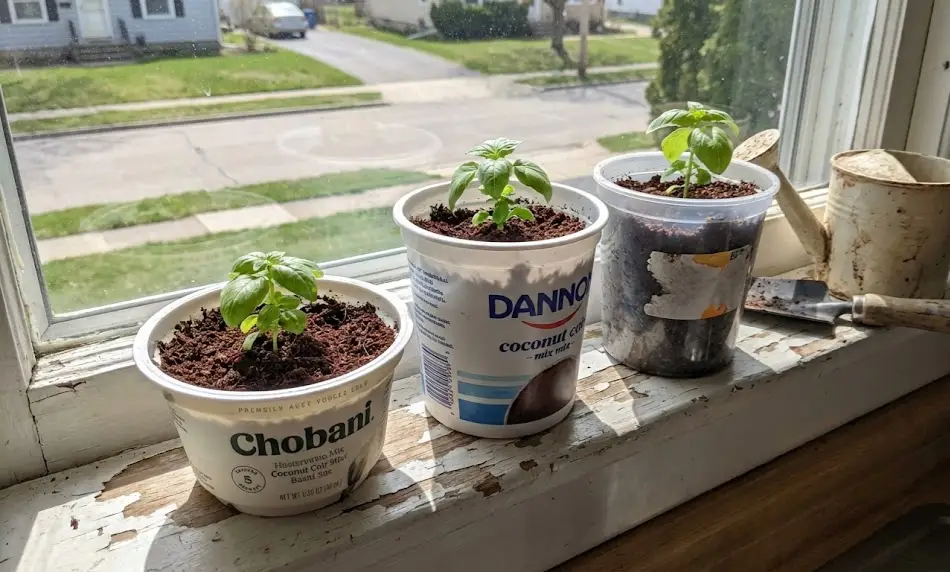
Soil Transplant Alternatives: Coconut Coir & Zero-Waste Mixes
Coconut coir outperforms peat for rooted cuttings. It retains moisture without compacting, which prevents root rot during the adjustment phase. Mix 70% coir with 30% perlite or vermiculite—avoid heavy potting soil that suffocates water-grown roots.
Ease the transition with a “mud-in” technique. Fill the pot halfway with damp coir, nestle roots in the center, then water thoroughly until the mix is saturated. This mimics the water environment while introducing solid structure gradually.
Upcycled container tip: Drill holes in yogurt cups, takeout containers, or tin cans for free pots. Basil roots spread laterally, so wide shallow containers (6-inch diameter, 4-inch depth) work better than deep narrow ones.
Troubleshooting Root Failures: The Slime Fix
Cloudy water = bacterial bloom. Basil stems leak sugars and starches into water, feeding microbes that form biofilm. The fix: scrape the stem base every 3 days to remove dead tissue, and add one drop of 3% hydrogen peroxide per cup of water (kills bacteria without harming roots).
Black or mushy stem ends mean rot has set in. Cut ½ inch above the rot zone, re-scrape, and start in fresh water. If multiple cuttings fail, the original pack was likely diseased—buy from a different store.
No roots after 3 weeks? Temperature is usually the culprit. Basil needs consistent 70-80°F—cold windowsills (below 65°F) pause rooting. Move the jar to a warmer spot or use a seedling heat mat set to 75°F.
Dividing Grocery Basil Roots for Bonus Plants
Most store basil packs contain 3-5 seedlings crammed in one rootball. Before rooting cuttings, gently tease apart the root mass in lukewarm water. Each separated plant can be potted individually, giving you instant transplants without waiting for water roots.
Combine both methods: Divide the rootball for immediate plants, then root cuttings from the tops for a staggered harvest. This strategy yields 6-8 productive basil plants from one $3.99 purchase.
Winter Indoor Setup: Light & Temperature Hacks
Basil cuttings root 40% slower in winter due to low humidity and shorter daylight. Compensate by misting leaves daily and placing jars on a humidity tray (pebbles in a shallow dish of water beneath the jar—roots don’t touch water).
Supplement with a grow light if rooting takes longer than 14 days. Position a 6500K LED bulb 12 inches above the cuttings for 10-12 hours daily. This mimics spring conditions and triggers faster root development.
Your Endless Basil Supply Starts Here
One grocery store basil bunch becomes a renewable resource when you master water propagation. The 7-14 day rooting window fits perfectly into winter meal prep timelines, and the hormone-free method eliminates supply runs to garden centers.
The real win? You’re rescuing a plant destined for the trash and turning it into months of fresh pesto, caprese, and Thai basil chicken. Every cutting you root is one less plastic clamshell in the landfill.
Ready to level up your indoor herb game? Check out our guide on regrow grocery store herbs in mason jars for cilantro, mint, and parsley propagation techniques that pair with this basil method.