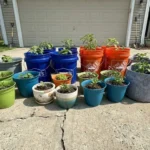
You grab a bucket from the garage, drill some holes, and plant tomatoes. But what if that container is slowly poisoning your harvest? Safe containers for gardening matter because the wrong plastic or coating can leach heavy metals and chemicals directly into your soil and vegetables.
This guide shows you exactly how to identify safe containers for gardening, which materials pass the toxin test, and which ones to toss immediately. No guesswork, just the recycling codes and field checks that protect your family.
Why Container Safety Matters for Edibles
Most gardeners focus on soil quality but ignore the vessel holding it. The container itself can release toxins that migrate into roots, especially when soil pH shifts or summer heat intensifies. Unlike ornamental plants, anything you eat becomes a direct pathway for contaminants into your body.
The EPA recognizes that certain plastics and metal coatings break down under UV exposure and moisture. Children and pregnant women face higher risk from accumulated heavy metals like lead or cadmium. Safe containers for gardening eliminate this hidden exposure before seeds even sprout.
The Leaching Process Explained
Leaching happens when heat, sunlight, or acidic soil pulls chemicals out of container walls into the surrounding medium. Plastic polymers degrade faster in outdoor conditions than indoor storage. Within one growing season, unstable compounds can concentrate in root zones where plants absorb water and nutrients.
You won’t see or smell most toxins. BPA, phthalates, and PFAS migrate invisibly. The only defense is choosing containers engineered to resist breakdown under garden conditions.
Decode Plastic Recycling Codes Fast
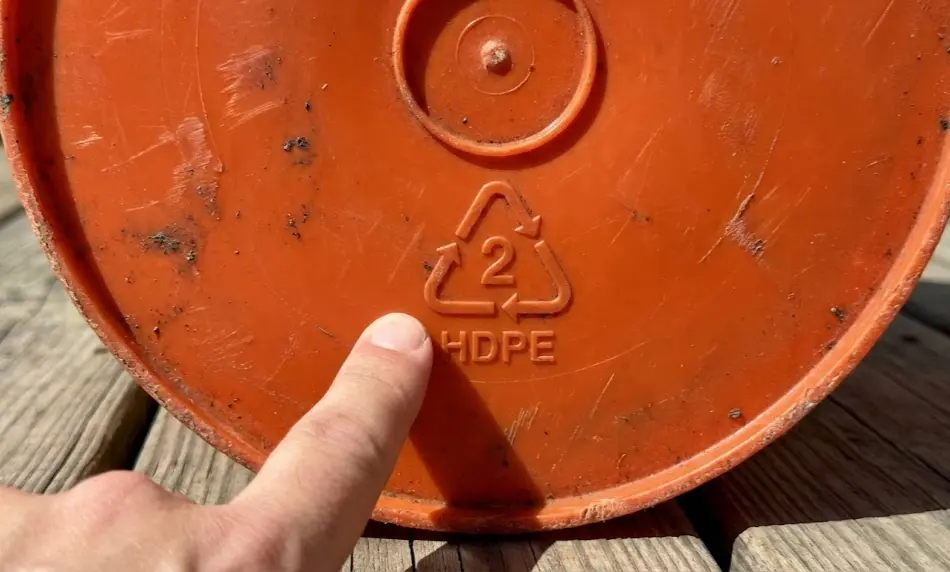
Flip any plastic container over and find the triangle with a number inside. That recycling code tells you whether it’s safe for food crops or a chemical timebomb. The FDA approves only three types for sustained food contact in garden settings.
Safe Codes (Use These):
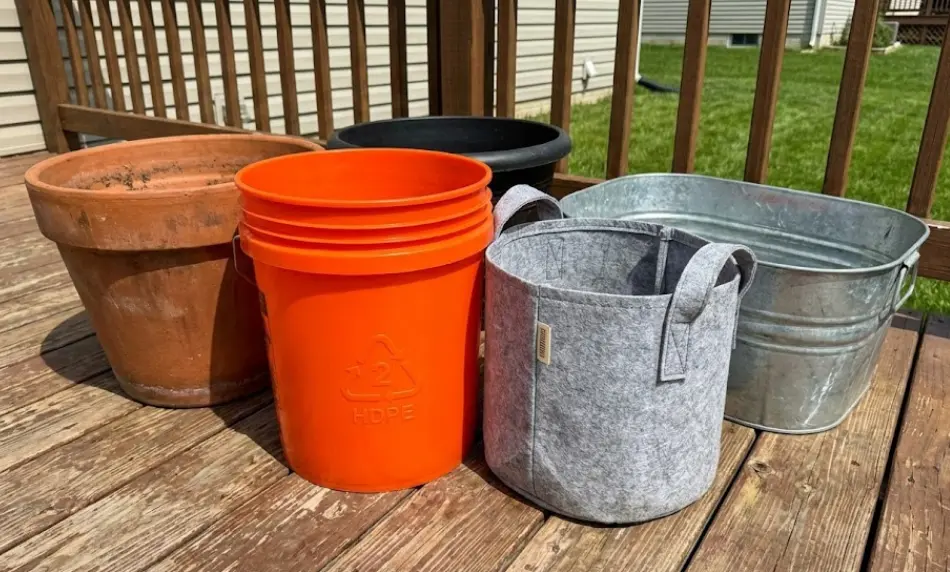
#2 HDPE (High-Density Polyethylene): The gold standard for vegetables. Home Depot orange buckets, milk jugs, and detergent bottles use HDPE because it resists UV breakdown and shows minimal leaching at neutral soil pH (6.0 to 7.5). Texas A&M extension tests confirm stability across multiple seasons.
#4 LDPE (Low-Density Polyethylene): Flexible and safe. Squeeze bottles and grocery bags share this polymer. It handles temperature swings without releasing phthalates, making it suitable for grow bags and flexible planters.
#5 PP (Polypropylene): Heat resistant and inert. Yogurt containers and nursery pots often use PP. This plastic maintains integrity even in full sun, though cheaper versions may become brittle after two years outdoors.
Dangerous Codes (Never Use for Food)
#1 PET: Water bottles seem convenient but degrade in heat above 120°F, common in black containers during July afternoons. Antimony leaching increases with each UV cycle.
#3 PVC: Releases chlorine compounds and phthalates. The distinct chemical smell when new PVC pipe sits in the sun is vinyl chloride off-gassing. Avoid completely for edibles.
#6 PS (Polystyrene): Styrofoam coolers and takeout containers break into styrene, a probable carcinogen per California Prop 65 standards. It crumbles into soil as microplastics within months.
#7 Other: This catch-all category may include BPA-laden polycarbonates or mixed resins. Without knowing the exact polymer, assume it’s unsafe for growing food.
Hidden Risks in Repurposed Buckets
That free five-gallon bucket from a restaurant or construction site looks perfect for peppers. But containers originally holding non-food substances retain chemical residues that resist washing. Industrial sanitizers, pool chemicals, and paint solvents absorb into plastic pores.
Reddit’s r/containergardening community reports ruined crops from bakery buckets that stored oxidizing agents. Even after scrubbing, chlorine compounds persisted and killed beneficial soil bacteria. Your tomatoes withered because the container itself was toxic, not the care you provided.
The Food-Grade Test
Look for “food grade” stamped on the container or a USDA/FDA approval symbol. Firehouse Subs sells empty pickle buckets with verified food-safe status for $3 each. These passed federal contact standards and come pre-cleaned.
Sniff the inside of any repurposed bucket. A chemical, petroleum, or solvent odor means residues remain. No amount of scrubbing removes compounds that have penetrated the plastic matrix. When in doubt, spend $5 on a new HDPE bucket at the hardware store rather than risk an entire season’s harvest.
Terracotta and Ceramic Considerations
Unglazed terracotta seems natural and safe, but manufacturing processes vary wildly. Some imported pots contain lead-based pigments in decorative finishes. The porous clay also absorbs salts and minerals from tap water, which concentrate over time.
Glazed ceramic offers a non-porous surface but check for lead-free certification. Pre-1978 pottery and decorative imports from countries with lax regulations may use lead glazes that leach in acidic soils (below pH 6.0). California Prop 65 requires warnings on suspect ceramics sold in-state.
When Clay Works Best
Plain, unpainted terracotta from US manufacturers typically passes lead tests. The clay breathes, preventing root rot in herbs and Mediterranean plants. Just verify the label says “lead-free” or “food-safe” before planting lettuce or carrots.
For heirloom or decorative pots without labels, use an at-home lead test kit from Home Depot ($10 for eight swabs). Rub the swab on moistened glaze. Red color indicates lead presence. Those pots work fine for flowers but keep them away from edibles.
Galvanized Metal: The Zinc Question
Galvanized steel stock tanks and tubs appeal to gardeners wanting a rustic look. The zinc coating prevents rust but can leach into soil under certain conditions. Acidic environments (blueberries, azaleas with pH below 5.5) pull more zinc ions than neutral beds.
Texas A&M soil tests show minimal zinc migration at pH 6.5 to 7.0, well within safe limits for vegetables. Problems arise when citric acid from decomposing mulch or acid-loving plant fertilizers drop pH significantly. Excess zinc causes iron deficiency (yellow leaves with green veins) in surrounding plants.
Safe Use Protocol
Line galvanized containers with thick landscape fabric before adding soil. This barrier blocks direct metal contact while still allowing drainage. Alternatively, use galvanized metal only for short-season crops (lettuce, radishes) that mature before significant leaching occurs.
Never weld or cut galvanized steel yourself. The fumes release toxic zinc oxide. Purchase pre-made stock tanks or hire welding with proper ventilation. Once installed and lined, galvanized tubs last 15+ years without rust issues.
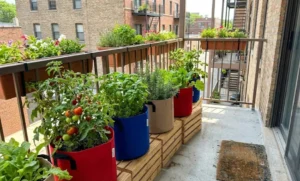
Grow Bags: The PFAS Problem
Fabric grow bags seem like the eco-friendly choice—breathable, reusable, and collapsible for storage. But recent r/DIY discussions exposed that many commercial grow bags contain fluorinated coatings for water resistance. These PFAS “forever chemicals” persist in soil and bioaccumulate in leafy greens.
The coating makes fabric shed water instead of absorbing it, exactly like non-stick pans. Each watering cycle releases microscopic PFAS particles that plants uptake through roots. Studies linked PFAS exposure to liver damage and immune suppression.
Finding Safe Grow Bags
Look for “PFAS-free” or “PFC-free” labels explicitly. Untreated burlap, jute, or certified organic cotton grow bags avoid coatings entirely. These natural fibers biodegrade after 2 to 3 seasons, so budget for replacement.
If you already own synthetic grow bags, contact the manufacturer to verify coating materials. Many brands won’t disclose this information, which itself is a red flag. When in doubt, switch to HDPE containers with drilled drainage rather than risk chronic PFAS exposure.
Wood Containers: Treated vs. Untreated
Wooden barrels and raised bed frames bring warmth to garden spaces. But lumber treatment determines whether they’re safe for edibles. Pressure-treated wood sold before 2004 contains chromated copper arsenate (CCA), which leaches arsenic into soil.
Post-2003 treated lumber uses alkaline copper quaternary (ACQ) or micronized copper azole (MCA). Both are less toxic than CCA but still release copper that accumulates over years. The EPA allows ACQ for residential use but recommends barriers between treated wood and food crops.
Identify Safe Wood Fast
Cedar, redwood, and black locust naturally resist rot without chemical treatment. These species cost more upfront but last 10 to 20 years touching soil directly. Look for “untreated” or “natural rot-resistant” labels at the lumber yard.
Avoid railroad ties, telephone poles, and pallets marked “MB” (methyl bromide fumigation). Creosote and industrial preservatives saturate these reclaimed materials. Even weathered ties release PAHs (polycyclic aromatic hydrocarbons) that contaminate root vegetables.
Test Kits for DIY Verification
When container origins are uncertain, chemical test kits provide definitive answers. Home Depot and Lowe’s carry lead test swabs ($8 to $15) that work on ceramics, painted surfaces, and glazes. Professional soil test kits ($20 to $40) measure heavy metal contamination from containers after one season.
For plastic analysis, contact your county extension office. Many offer free or low-cost screening for BPA and phthalates in donated samples. You mail a small plastic chip, and they return results within two weeks showing leaching potential.
When to Test vs. Replace
If a container cost less than $10 and you can’t verify its safety, replacing it costs less than testing. Save test kits for expensive ceramic heirlooms or large wooden beds you’ve already built. Routine testing every 3 to 5 years catches gradual degradation before it affects crops.
Document test results with photos and dates. This record helps you retire containers before they become hazards. A terracotta pot that tests clean today might crack and expose lead-containing core layers after a harsh freeze.
Quick Reference Checklist
Before you fill any container with soil, run through this safety audit:
- Container Bottom: Check for recycling code #2, #4, or #5. No code means avoid for food.
- Smell Test: Chemical, petroleum, or solvent odors indicate retained contaminants.
- Label Search: Look for “food grade,” “food safe,” or “lead-free” stamps.
- Previous Use: Know what the container originally held. Food-only sources are safest.
- Coating Inspection: Avoid peeling paint, rust, or flaking finishes that expose substrate materials.
- Age Verification: Pre-2004 treated wood and pre-1978 ceramics carry higher contamination risk.
This 60-second check eliminates 90% of toxic container risks. When any item fails multiple checks, don’t gamble with your family’s health over a $5 planter.
EPA Guidelines for Home Gardeners
The Environmental Protection Agency publishes consumer fact sheets on container safety at epa.gov/saferchoice. These documents summarize federal testing standards for materials contacting food. Cross-reference any container material against EPA’s approved substance lists.
California Prop 65 warnings appear on products sold nationwide, not just in California. If a planter carries a Prop 65 sticker for lead or phthalates, believe it. Manufacturers don’t add warnings for fun; they’re avoiding lawsuits over documented health risks.
Report Unsafe Products
If you discover mislabeled containers or suspect violations, file a complaint through the Consumer Product Safety Commission at cpsc.gov. Your report triggers investigations that protect other gardeners. Include photos of labels, recycling codes, and any test results you’ve obtained.
Community reporting led to recalls of lead-glazed imported pottery in 2023. One gardener’s complaint snowballed into removing 40,000 toxic planters from retail shelves. Your vigilance matters beyond your own backyard.
Moving Forward Safely
Safe containers for gardening aren’t about perfection or paranoia. They’re about making informed choices with available information. Start by auditing your current containers against the recycling code and material guidelines above.
Replace the worst offenders first (PVC, styrofoam, unknown buckets). Gradually upgrade to verified HDPE or untreated wood as budget allows. Within one season, you’ll have a container collection you trust completely.
The vegetables you grow should nourish your family, not expose them to hidden toxins. Spending 10 minutes checking container safety today prevents years of accumulated chemical exposure. Your future self, biting into that perfect homegrown tomato, will thank you.