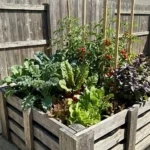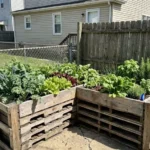
You’ve built your pallet raised bed. Now you’re staring at that massive empty box, realizing it’ll take hundreds of dollars to fill with bagged soil.
There’s a smarter way. Most plants only need quality soil in the top 12-18 inches where roots actively grow. Everything below? That’s prime territory for free organic matter that breaks down over time, feeds your soil, and slashes your costs by 80% or more.
Why Traditional Filling Methods Cost a Fortune
Bagged soil adds up brutally fast. A standard 4×8 foot pallet bed that’s 2 feet deep needs roughly 64 cubic feet of material. At $4-6 per cubic foot for bagged garden soil, you’re looking at $250-380 before you plant a single seed.
Most of that expense is wasted. The bottom half of your bed doesn’t need premium soil—it’s just taking up space. Deep-rooted plants like tomatoes will eventually reach down there, but by then, the organic layers you placed at the bottom will have partially decomposed into rich, root-friendly material.
Bulk delivery sounds cheap but has hidden costs. While a cubic yard of topsoil might cost $30-50 delivered, minimum delivery quantities often start at 3-5 yards. That’s way more than one bed needs, and you’ll pay disposal fees if you don’t use it all.
The Hugelkultur Foundation Strategy
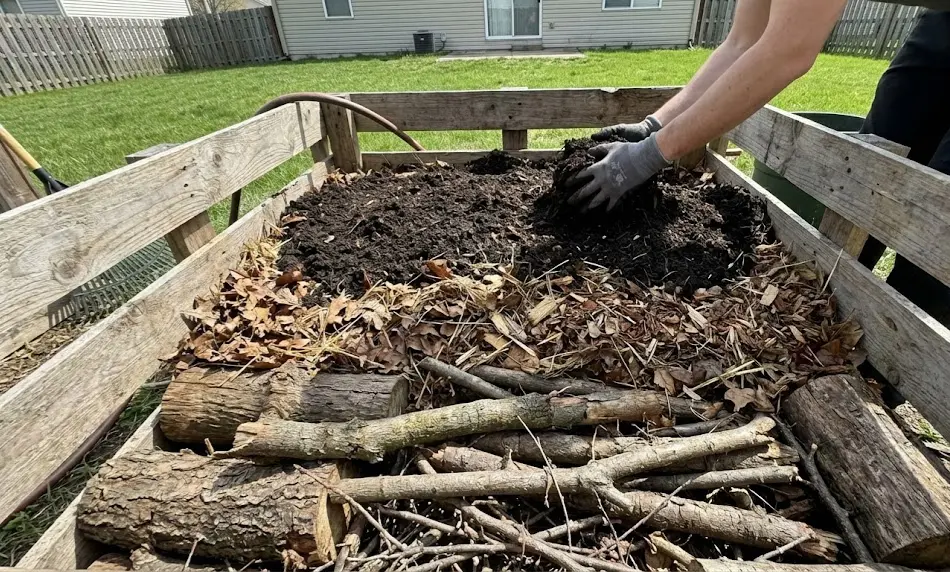
This centuries-old method transforms your biggest “waste” materials into garden gold. The principle is simple: stack carbon-rich materials at the bottom, where they’ll slowly decompose and feed your plants for 5-10 years.
What Goes in the Bottom Third
Start with logs and larger branches. Anything from 2-6 inches in diameter works perfectly. Rotting wood you’d normally haul to the dump? Perfect. Dead branches from your last storm cleanup? Even better.
Avoid treated lumber completely. Pressure-treated wood, painted boards, or anything with a chemical smell will leach toxins into your soil. Stick to untreated, natural wood from trees and shrubs.
Lay your logs crosswise at the bottom, filling gaps with smaller sticks and twigs. This creates drainage channels while slowly breaking down into spongy, water-retentive material.
The Middle Layer: Free Organic Matter
Pile on leaves, grass clippings, and wood chips. This layer soaks up water like a sponge and decomposes faster than the logs below. Municipal yard waste sites often give away free wood chips—call your local public works department.
Old potting soil from containers works here too. Even if it’s depleted, it adds bulk and structure. Mix it with your leaves and chips rather than relying on it as your primary growing medium.
Wet everything down as you build. Dry wood and leaves can take months to absorb moisture once buried, creating hydrophobic pockets that repel water instead of holding it.
Your Top Layer: Where Quality Matters
This is where you invest. The top 12-18 inches need actual growing medium—but you’re only buying soil for a fraction of your bed’s volume.
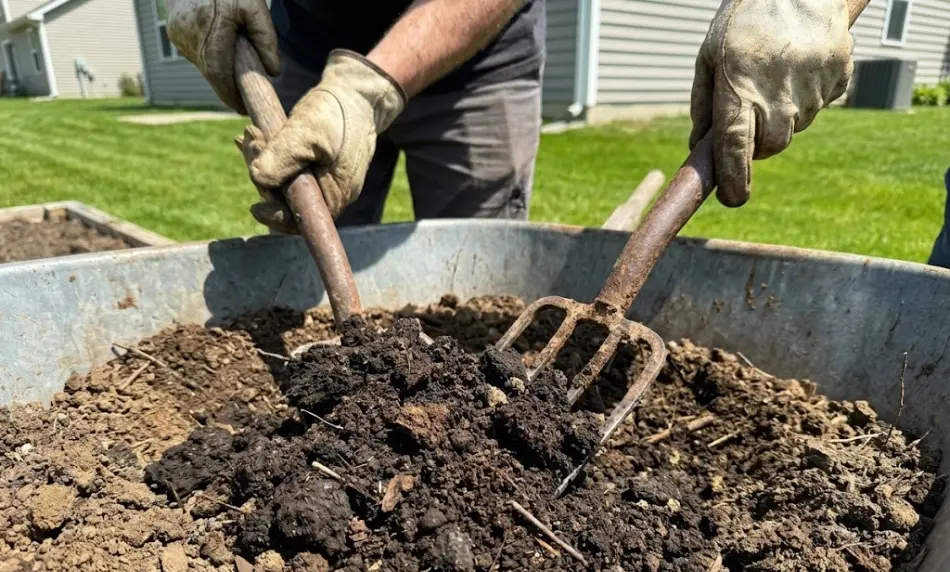
The 50/50 Budget Mix That Works
Blend equal parts compost and topsoil. For that 4×8 bed, you’ll need about 21 cubic feet (roughly 0.8 cubic yards) to create an 8-inch deep planting layer over your organic base.
Source bulk topsoil from landscape suppliers. Even if you’re paying a $50 delivery fee, you’ll spend $80-100 total versus $250+ for bagged equivalents. Split an order with neighbors to make the math work.
Bulk compost is your second stop. Municipal composting facilities often sell finished compost for $15-25 per cubic yard. Some even offer free compost to residents—check your city’s waste management website.
Mixing Your Top Layer
Wheelbarrow mixing saves your back. Load equal scoops of compost and topsoil, blend with a garden fork, then dump into your bed. Repeat until you’ve filled to 2-3 inches from the top rim.
Test texture before planting. Squeeze a handful—it should hold together but crumble when poked. Too sticky? Add more topsoil. Too sandy? Mix in extra compost or peat moss.
Leave that 2-3 inch gap. Your soil level will drop 15-30% in the first season as organic layers compress and decompose. You’ll top-dress with compost later, but starting lower prevents overflow during heavy rain.
The Lasagna Gardening Alternative
This method skips logs entirely. Instead, you build thin alternating layers of “browns” (carbon) and “greens” (nitrogen) that decompose into rich soil over 4-6 months.
How to Layer for Lasagna Beds
Start with cardboard directly on grass. This smothers weeds and breaks down into organic matter. Wet it thoroughly before adding the next layer.
Alternate 2-3 inch layers: Brown (shredded leaves, wood chips, straw), then green (grass clippings, kitchen scraps, coffee grounds), then brown again. Repeat until you’ve filled the bottom half of your bed.
Top with 6-8 inches of your compost-topsoil blend. You can plant immediately into this top layer while the lasagna cooks below.
Why Lasagna Layers Settle Fast
Expect dramatic soil loss the first year. Those fluffy layers can compact by 40-50% as they decompose. One gardener reported a 22-foot pallet bed dropping 6 inches in just one season.
Budget for annual top-ups. Plan to add 2-3 inches of compost each spring. This isn’t failure—it’s the method working. That settling means you’re building incredible soil biology underground.
Water more frequently year one. Until those layers knit together, water can run through gaps instead of soaking in evenly. Mulching the top layer with straw helps retain moisture.
Materials to Avoid (Hidden Budget Killers)
Construction debris ruins drainage. Concrete chunks, drywall, or rubble settle into root-blocking layers. What seems like free fill creates expensive problems when plants struggle.
Treated lumber is non-negotiable. Even old railroad ties or deck boards can leach arsenic and chromium. The $30 you save isn’t worth poisoning your vegetables.
Fresh wood chips need nitrogen. Uncomposted chips rob nitrogen from your soil as they break down. If using fresh chips, mix in a high-nitrogen source like blood meal or let them age 6 months in a pile first.
Diseased plant material spreads problems. Don’t fill your bed with tomato vines that had blight or roses with black spot. You’ll just reinfect next year’s plants.
How Much Soil You Actually Need
Volume calculations prevent expensive over-ordering. Multiply length × width × depth (all in feet), then divide by 27 to convert cubic feet to cubic yards.
For a standard 8×4 foot pallet bed that’s 24 inches deep:
- Total volume: 64 cubic feet (2.37 cubic yards)
- If filling bottom 12 inches with logs/organic matter: 32 cubic feet of filler
- Top 12 inches needs: 32 cubic feet (1.18 cubic yards) of soil blend
Round up slightly. Soil settles, and you’ll want extra for topping off. Order 1.5 cubic yards of bulk mix to ensure complete coverage.
Track your costs realistically. That example bed costs roughly $30-50 for the logs/organic base (or free if you source from your yard), plus $60-80 for bulk soil delivery. Total: $90-130 versus $300+ for all bagged soil.
Your First Season Reality Check
Soil will settle significantly. Mark your initial fill line with a permanent marker on the inside of the bed. You’ll see it drop—and that’s okay.
Monitor moisture carefully. Until your layers integrate, watering patterns can be uneven. Stick your finger 4 inches deep in multiple spots to check actual soil moisture, not just surface dryness.
Top-dress with compost monthly. A 1-inch layer every 4-6 weeks feeds plants and gradually replaces the settling soil. By year two, you’ll have a stable, self-sustaining bed.
Plants may struggle in week one. If you planted immediately into fresh lasagna layers, expect slower initial growth as nitrogen temporarily locks up. They’ll rebound hard once decomposition kicks in.
Beyond the First Fill
Your bed gets richer every year. Those logs and branches at the bottom will feed your plants for 5-10 seasons. The compost you add on top just keeps improving the texture.
Rotate crops, not soil. Unlike in-ground gardens, you don’t need to buy new soil annually. Just add compost, rotate plant families, and watch your yields improve.
Save kitchen scraps for bed top-ups. Coffee grounds, eggshells, and vegetable scraps break down quickly when buried under mulch. Free fertilizer that would’ve gone to the trash.