Fresh flowers are gorgeous — and brutally expensive. The average couple spends over $2,000 on wedding florals alone, a number that climbs fast once you factor in centerpieces, bouquets, arches, and aisle arrangements.
Here’s the secret seasoned DIY brides have quietly known for years: paper flowers made from crepe paper, tissue paper blooms, and coffee filters are virtually indistinguishable from the real thing in photos, they last forever as keepsakes, and your entire floral budget can drop under $50 total.
This guide gives you 30 actionable, step-by-step designs — from bridal bouquets to photo booth backdrops — using supplies you can grab at the dollar store today.
Tools & Materials You’ll Need Before You Start
Gathering your supplies in one go saves time and keeps costs predictable. Here’s exactly what to stock up on:
- Crepe paper flowers in bulk packs (roughly $10 for 200 sheets)
- Tissue paper blooms and plain white coffee filters
- Floral wire stems (18-gauge and 26-gauge) and floral tape wrapping
- Hot glue assembly gun with extra glue sticks
- Free petal templates — printable PDFs available from sites like Lia Griffith or Pinterest
- Scissors, a bone folder or ruler, and any recycled materials crafts you have on hand (newspaper, magazines, toilet paper rolls)
- Optional: acrylic paints or liquid watercolors for realistic petal shaping and custom color matching
30 DIY Paper Flowers for Weddings on a Budget
Every single flower below costs pennies to make and delivers a professional, editorial-quality result. Work through them in any order, or batch-produce your favorites in an assembly-line session with your wedding party. The designs below move from beginner-friendly to slightly more detailed, so you’ll build confidence as you go.
1. Craft Quick Tissue Peonies for Bouquets

Stack eight layers of tissue paper, cut them all into rough circles at once, then fringe the edges with small snips all the way around. Scrunch the fringed stack at the center, twist a floral wire stem around the base tightly, and fluff every layer upward and outward. The fringed edges bloom into a full, cloud-like peony head that reads as completely luxurious in bridal shower decor and hand-tied bouquets — and the entire process takes five minutes per bloom.
2. Shape Crepe Paper Roses for Table Centerpieces
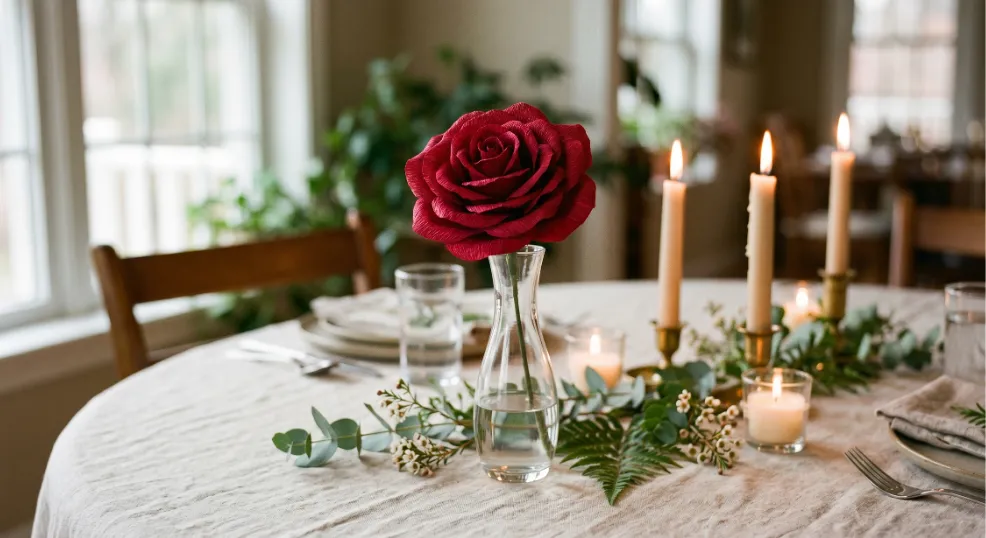
Cut crepe paper into long strips about two inches wide, then roll the first few inches tightly around the top of a floral wire stem to form the bud. Continue wrapping loosely, pinching the base of each new layer so the top fans outward naturally. The grain of the crepe paper does most of the work — it stretches and cups as you press petals between your thumbs, producing realistic petal shaping that mimics a garden rose so closely that guests will reach out to touch them before they realize they’re paper.
3. Assemble Giant Paper Dahlias for Photo Booth Backdrops
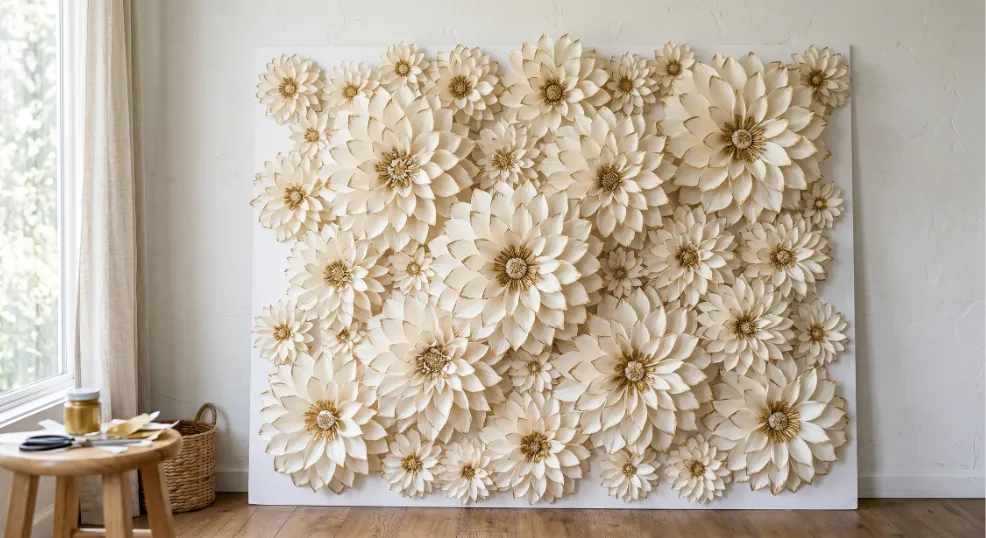
Cut at least twelve large circles from crepe paper or cardstock, graduating in size from about four inches to ten inches. Make radial cuts halfway to the center on each circle, then cup every petal section by pressing it over your thumb. Layer them from largest to smallest, stapling or hot-gluing the center, and finish with a tight rolled spiral in the middle. These oversized dahlias are the workhorse of any photo booth backdrop — mount a dozen in a honeycomb cluster on a foam board wall and the effect rivals a $500 florist installation.
4. Fold Coffee Filter Anemones for Archway Accents

Dip plain white coffee filters into diluted watercolor or food dye — dusty rose, lavender, or sage all look stunning — and let them dry completely before shaping. Once dry, pleat each filter like a fan from the center outward, pinch the base onto a floral wire stem, and add a small black bead cluster at the center using a dab of hot glue. The lightweight, translucent nature of coffee filters makes these anemones sway gently in any breeze, giving a wedding arch that organic, living quality that even fresh flowers sometimes can’t deliver.
5. Twist Recycled Magazine Hydrangeas for Aisle Markers
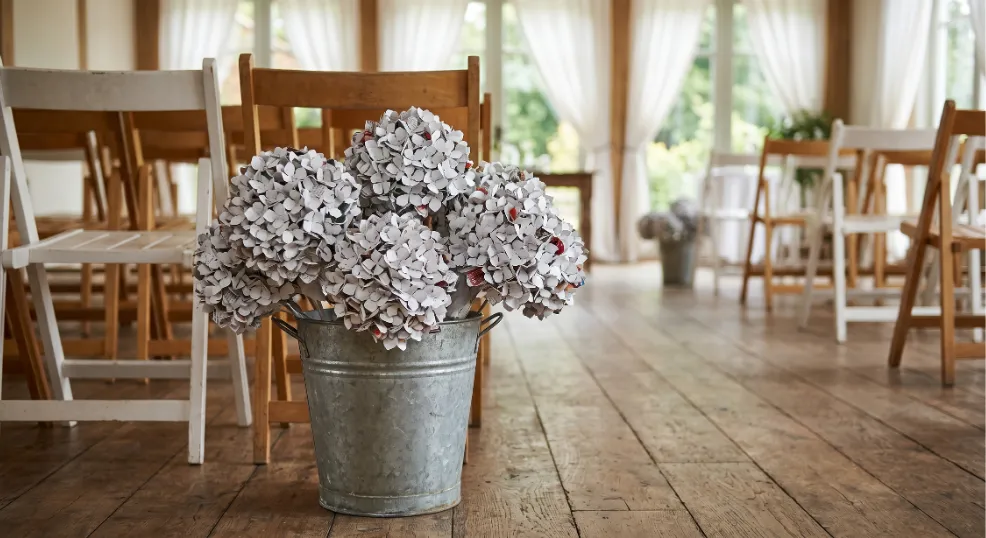
Tear or cut magazine pages into small square clusters, about two by two inches each, and fold each square into a four-petaled flower shape. Wire bunches of twenty or more together tightly, building a full hydrangea head, then spray the whole bloom lightly with matte white or sage spray paint to unify the varied colors beneath. These recycled materials crafts are extraordinarily budget-friendly — literally zero raw material cost — and the finished hydrangeas have an interesting layered texture that purely monochromatic paper flowers sometimes lack.
6. Layer Tissue Carnations for Guest Favor Wraps
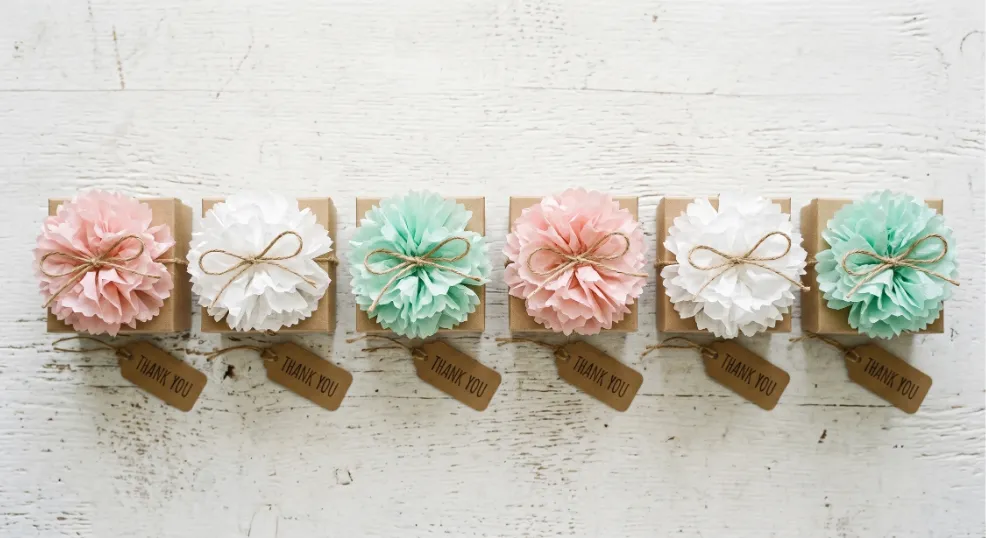
Stack five to six squares of tissue paper in alternating colors, then cut the stack into a rough circle. Fringe the entire outer edge with tight, close-together cuts, stopping about an inch from the center. Pinch the center firmly and twist a short piece of floral wire around it, then use your fingers to ruffle and separate each layer upward. The result is a perfect pom-pom carnation that doubles brilliantly as a decorative topper for small gift boxes, favor bags, or bridal shower decor wrapping — and guests almost always take them home as keepsakes.
7. Curl Crepe Tulips for Cake Topper Stems
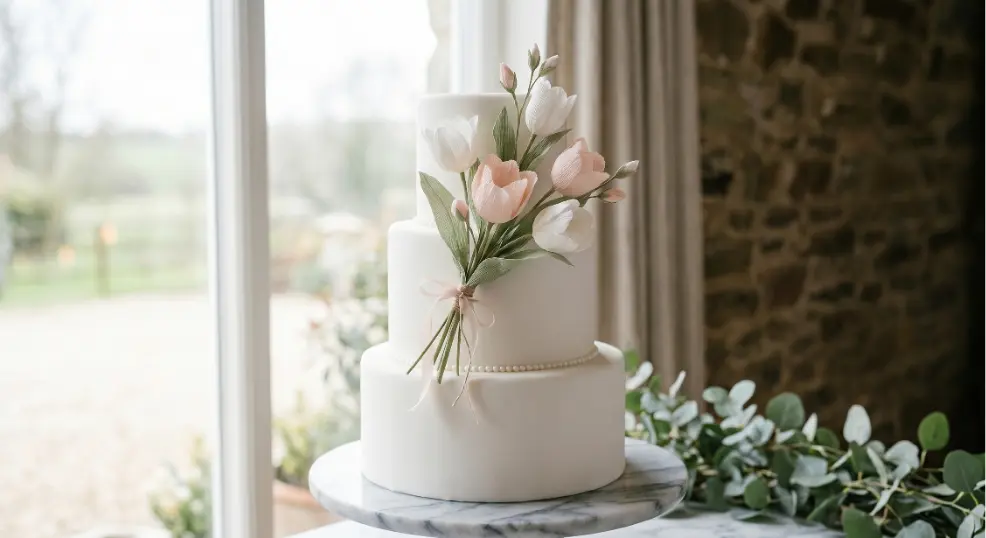
Cut flame-shaped petals from crepe paper — three inner petals slightly smaller, three outer petals slightly wider — and cup each one by stretching the center gently with your thumbs. Wrap the innermost petals around a floral wire stem using floral tape wrapping, adding the outer petals just below and angling them outward, then bend the very tip of each petal backward slightly with a pencil. Perched on top of a multi-tiered wedding cake, a cluster of these slim crepe tulips in white and blush creates a garden-party elegance that fondant flowers simply can’t replicate.
8. Fan Paper Magnolias for Chandelier Drapes
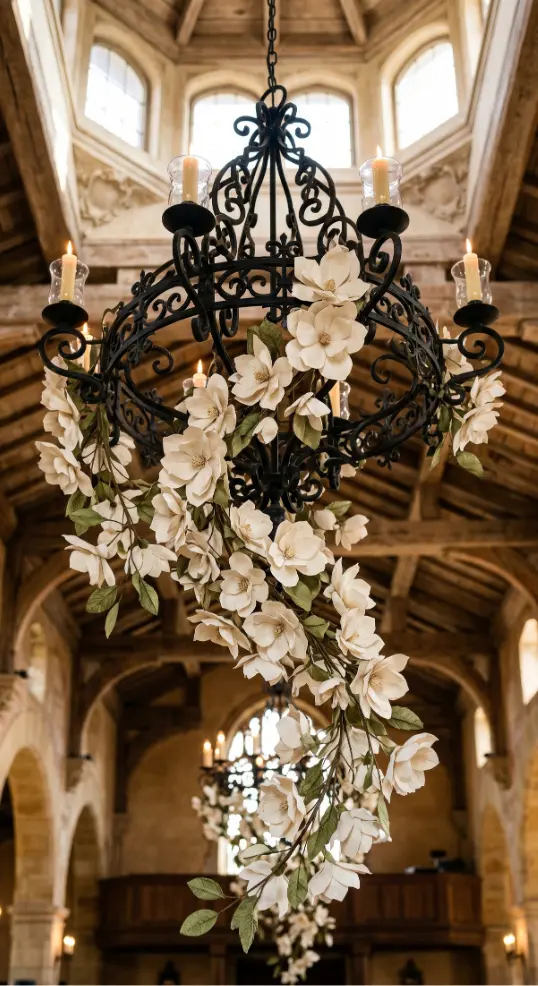
Cut large oval petals from white or cream cardstock, score down the center of each with a bone folder, and deep-fringe the outer edges so they feather softly. Layer six to eight petals around a central cluster of cream ribbon stamens, securing everything with hot glue at the base. Because cardstock holds its shape beautifully under humidity — unlike fresh magnolias which brown quickly — these blooms can be wired to chandelier chains or ceiling installations weeks in advance, making them the smartest choice for venue styling that needs to be set up early.
9. Pinch Tissue Zinnias for Ring Bearer Pillows
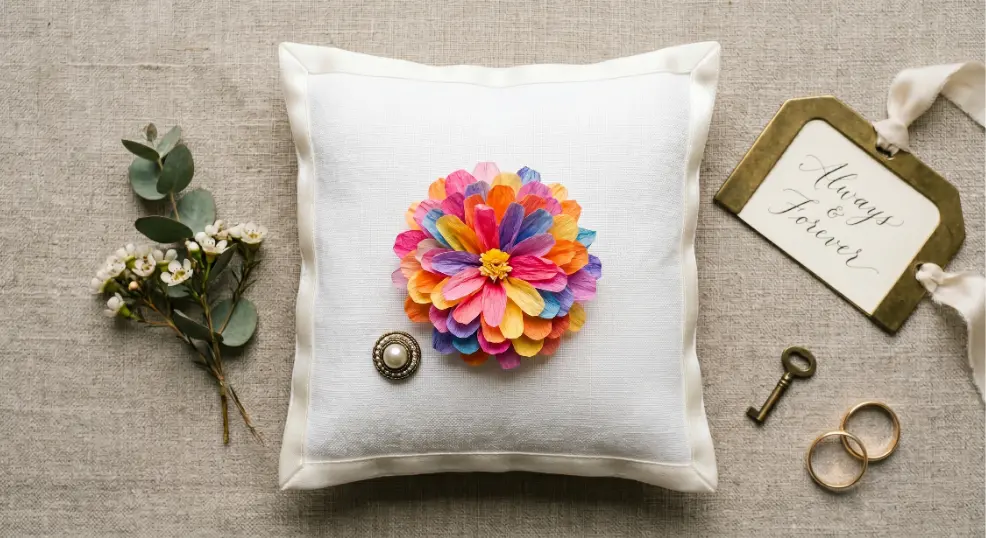
Cut multiple circles of tissue paper in three or four bright complementary colors, then make radial fringe cuts from the outer edge inward, stopping one inch from center. Stack all the layers, pinch the very center, and staple it through a small square of felt that will form the back panel of your pillow. Hot-glue a vintage button at the center of each zinnia, then attach the finished bloom to the pillow top. The burst of color draws every eye in the room and gives your ring bearer’s moment a charming, handmade warmth that a plain satin pillow can’t match.
10. Roll Newspaper Ranunculus for Bar Signage
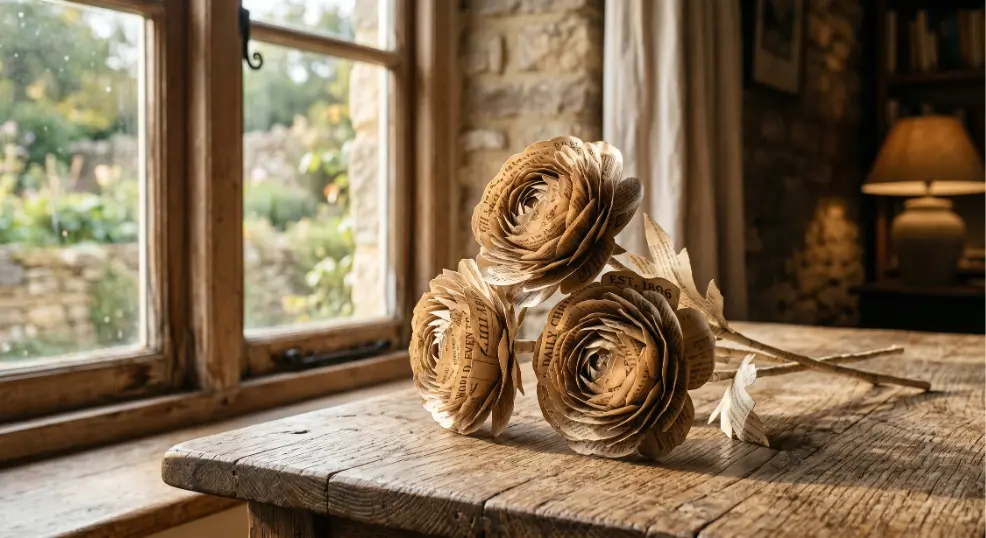
Tear newsprint into irregular petal shapes — roughly teardrop sized — and tightly roll each one from tip to base to create a curved, tubular petal. Glue these curled petals in tight concentric circles around a small ball of crumpled newspaper at the center, building outward layer by layer until the bloom is dense and full. A light wash of warm sepia or dusty rose watercolor over the finished flower ties the newsprint texture into the color palette, and a cluster of three framing a chalkboard cocktail menu gives your bar station a rustic, editorial charm that matches perfectly with industrial or vintage wedding aesthetics.
11. Crinkle Crepe Camellias for Escort Cards
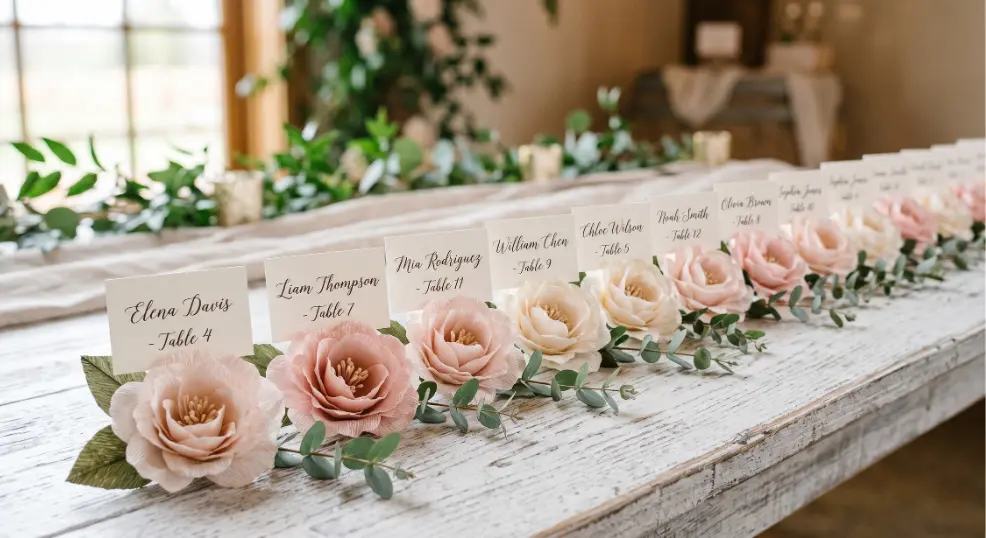
Cut a single sheet of white or blush crepe paper into a large circle, then fold it into quarters and cut a petal profile around the curved edge. Unfold to reveal a layered blossom shape, notch the petal edges slightly, and curl the outer petals backward over a pencil. Fold a small name card tab at the base of the stem so each camellia stands upright in a row. When lined up along a wooden escort card table, these delicate camellias make the assignment process feel like an elegant garden discovery rather than an administrative task.
12. Pleat Filter Poppies for Head Table Garlands
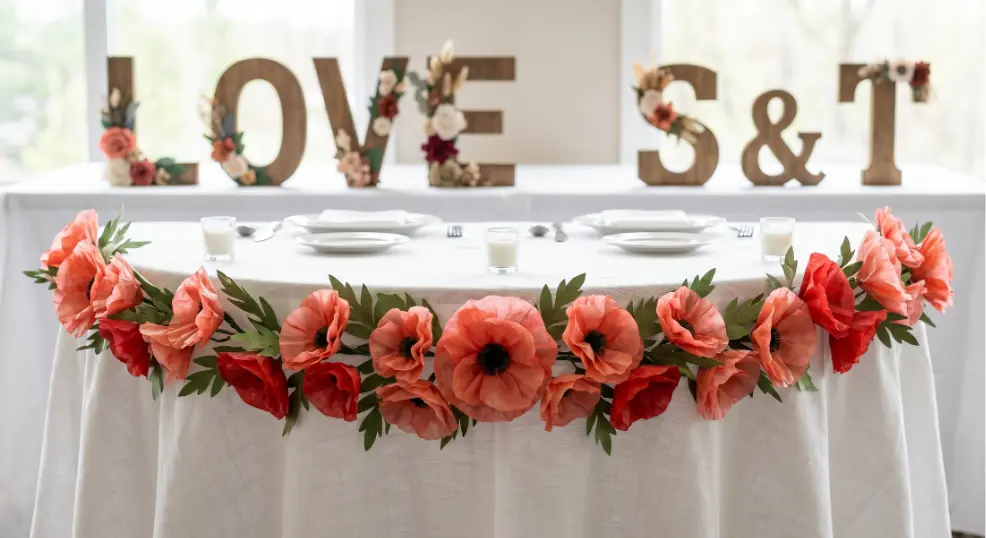
Soak coffee filters in diluted orange, coral, or deep red dye, crumple them while wet, then open them back out and let them dry — the crumpling process gives the finished petals an exquisite organic texture that mimics the thin, papery look of real poppy petals almost exactly. Once dry, pleat each filter from the center, pinch onto a floral wire stem, and string multiple stems along a length of jute twine. Draped across the front of a sweetheart table, a poppy garland in warm jewel tones makes the head table the undisputed focal point of the entire reception.
13. Fringe Toilet Paper Sunflowers for Rustic Arbors
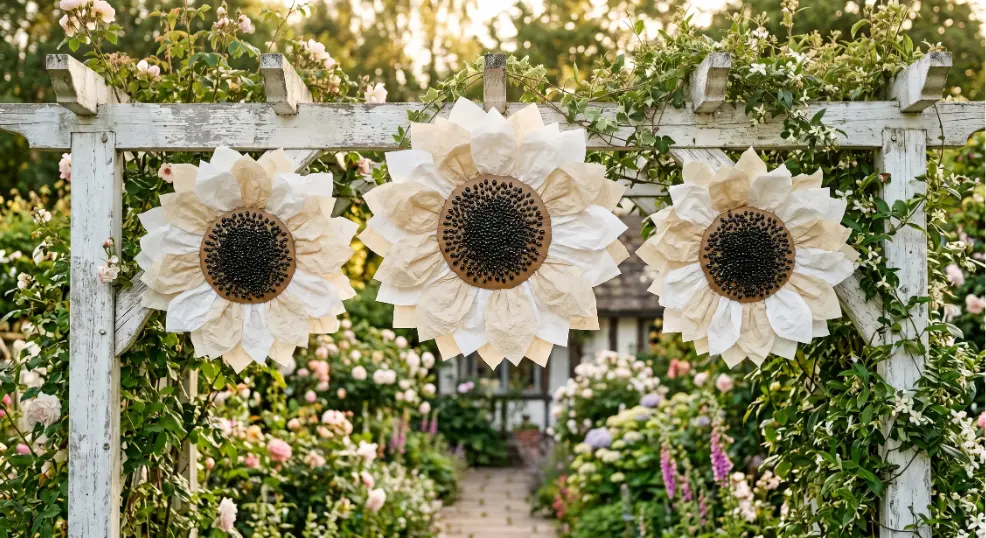
Unroll a length of toilet paper into a long strip, fold it accordion-style into a thick stack, then cut petal shapes along one long edge. Carefully unfold into a continuous ring of petals, curl each one slightly over your finger, and wire the ring around a circular cardboard center painted brown with scattered black seed bead glue-dots. A cluster of five or six of these oversized sunflowers arching over a couple’s entrance creates that quintessential golden-hour, barn-wedding feeling — and the material cost is essentially nothing since the only real purchase is the pack of seed beads.
14. Sculpt Tissue Orchids for Bridal Hairpieces
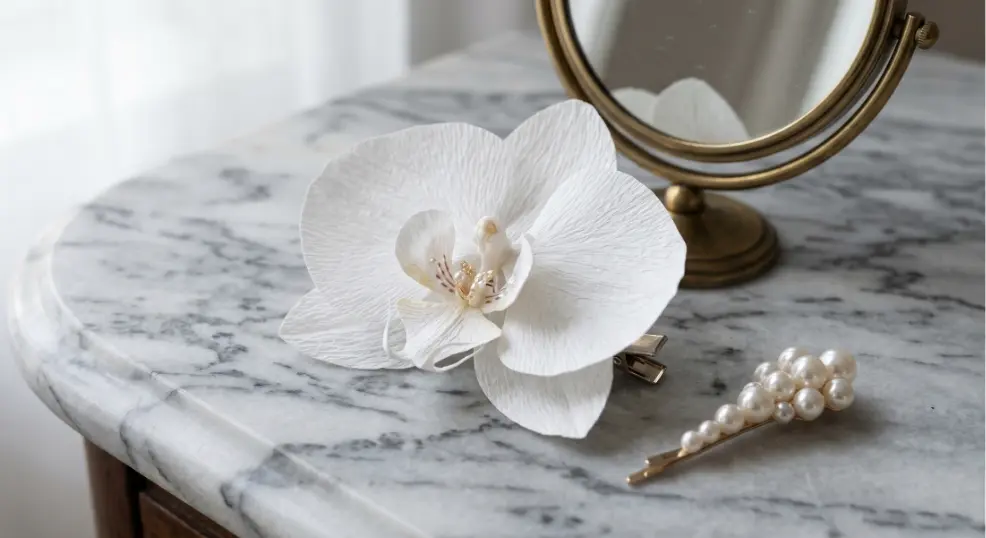
Cut five slim, slightly asymmetrical petals from white tissue paper and one modified lip petal with a ruffled center edge. Gently stretch and wave each petal with your fingers to give it a natural curve, then assemble them around a cluster of pearl-tipped stamens using a tiny bead of hot glue. Because tissue orchids weigh nearly nothing, they stay perfectly positioned in an updo or beneath a veil without the weight or wilting risk of a fresh flower — giving a bridal hairpiece that lasts from first look to final dance.
15. Cluster Crepe Gardenias for Candle Rings
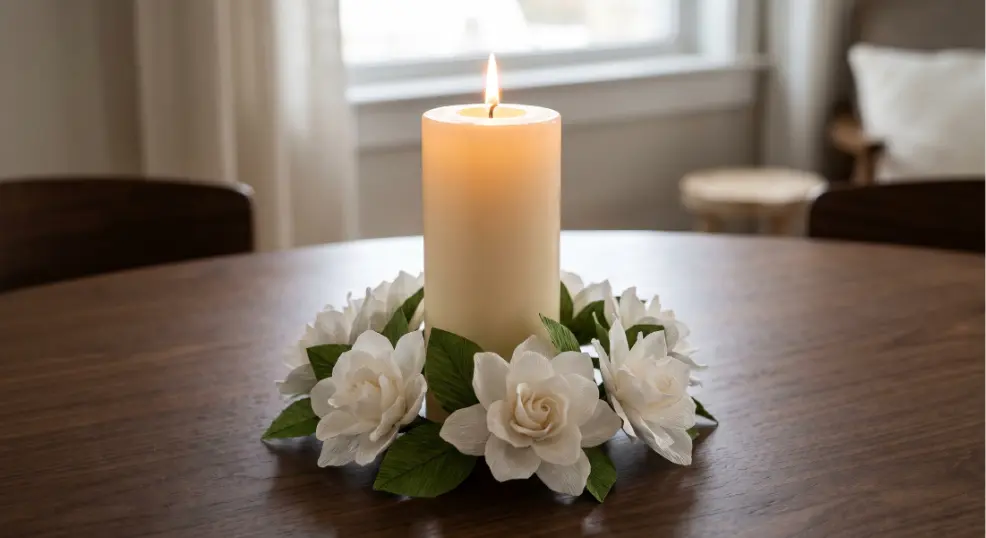
Roll small cone shapes from white crepe paper for the inner petals, then surround them with broader, flatter outer petals cut and cupped to angle outward. Build three or four complete gardenia heads and wire them together with lush crepe foliage leaves into a circular ring. Slipped around a pillar candle on a reception table, a gardenia candle ring immediately elevates the entire centerpiece — the contrast of warm candlelight against the bright white crepe paper gives an effect that looks far more expensive than the fifty cents it cost to make.
16. Build Paper Peonies for Confetti Cones
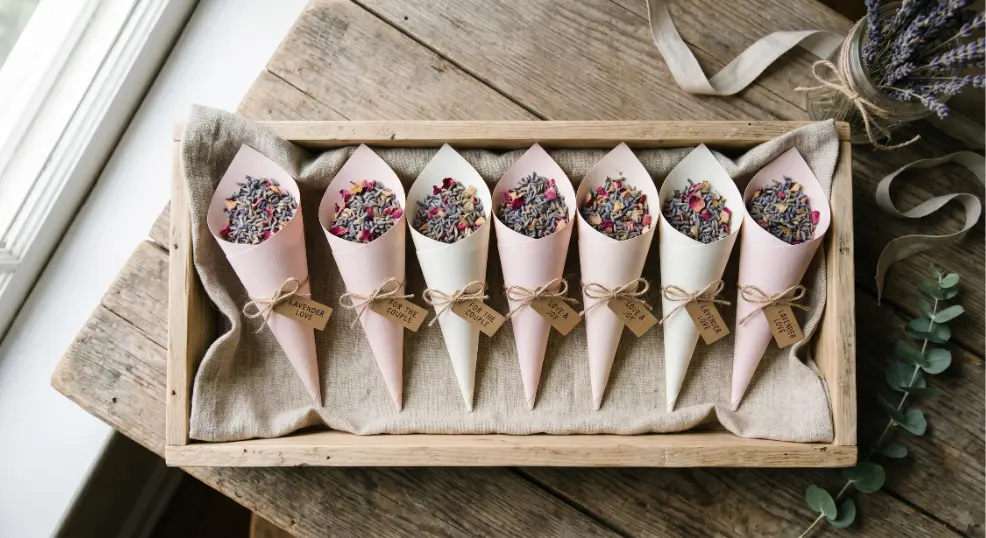
Following a paper peonies tutorial approach, cut graduated petal sets from blush and white crepe paper — five small, five medium, five large — and shape each petal by stretching the center outward with both thumbs. Assemble them onto a cone of rolled cardstock, layering from smallest innermost petals outward, and secure with a ribbon tied at the base. When guests pull one from a display basket, the cone doubles as a functional confetti holder and a floral keepsake they’ll take home and keep.
17. Wire Giant Paper Roses for Welcome Signs

Using the same basic crepe rose technique but scaling up dramatically, cut petal templates that are four to six inches tall and build each giant paper rose around a thick dowel rod rather than a floral wire stem. Ten or more petals of graduating sizes give these blooms a full, theatrical diameter of nearly a foot. Flanking a chalkboard or acrylic welcome sign with two of these oversized roses immediately creates a dramatic, gallery-worthy entrance installation that anchors the entire event space.
18. Stack Crepe Lotus Flowers for Floating Centerpieces
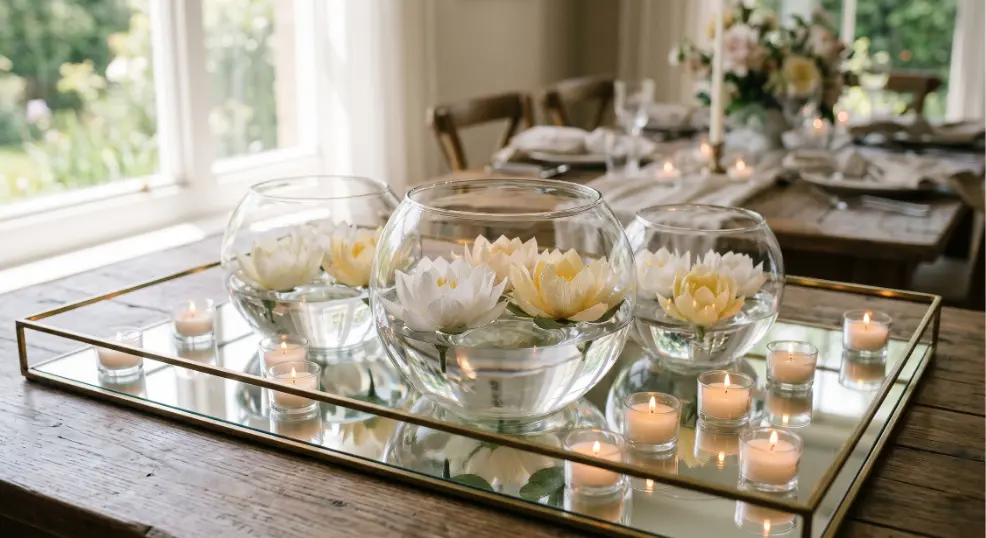
Cut petals in three graduating sizes — narrow and pointed for the inner ring, broad and rounded for the outer rings — from white and pale yellow crepe paper. Assemble in concentric layers onto a circular foam disk, angling outer petals downward slightly so the whole bloom floats naturally when placed in a shallow bowl of water. Floating lotus centerpieces on mirrored trays or in glass bowls require no vase, no mechanics, and no floral foam — just water and the flowers themselves — making them the most minimal-cost, maximum-impact centerpiece option on this entire list.
19. Construct Tissue Paper Proteas for Bohemian Bouquets
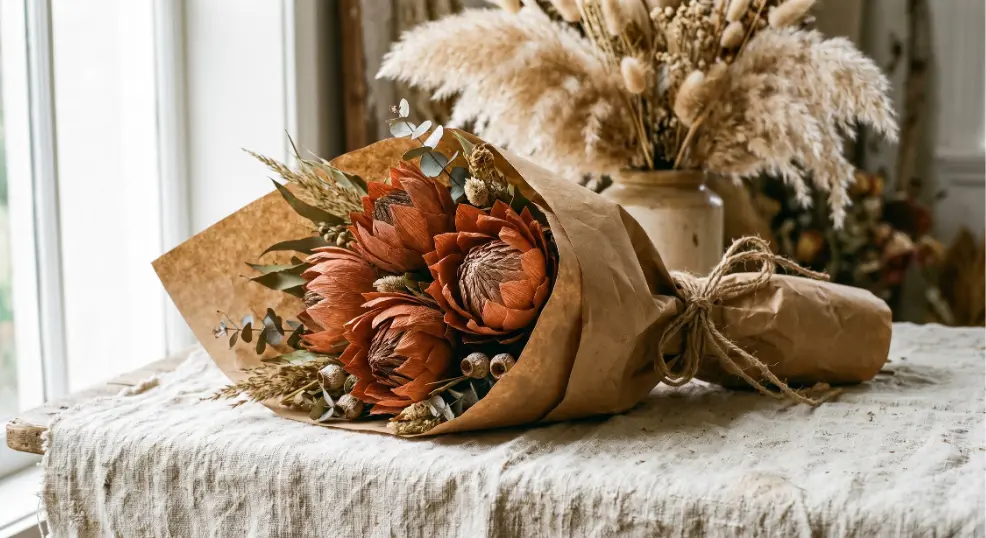
Layer multiple rounds of stiff tissue in earthy terracotta, rust, and dusty pink, and cut each layer into a pointed, elongated petal shape. Assemble them tightly from the outermost ring inward, packing the center with upright thin strips of paper to mimic the brush-like texture of a real protea. These bold, architectural blooms are the defining element of a boho-chic aesthetic, and a bouquet of three proteas wrapped in brown kraft paper and jute twine creates an effortlessly editorial look that costs under three dollars total.
20. Form Crepe Paper Wisteria for Hanging Installations
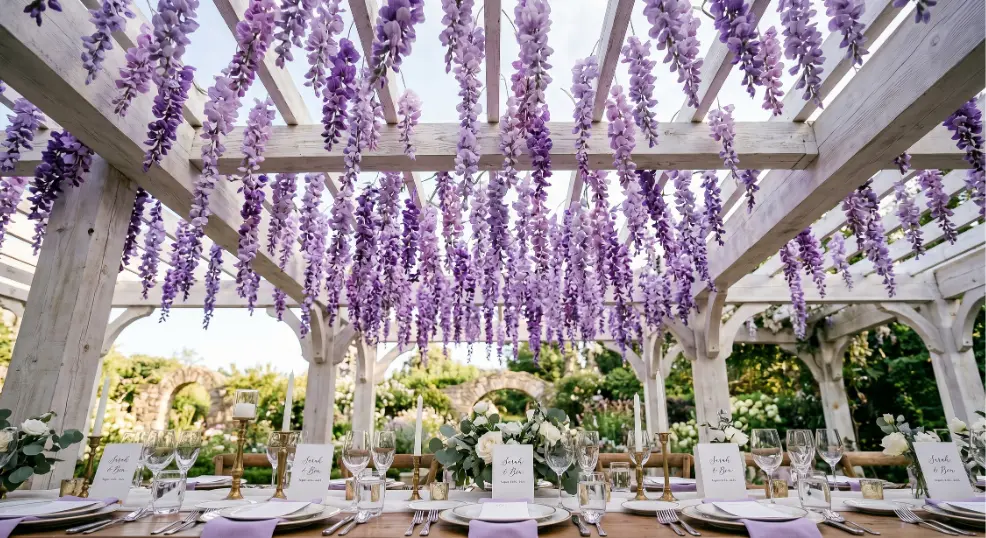
Cut long strips of purple and lavender crepe paper, fringe one long edge into tiny close-set cuts, then roll each strip loosely and wire it to a length of trailing wire or fishing line. Cluster ten to fifteen of these fringed rolls per strand to mimic the drooping, dense cascade of real wisteria. Hung from a pergola, tent ceiling, or ceiling-mounted hoop in overlapping lengths, a wisteria installation creates the most romantic, immersive floral environment imaginable — and a full canopy requires only a few rolls of crepe paper and an afternoon of easy assembly.
21. Sculpt Tissue Sweet Peas for Boutonniere Pins
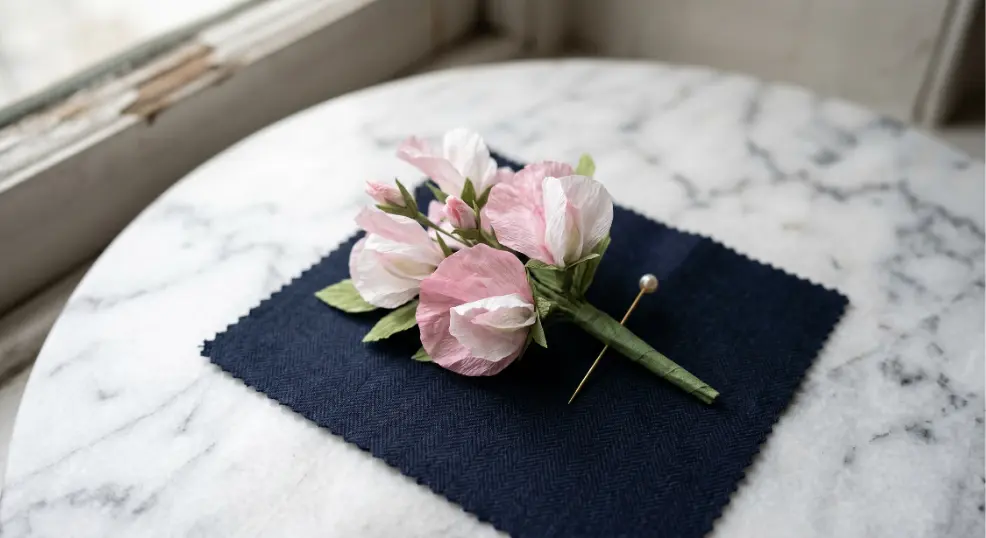
Cut small ruffled ovals from soft pink and white tissue paper — two layers each — and fold each one gently in half, then pinch the fold at the base to create a cupped, wing-like petal shape. Wire three or four petals together tightly, add a small sprig of crepe paper foliage, and wrap the entire stem tightly with floral tape wrapping for a clean, professional finish. Pinned to a lapel, these delicate sweet pea boutonnieres look like they came from a high-end florist, and making twenty of them for the full wedding party costs roughly ten dollars in materials.
22. Press Crepe Cosmos for Place Card Holders
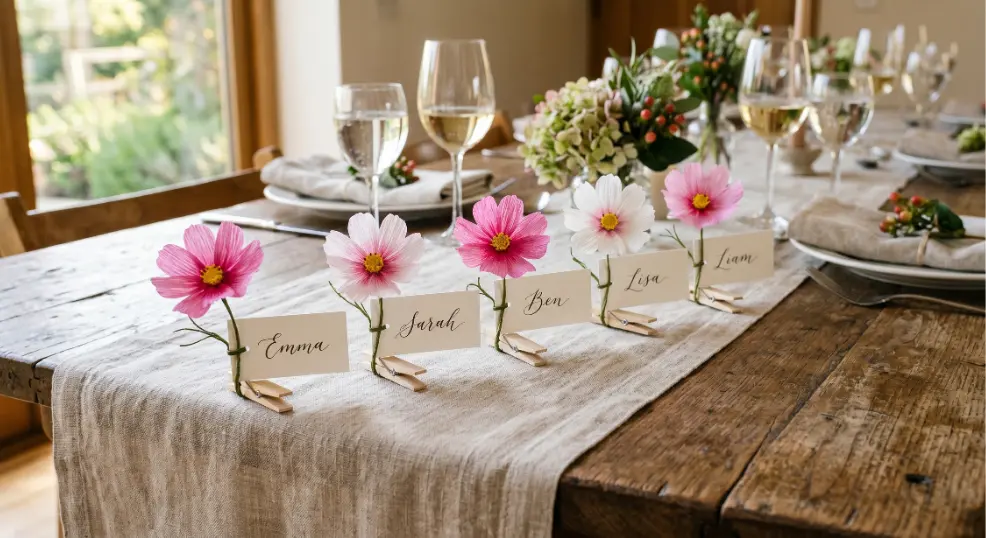
Cut eight to ten slim, slightly wavy petals from bright pink, white, or magenta crepe paper, and stretch each petal’s center gently to give it a natural ripple. Assemble them flat around a yellow button center secured with hot glue onto a small wooden clip. Each cosmos clip holds a place card upright, and arranged across a long banquet table in alternating colors, they create the cheerful, informal charm of a wildflower meadow — which is exactly the right energy for an outdoor summer wedding.
23. Twist Kraft Paper Roses for Rustic Centerpiece Vases
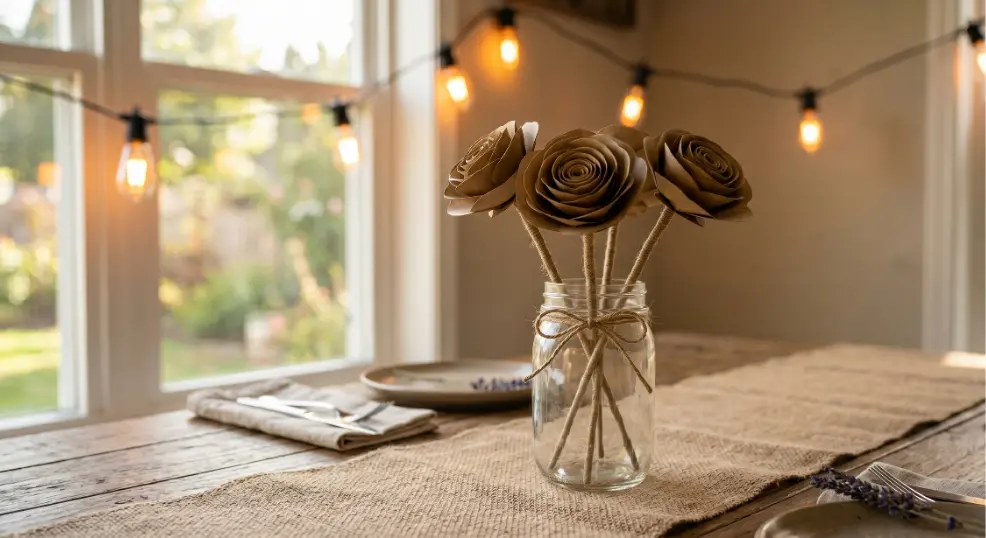
Cut long diagonal strips from brown kraft paper bags, twist each strip tightly along its length to create a textured, rope-like cord, then loosely coil the cord from one end inward to form a spiral rose head. Secure the base with a small loop of wire and flute the outer edges outward slightly with your fingers. These kraft roses have a beautiful, raw, tactile quality that pairs perfectly with mason jars, hessian runners, and Edison bulb string lights — a complete centerpiece using budget craft supplies that you literally make from grocery bags.
24. Layer Metallic Tissue Dahlias for Glamour Reception Tables
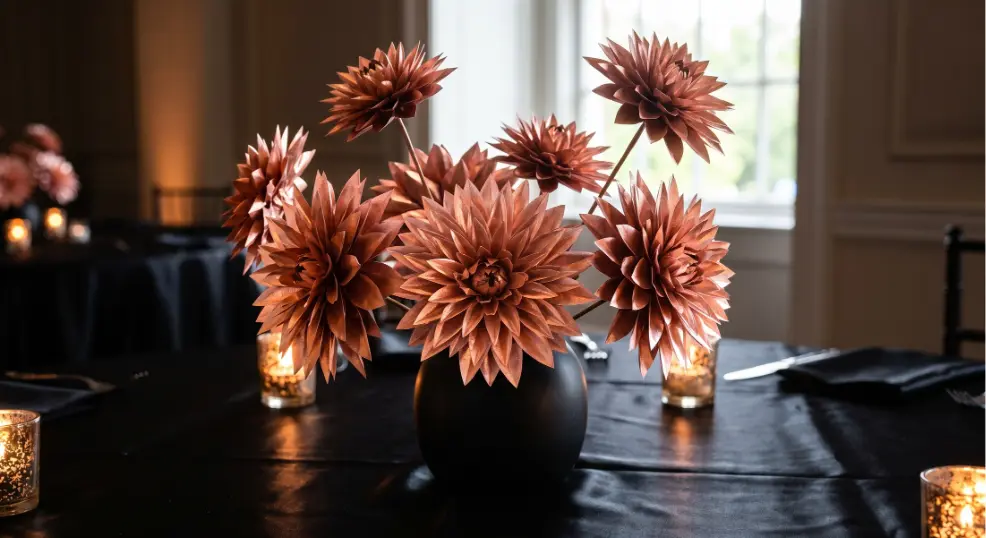
Use metallic gold or rose gold tissue paper and follow the same layered petal technique used for the giant dahlias in entry three, but keep these flowers at a more intimate six-inch diameter. The metallic surface catches and reflects candlelight and ambient lighting in a way that no matte paper can, and a cluster of five or six metallic dahlias arranged at varying heights in a black vase becomes an instant glamour centerpiece that looks like it belongs in a luxury hotel ballroom.
25. Assemble Crepe Bleeding Hearts for Romantic Garlands
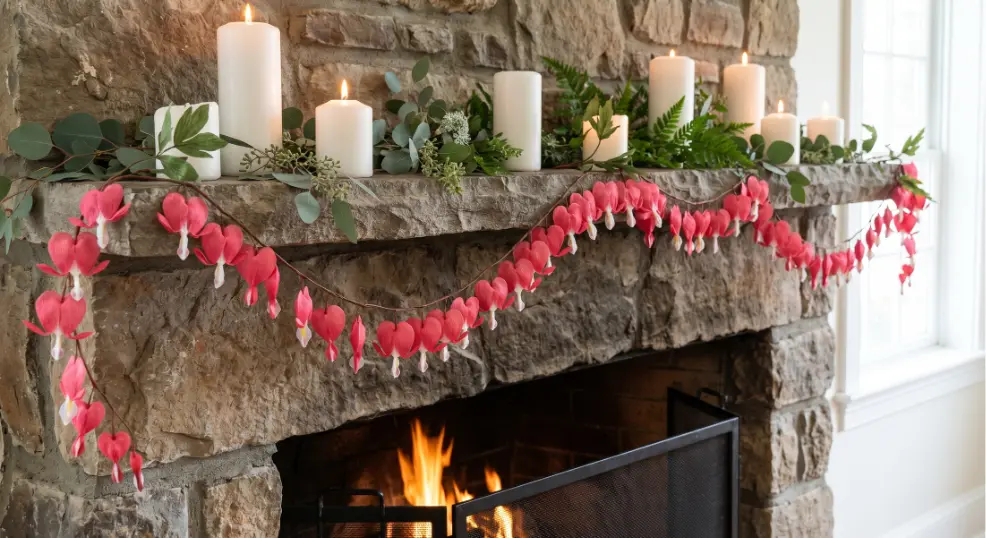
Cut small heart shapes from deep rose crepe paper, fold each in half lengthwise, and pinch the bottom into a tiny droop. Wire each heart-shaped bloom onto a long, arching stem wire at regular intervals, hanging naturally downward just like the real plant. Strung along the edge of a ceremony altar, between candles on a mantelpiece, or draped around a staircase banister, bleeding heart garlands create an intensely romantic, almost Victorian elegance that no other paper flower quite replicates.
26. Craft Tissue Paper Chrysanthemums for Ceremony Pew Clips
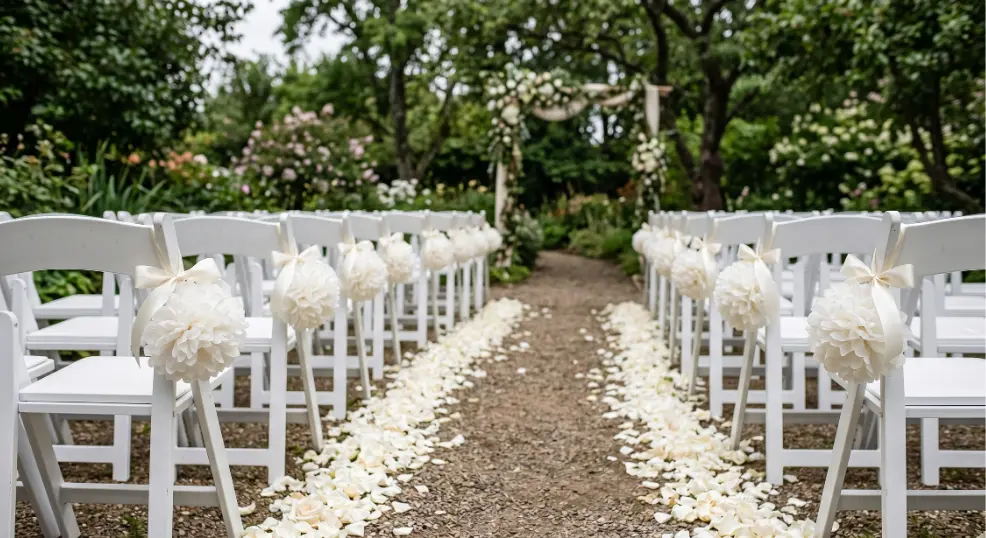
Stack ten sheets of tissue paper, fold the entire stack accordion-style into one-inch pleats, and tie the center tightly with a piece of wire. Fan out both sides of the accordion to form a full sphere, then gently separate and pull each individual layer upward toward the center to create a dense, pompom chrysanthemum. Clipped to the end of ceremony pews or chairs with a ribbon tie, a row of these soft white or champagne chrysanthemums creates an aisle that feels like walking through a cloud.
27. Build a Crepe Paper Cherry Blossom Branch for Ceremony Arch
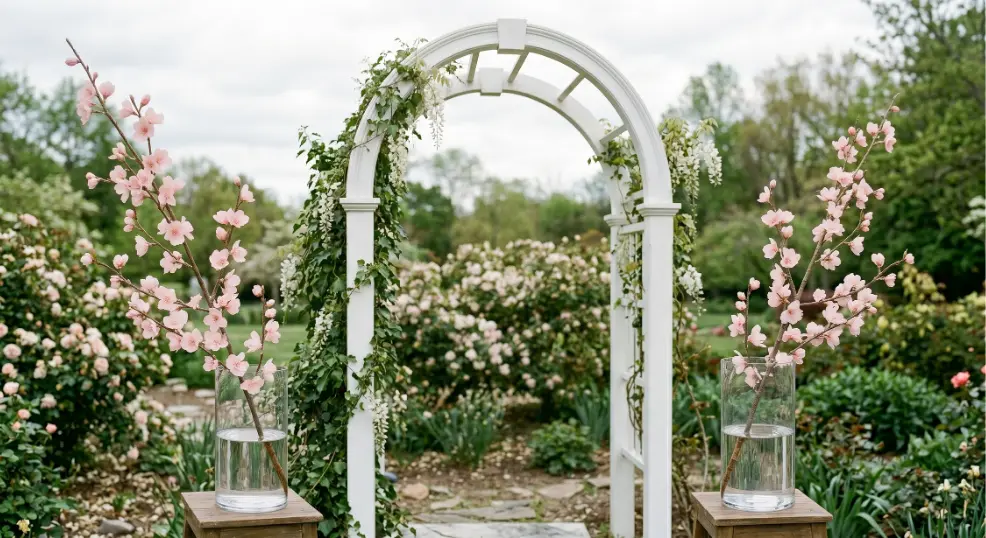
Take bare branches — gathered from the yard or purchased cheaply at a craft store — and hot-glue clusters of tiny five-petaled cherry blossoms made from pale pink crepe paper directly onto the branch ends. Each blossom takes about thirty seconds, and once fifty or more are attached to a single branch, the transformation is staggering. Propped inside tall vases at either side of a ceremony arch, cherry blossom branches create a Japanese-garden serenity that costs under five dollars per arrangement and makes for some of the most beautiful ceremony photographs of the entire day.
28. Fold Origami Roses for Napkin Ring Accents
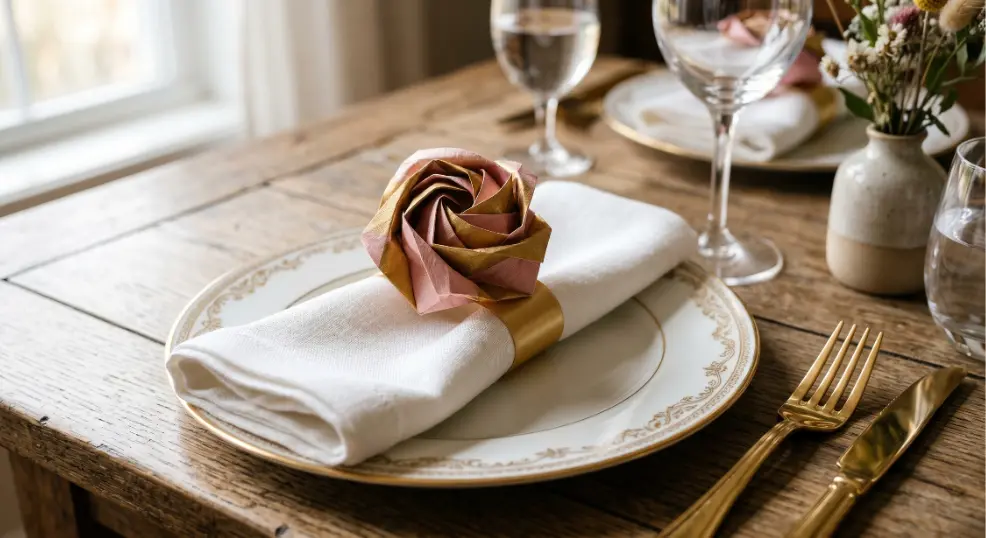
Using the classic origami rose folding method with a single square of double-sided patterned paper — blush on one side, gold on the reverse — create compact, geometric rose forms that hold their shape without any glue at all. Slip one finished origami rose under a narrow satin napkin ring at each place setting. The contrast of the crisp geometric folds against the soft draped napkin linen creates an incredibly sophisticated, editorial table-setting detail that doubles as a small guest gift they can take home.
29. Create Watercolor Tissue Anemones for Floating Floral Bar
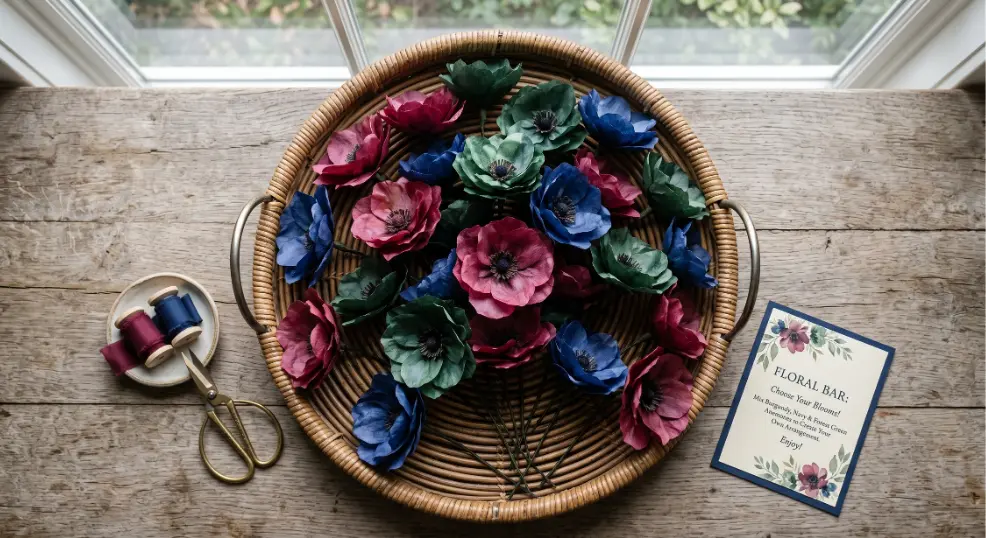
Paint white tissue paper with loose, abstract washes of watercolor — deep burgundy, navy, or forest green — and allow to dry fully before shaping into the same fluted anemone form described in entry four. Arrange twenty or thirty finished blooms in a large flat basket or tray, label it a “Floral Bar,” and invite guests to pick their own bloom to tuck behind an ear or into a pocket square. This interactive element adds an extraordinarily personal and memorable touch to any reception for a total cost of under eight dollars.
30. Form Floral Tape-Wrapped Lilacs for Cake Stands
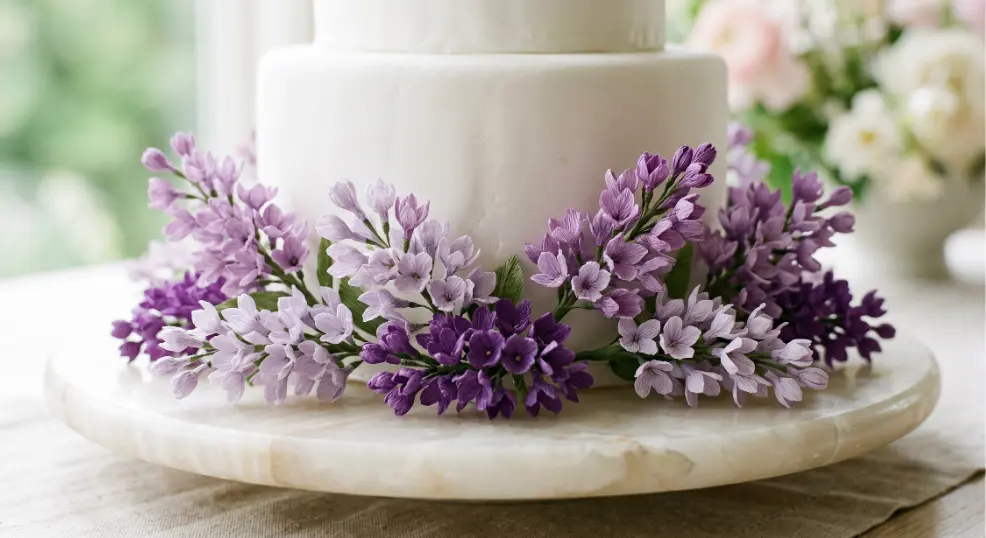
Cut small five-petaled flowers from lavender and soft purple crepe paper — each individual floret no larger than a dime — and build them in dense clusters of twenty or more onto a single floral wire stem, wrapping the connecting wire between each cluster firmly with floral tape wrapping. Bend the finished spray into a natural, arching curve and tuck it alongside fresh or faux greenery around the base or on tiers of the wedding cake. These delicate lilac sprays are the ultimate proof that meticulous small-scale paper work, using only budget craft supplies, can produce results that steal every bit as much attention as a bespoke sugar flower.
Budget Breakdown & Customization Tips
Making all 30 flower types above for a full wedding comes in at approximately $0.40–$0.60 per bloom when you buy crepe paper in bulk rolls (a 60-foot roll costs around $3 and yields 80+ flowers), tissue paper in multi-packs, and source free petal templates online. For a ceremony and reception requiring 100 flowers total, your complete floral budget lands between $40 and $60 — a saving of well over $1,900 against the average professional florist quote.
Color-matching your theme is straightforward: crepe paper comes in over 40 standard colors, and any gaps can be filled with a light spray of floral spray paint or a watercolor wash. For realistic petal shaping, always stretch crepe paper across the grain (horizontally, not lengthwise) to get natural curvature — this is the single technique that separates flat, unconvincing paper flowers from ones that genuinely fool guests.
Scaling for 100+ pieces is easiest with an assembly-line method: cut all petals in one session, shape them in the next, and assemble and stem in the final session. Spread the work over three evenings and 100 flowers become completely manageable. Finally, for humidity resilience — important for outdoor summer weddings — a light coat of clear matte sealant spray over finished blooms prevents any softening or drooping, even in muggy conditions.
Frequently Asked Questions
How long do paper flowers last?
Indefinitely, as long as they’re kept away from direct sunlight and moisture. Many couples frame or display their paper bouquet as home decor after the wedding.
What’s the best paper for beginners?
Tissue paper is the most forgiving and the easiest to shape. Graduate to crepe paper once you’re comfortable — its stretch makes realistic petal shaping much more achievable.
Can I make a full bridal bouquet from paper flowers?
Absolutely. A hand-tied tissue peony and crepe rose bouquet wrapped in satin ribbon is indistinguishable from a fresh bouquet in photographs, and it weighs almost nothing.
Where can I find free petal templates?
Search “free petal templates PDF” on Pinterest or visit Lia Griffith’s website, which offers both free and premium downloadable templates for most flower varieties on this list.
How do I attach paper flowers to a floral arch?
Use zip ties or paddle wire to attach stems to the arch frame, then cover any visible mechanics with extra crepe paper leaves or strips of greenery.