Got a pile of leftover wood scraps collecting dust?
Stop tossing them! Those mismatched pieces are about to become your home’s most unique decor—without spending a dime on new materials.
Today, I’m showing you 5 gorgeous projects that transform scrap lumber into pieces your guests will think came from a boutique shop.
The Cheat Sheet
| Time | Cost | Difficulty | Eco-Rating |
|---|---|---|---|
| 1-3 hours | $0-15 | Beginner-Friendly | Diverts 5-10 lbs from landfills per project! |
Eco-Win: Each project saves waste equal to 2-3 plastic bags and reduces demand for new lumber. Build 10 projects = save 1 mature tree!
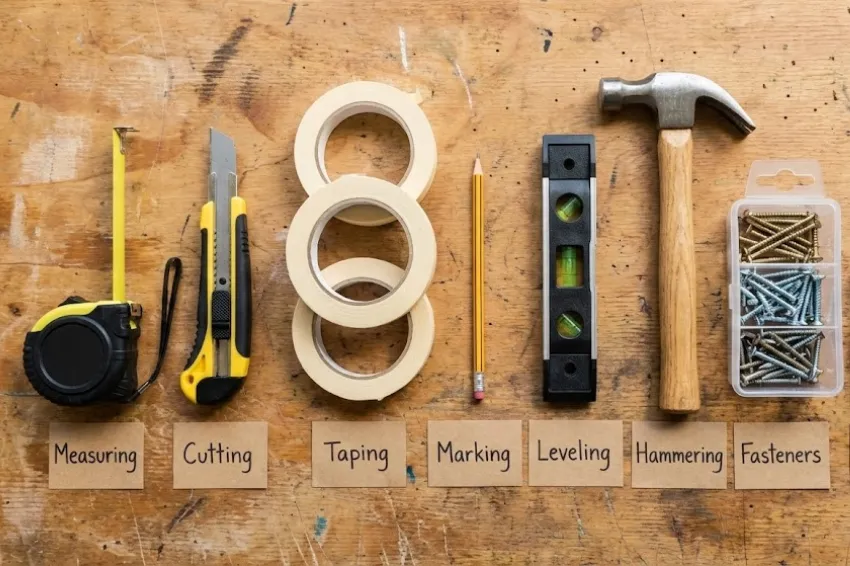
Supplies You Need
Shop your home first! You likely have 80% of these already.
Must-Haves:
- Wood scraps (pallet slats, leftover boards ≥1/2″ thick) If you aren’t sure what you’ve found in your garage, identifying the essential types of recycled wood decor can help you choose the best pieces for a durable finish.
- Wood glue (Titebond or eco PVA adhesive)
- Sandpaper (80-220 grit) or sanding block
- Measuring tape, pencil, straightedge
- Clamps or heavy books for pressure
- Safety gear: dust mask, gloves
Nice-to-Haves:
- Wood stain or chalk paint (water-based, low-VOC)
- Hand saw or jigsaw
- Brad nailer (or skip it—glue works!)
- Natural bristle paintbrush
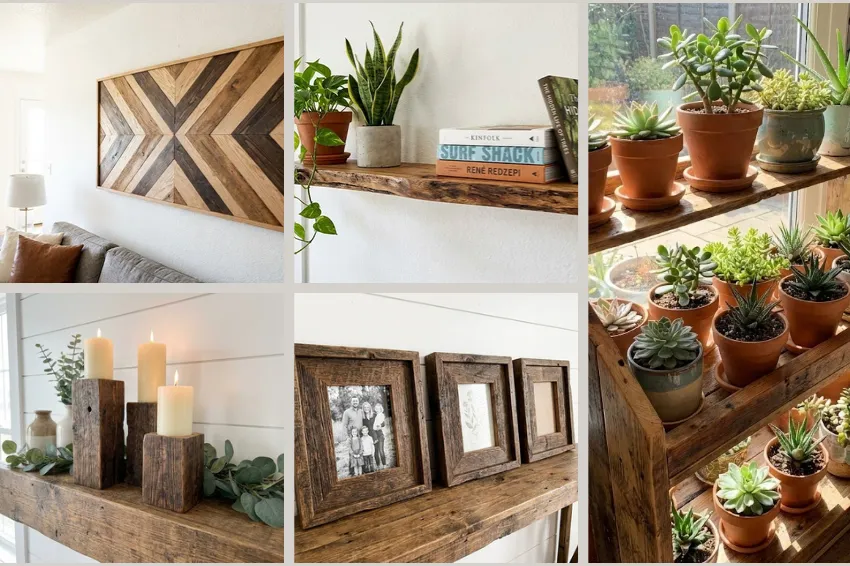
5 Projects You Can Make Today
1. Rustic Floating Shelf

Why we love it: Instant storage + major style points. Mix different wood tones for that “reclaimed timber” vibe.
Best for: Renters (use Command strips!) and anyone wanting storage without buying new shelves.
Time: 90 minutes
2. Geometric Wall Art
Why we love it: Turn mismatched scraps into modern art. Different wood species? That’s a feature, not a flaw!
Best for: Beginners—no power tools needed, just glue and creativity.
Time: 4 hours
3. Tiered Plant Stand
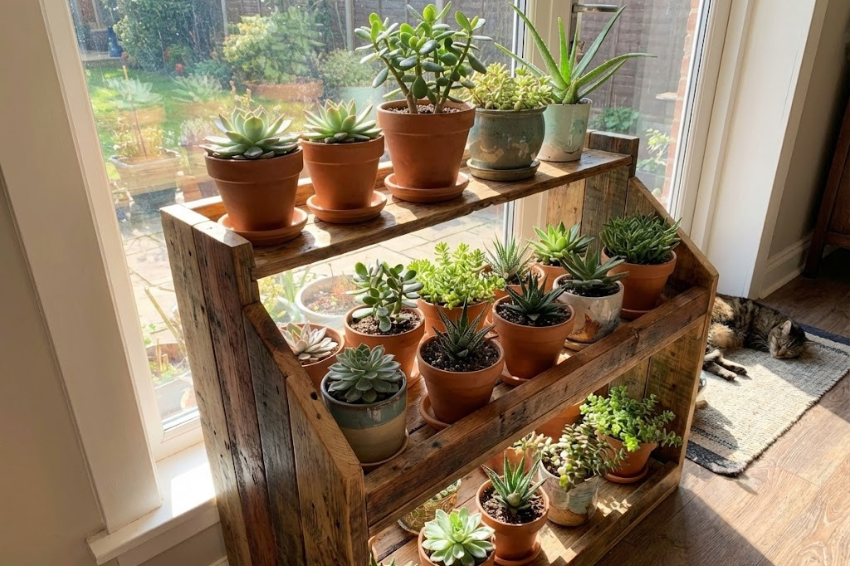
Why we love it: Freestanding design = zero wall damage. Perfect for showcasing your plant babies.
Best for: Renters and anyone with limited floor space.
Time: 3.5 hours
4. Chunky Picture Frames
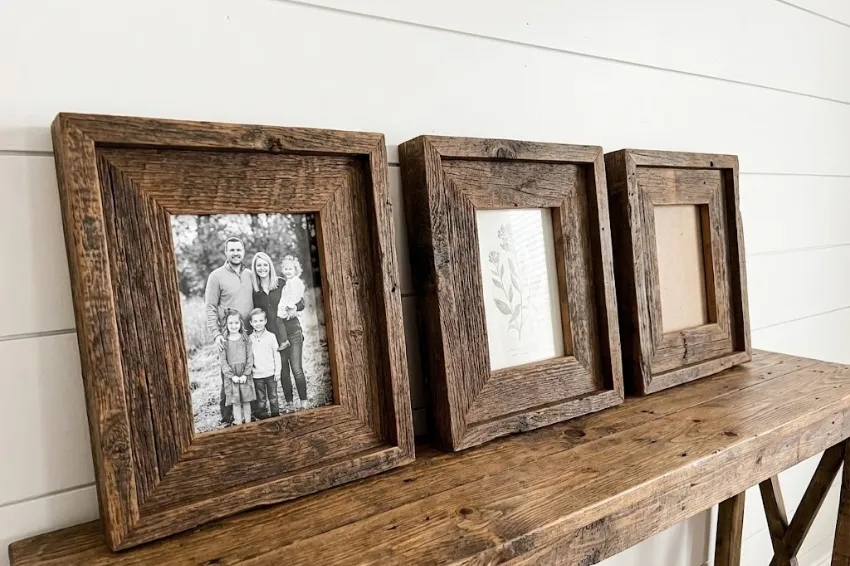
Why we love it: Thick, rustic frames make any photo look gallery-worthy. Use leftover pallet slats for that farmhouse feel.
Best for: First-time builders—simple cuts, massive impact.
Time: 1 hour per frame
5. Wood Block Candle Holders
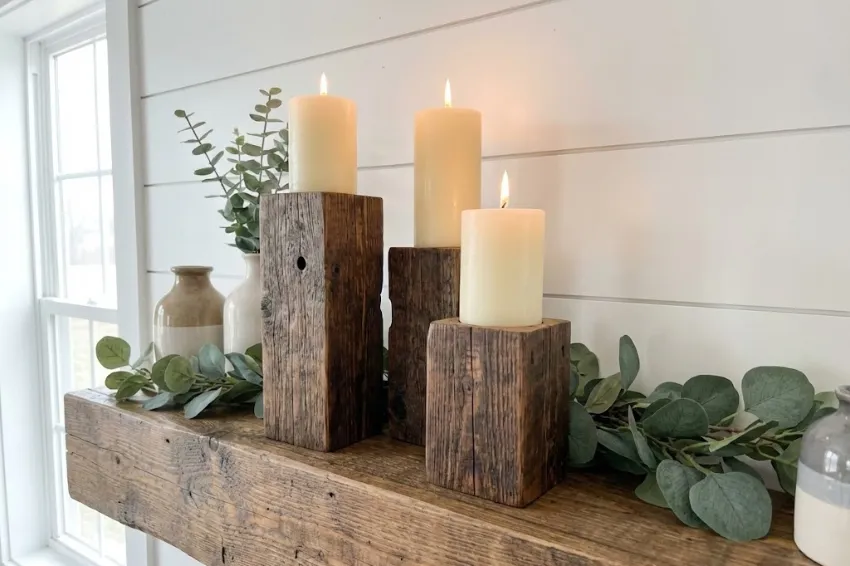
Why we love it: Five-minute project with restaurant-level ambiance. Drill a hole, sand, done.
Best for: Gift-making and using up those tiny scraps you almost threw away.
Time: 30 minutes for a set of 3
Quick How-To: Build the Floating Shelf
Step 1: Measure & Cut Your Scraps
Line up your scrap pieces side-by-side until you hit your desired shelf width (12-24″ works great). Cut them to the same length—doesn’t have to be perfect!
Pro-Tip: Mix 2-3 wood types for that “expensive reclaimed” look.
Step 2: Sand Like You Mean It
Always sand with the grain to avoid scratches. Start with 80-grit, finish with 220-grit for glass-smooth results.
Wipe off dust with a damp cloth before moving on.
Pro-Tip: Splinters gone? You’re ready for the next step!
Step 3: Glue & Clamp
Apply wood glue generously to edges, press pieces together, then wipe excess immediately. Clamp for 1-2 hours (or weigh down with heavy books).
Pro-Tip: This bond will be unbreakable—no nails needed!
Step 4: Stain or Seal
Test your stain on a scrap first! Different woods absorb differently. Apply conditioner to porous pine for even color.
Let dry 24 hours, then seal with non-toxic, water-based finish.
Pro-Tip: Skip paint—stain is way more forgiving for beginners.
Step 5: Mount with Confidence
Pre-drill holes to avoid splitting. Use two anchors per bracket for 50+ lb stability.
For renters: Command strips hold up to 16 lbs—perfect for lighter decor!
Common Questions
Will my wood scraps be too splintery or uneven?
Yes initially, but sanding fixes everything—start coarse (80-grit), finish fine (220-grit).
Are these projects sturdy enough for everyday use?
Absolutely! Proper wood glue bonds are stronger than the wood itself.
What if I’m terrible at painting?
Use stain instead—it’s way more forgiving and lets the wood grain shine through.
Are the finishes safe around kids and pets?
Yes! Choose water-based, low-VOC, or soy-derived sealants labeled non-toxic.
My scraps are all different woods—will they look mismatched?
That’s the charm! Mixing adds character, or unify everything with one stain color.
Can renters do this without damaging walls?
100%—use Command strips or build freestanding pieces like the plant stand.
How long does this really take for a beginner?
Most projects clock in under 2 hours of active work time.
Your Turn to Create!
You’ve got the scraps. You’ve got the plan. Now go make something stunning!
Tag us @LoveHobbyCraft with your build—we can’t wait to see your unique creations!