Rock Painting Ideas. Got a pile of plain rocks and a restless kid? You’re closer to an afternoon of pure creative magic than you think. Rock painting is one of those rare crafts that costs almost nothing, makes a genuine mess in the best possible way, and produces something kids actually want to keep — or hide in a neighbor’s garden for someone else to find.
Why Rock Painting Is Perfect for Kids (Benefits & Getting Started)
Rock painting bridges the gap between outdoor exploration and hands-on art, turning something kids literally pick up off the ground into a personalized treasure. There’s no expensive kit to buy, no subscription to sign up for, and no complicated setup — just rocks, paint, and a kitchen table covered in newspaper.
The benefits go deeper than just keeping little hands busy. Painting small details on a rock’s surface actively develops fine motor skills, building the same hand-eye coordination kids need for writing and cutting. Working with non-toxic paint that’s safe for children means even toddlers can join the fun without any safety worries. And once the paint dries, those rocks become real-life garden decorations, paperweights, or bookend treasures that kids beam with pride over every time they spot them.
Before you start painting, here’s what you’ll need to gather.
Rock Painting Supplies Kids Need (Complete Checklist)
Essential Materials
- Smooth flat rocks — clean, dry, and ideally 2–4 inches across for easy handling
- Acrylic paint for rocks — brands like Apple Barrel, FolkArt, or Craft Smart are AP-certified and non-toxic, making them the gold standard for kids’ projects
- Small and medium paintbrushes — fine tips for details, wider bristles for base coats
- Googly eyes — assorted sizes from 3mm to 12mm unlock a whole world of animal and character designs
- Pencil — for sketching the design lightly onto the rock before committing to paint
- Paper towels — essential for blotting brushes and quick cleanup
- Dish soap — for washing rocks before you begin
Optional but Recommended
- Mod Podge or a weatherproof sealer — Mod Podge works beautifully for indoor display rocks, while a weatherproof sealer is essential if the finished piece will live in the garden
- Fine-tip permanent markers — perfect for drawing mouths, tiny eyes, and template outlines
- Clear sealant spray — a quick coat on outdoor rocks protects against rain and sun fading
How to Prepare Rocks for Painting with Children
Prep work is the secret ingredient most tutorials skip. Start by scrubbing rocks with dish soap and warm water to remove dirt and oils that would prevent paint from sticking. Dry them completely with paper towels, then let freshly-washed outdoor rocks sit for a full 24 hours before painting — any trapped moisture will bubble your base coat. Once dry, have kids sketch their design lightly in pencil first. This single step reduces frustration dramatically, especially for younger painters who want to “plan” before they commit.
21 Cute Rock Painting Ideas for Kids
Every single idea below can be completed with basic rock painting supplies found at any craft store. Some are genuinely toddler-friendly; others offer enough complexity to challenge an eight-year-old who’s already painted fifty rocks and wants a new challenge. Start with whatever sparks the most excitement — there’s no wrong entry point into this hobby.
1. Paint Adorable Ladybug Rocks with Polka Dots (Easiest First Project)
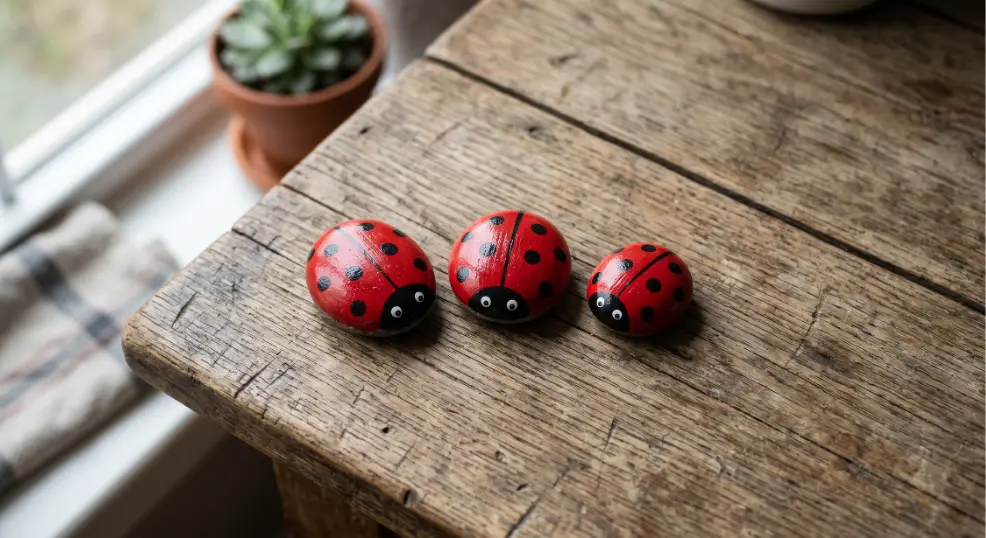
Ladybug rocks are the definitive beginner project for good reason: a red base coat, a black dividing line down the center for wings, a handful of black polka dots, and two white eye dots with black pupils — and suddenly a plain rock becomes an instantly recognizable insect that every three-year-old will recognize and love. The round shape of a smooth rock naturally mimics a ladybug’s domed body, so the rock itself does half the work for you. This is the perfect first project for ages 3 and up, taking only 15–20 minutes from first brushstroke to finished piece.
2. Create Paw Print Rocks for Pet Lovers (Simple 5-Stroke Design)
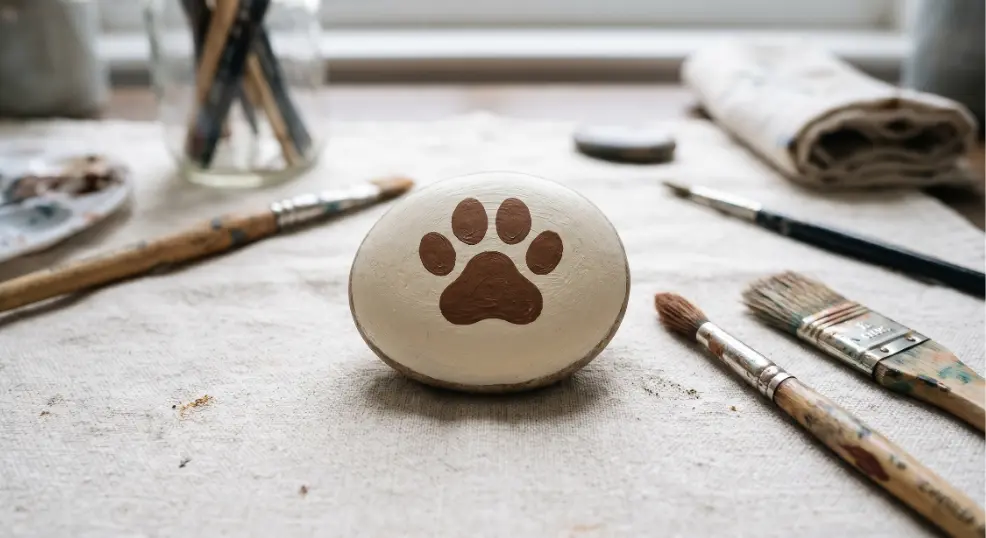
Five simple shapes are all it takes to turn any rock into a pet-themed keepsake: one large central oval pad and four small rounded toe prints arranged above it instantly read as an animal paw print to anyone who sees it. Choose the base color based on the pet you’re honoring — warm brown for a golden retriever, soft pink for a cat, classic black for a Labrador — and the result looks surprisingly polished for such a minimal design. Kids aged 4 and up can typically manage the spacing within 10–15 minutes.
3. Paint Rainbow Rocks with Bright Color Stripes (Color-Learning Project)
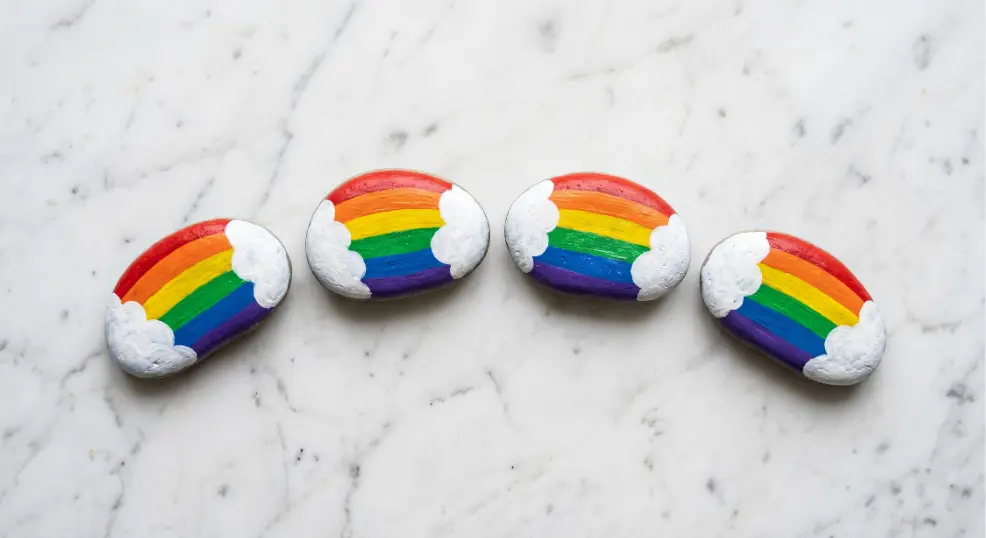
Rainbow rocks are secretly a color theory lesson disguised as a craft — layering horizontal stripes in the correct spectral order (red, orange, yellow, green, blue, purple) teaches color sequence without any flashcards required. Smooth flat rocks are the ideal canvas here because their even surface keeps the stripes clean and parallel. Finishing each end with a small white cloud painted on the sides ties the whole composition together into something that looks genuinely gallery-worthy for a toddler’s bedroom wall. Ages 3 and up can tackle this in about 15 minutes.
4. Create Minion Rocks with Goggles and Overalls (Pop Culture Craft)
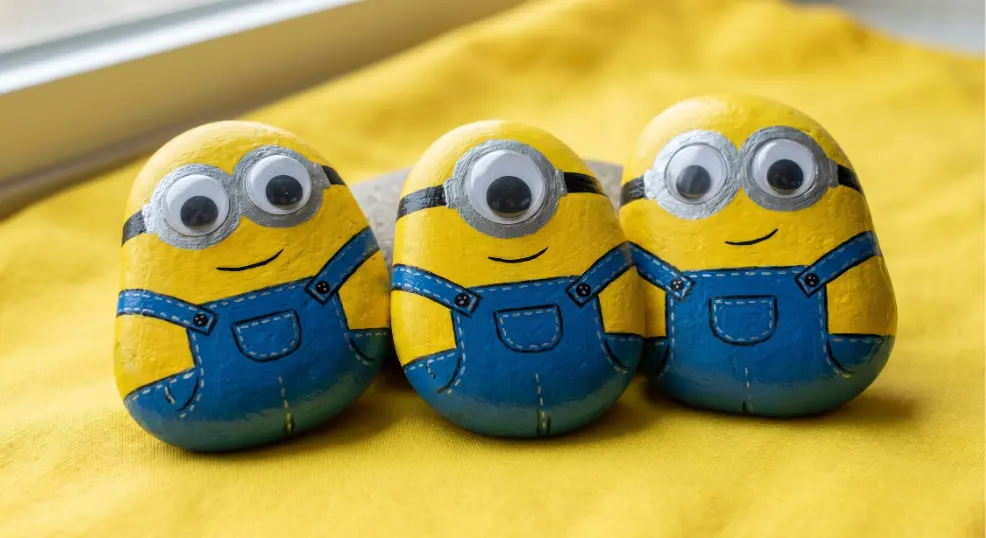
Yellow rocks are basically Minions waiting to happen. A solid yellow base coat covers the rock entirely, then a band of cornflower blue across the lower third becomes the iconic overalls. The goggles — silver or grey circles with a painted strap across the forehead — are what make the design unmistakable, and adding one or two googly eyes inside those goggles instead of painting them takes the finished piece from cute to genuinely hilarious. This is a crowd-pleaser for ages 5 and up that takes around 20 minutes and consistently ends with kids immediately wanting to make an entire Minion army.
5. Paint Pumpkin Rocks with Orange Body and Green Stem (Fall Seasonal)
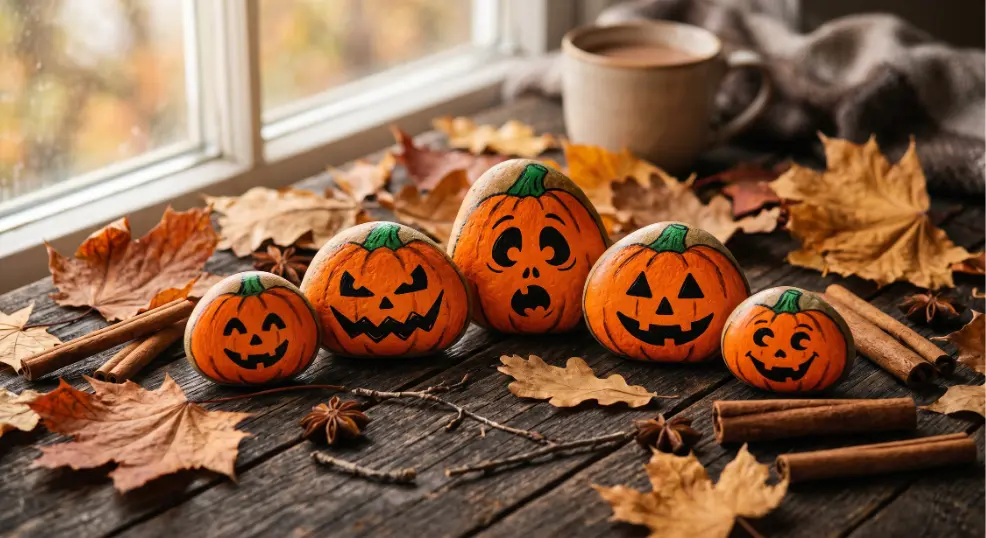
Round orange rocks look so naturally pumpkin-like that a green stem on top and a simple carved face are almost all you need to complete the illusion. For a Halloween feel, classic jack-o’-lantern triangle eyes and a toothy grin in black paint deliver instant spooky-cute energy. For a more neutral fall display that works through Thanksgiving, round painted eyes and a smile keep pumpkin rocks friendly enough for any shelf. Ages 4 and up can finish this project in 15 minutes, and a cluster of three pumpkin rocks of different sizes makes a complete seasonal vignette.
6. Make Story Stones with Picture Prompts (Interactive Game)
Story stones transform a simple rock painting activity into an open-ended game that kids return to again and again. Paint six rocks with simple, distinct images — a cat, a star, a house, a sun, a key, a tree — then drop all six into a fabric bag or bowl. The magic happens when a child draws three random rocks and has to build a story that connects all three images. It sounds simple, but the combination of visual prompts and narrative improvisation builds language skills, imagination, and storytelling confidence in a way that feels entirely like play. Plan for about 30 minutes to paint the full set; ages 5 and up get the most out of the storytelling mechanic.
7. Design Kindness Rocks with Uplifting Messages (Social Movement)
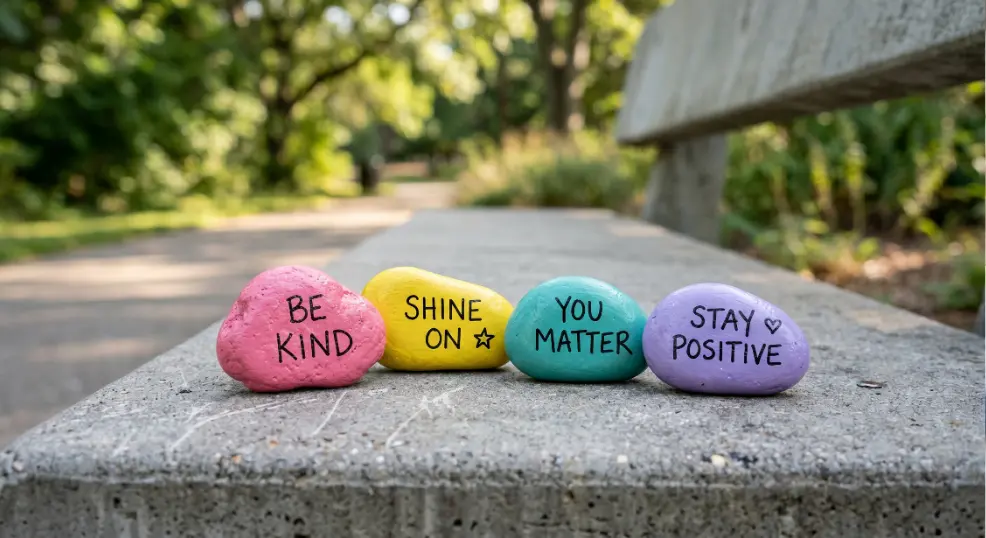
The kindness rocks movement started with a simple idea: leave painted rocks with positive messages in public spaces for strangers to find, and watch the ripple effect of small, unexpected joy. For kids, painting a bright background — hot pink, sunshine yellow, sky blue — and then writing a short message like “You Matter” or “Be Kind” in fine-tip marker teaches empathy in the most tangible way possible. The act of hiding the finished rock somewhere a stranger will discover it transforms the craft into an act of genuine generosity. Ages 6 and up (who can form legible letters) can complete a kindness rock in about 15 minutes, and it’s one of the few crafts with a built-in second chapter.
Kindness Rocks Tip for Kids: Start by visiting the official #TheKindnessRocksProject community online for inspiration. Have kids choose one word that made them feel good recently — that’s usually the most powerful message to pass on.
8. Paint Butterfly Rocks with Symmetrical Wings (Mirror Tutorial)
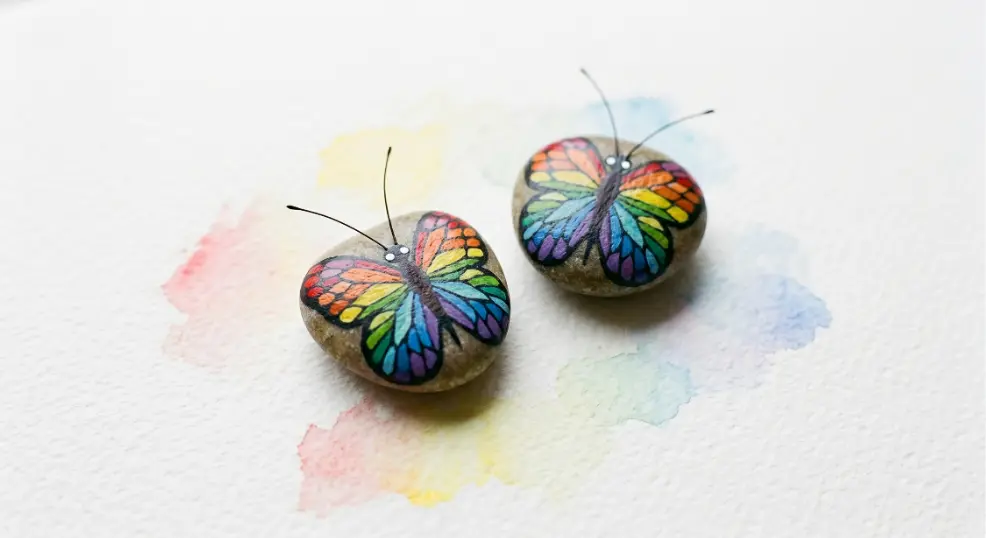
Here’s the trick that makes butterfly rocks look professionally executed even when a four-year-old makes them: instead of trying to paint matching wings freehand, lay the rock on a folded piece of paper that has wet rainbow paint dabbed on it and press gently. When you unfold the paper, the paint transfer creates a perfectly symmetrical wing pattern on both sides of the rock without any drawing skills required. Add painted antennae and simple black eyes once it dries, and the butterfly looks like it genuinely required talent. Ages 4 and up love the surprise reveal moment; allow about 15 minutes plus drying time.
9. Design Fairy Garden Rocks with Tiny Houses (Miniature World)
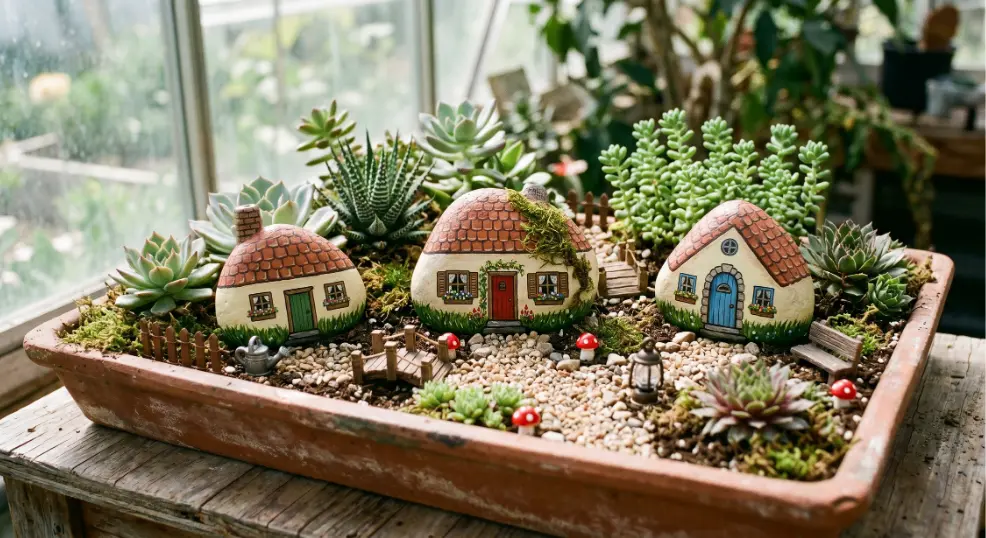
A rock painted as a tiny cottage — triangular roof in terracotta, square base in cream, a small brown door, two white-framed windows, and a stripe of green along the bottom for “grass” — becomes the anchor point for an entire miniature fairy garden world. Once kids make one, they inevitably want a bakery, a clock tower, and a tiny stone well to complete the village. Arrange the finished rocks among real succulents, pebble pathways, and tiny figurines for a display that stays genuinely interesting for months. Ages 6 and up nail the architecture details in about 25 minutes per house.
10. Paint Universe Galaxy Rocks with Swirls and Stars (Space Theme)
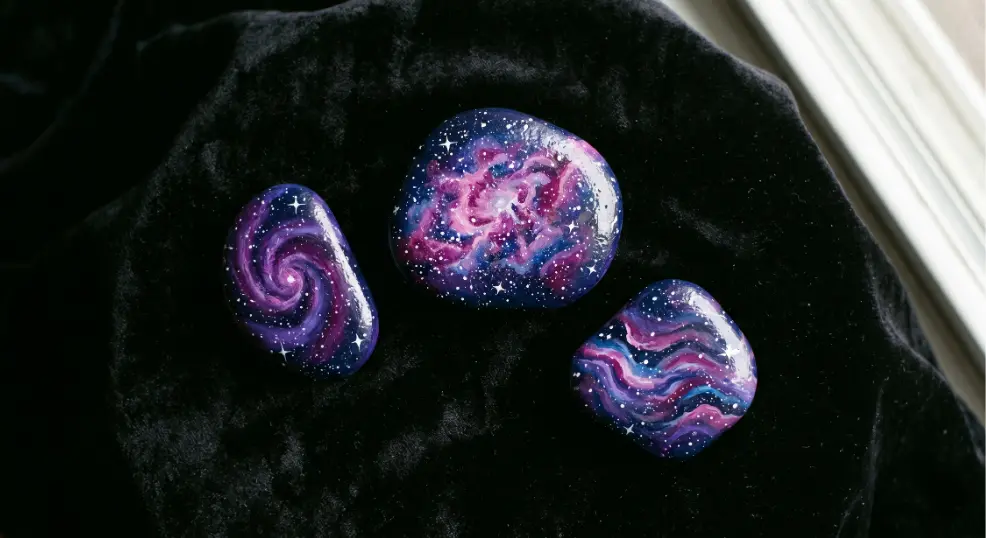
Galaxy rocks are one of those projects where imperfection is actually the goal — the looser and more blended the swirls, the more they actually look like deep space photography. Start with a rich dark navy or purple base coat, then load an old toothbrush with white paint and run your thumb across the bristles to splatter tiny star dots across the surface. A dry brush with pale pink and lilac creates the nebula swirls that bring the whole composition to cosmic life. Ages 7 and up love the toothbrush splattering technique especially; the whole project takes about 20 minutes and produces rocks that look genuinely stunning in a dark bedroom.
11. Create LEGO Minifigure Rocks That Stand Up (3D Hybrid Craft)
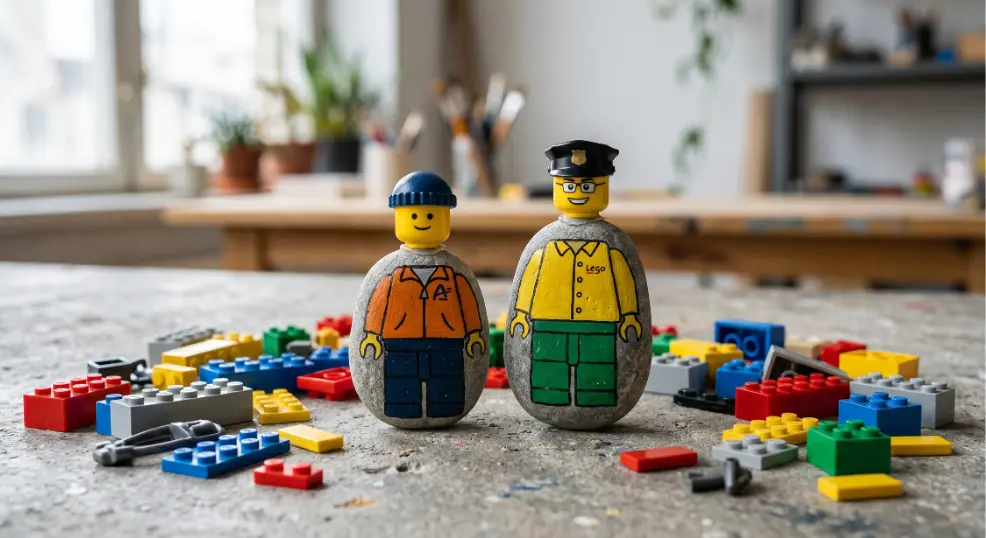
The genius of this hybrid project is that the rock and the toy become part of the same object. Paint the rock as a LEGO minifigure torso — choose a custom design, a superhero costume, or a classic yellow body — and paint legs across the bottom half. Then glue an actual LEGO minifigure head onto the top using strong craft glue. The result is a sturdy, displayable figure that’s also genuinely playable, bridging the gap between a finished artwork and an active toy. Ages 6 and up (particularly avid LEGO fans) complete this in about 20 minutes and are consistently amazed by how “real” the finished piece looks.
12. Paint Strawberry Rocks with Green Leafy Top (Fruit Design)
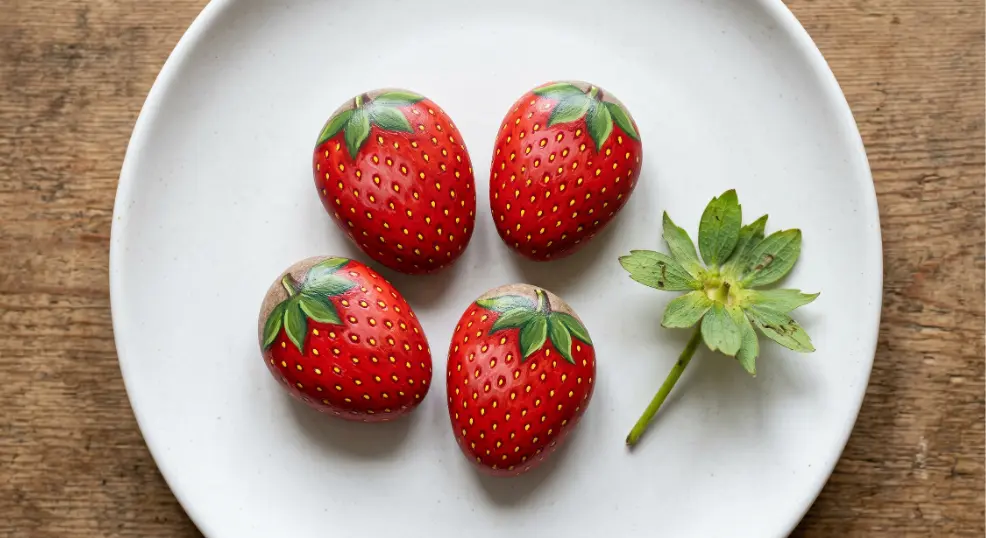
Strawberry rocks are the perfect project for very young painters because the design is forgiving, bold, and immediately recognizable even with a slightly wobbly technique. An oval or rounded-triangular rock shape mimics the strawberry’s natural silhouette; a red base coat covers it completely, then a leafy green crown painted across the top and a scatter of small yellow seed dots across the red body finishes the fruit in a way that somehow always looks adorable regardless of execution. Ages 3 and up can manage this in about 10 minutes, making it one of the fastest satisfying projects on this entire list.
13. Paint Ocean Fish Rocks with Scales and Fins (Underwater Theme)
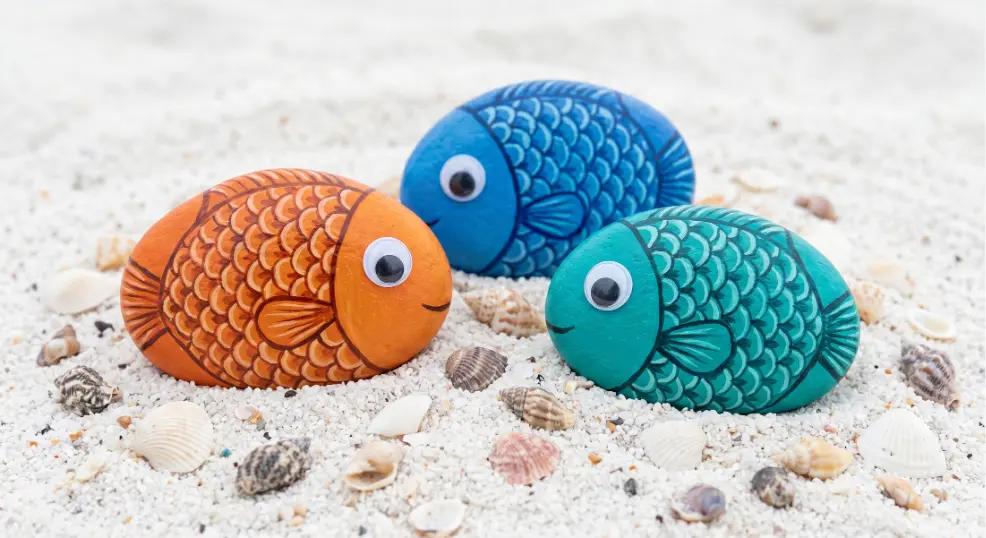
An oval rock is practically a fish already — it just needs a fin, some scales, and a personality. Paint the base in a bright tropical color (cobalt blue, clownfish orange, or electric teal), then add a pointed triangular fin along one side and a repeating V-shaped scale pattern across the body using a slightly darker shade of the base color. A googly eye glued near the rounded end gives the fish an expression that’s more charming than any painted eye could manage, and a small white dot creates a highlight that makes the whole piece look dimensional. Ages 4 and up enjoy the scale patterning; allow about 15 minutes.
14. Create Christmas Ornament Rocks with Red and Green (Holiday Seasonal)
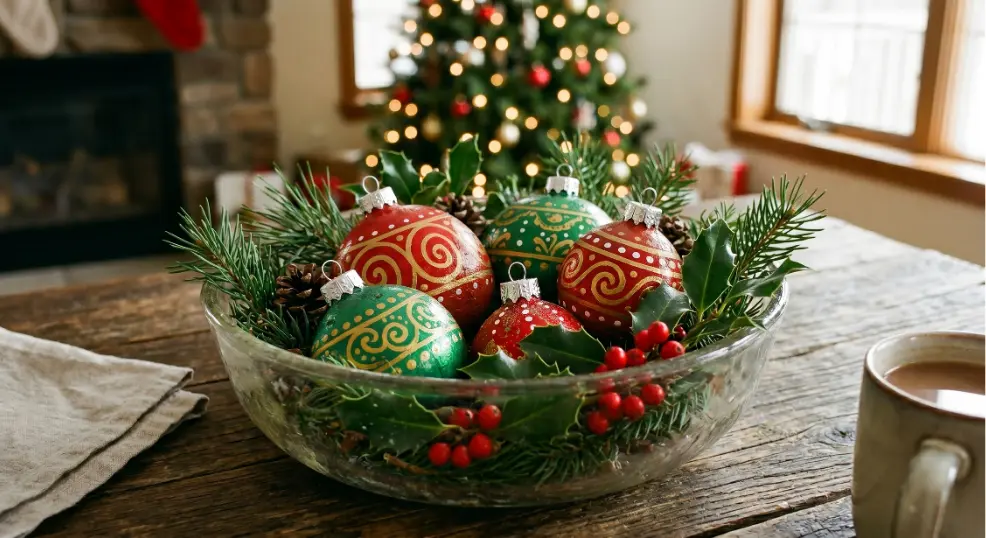
Christmas ornament rocks solve a real problem: breakable glass ornaments and enthusiastic small children don’t mix, but a painted rock “ornament” is entirely indestructible. A round rock painted red or deep green gets swirling gold or silver patterns painted across its surface, plus a painted silver cap at the top. If a parent drills a small hole through the cap area beforehand, a ribbon loop turns the finished rock into an actual tree ornament that will outlast any glass ball. Ages 5 and up complete the painting in about 20 minutes, and the rocks look genuinely elegant grouped in a decorative bowl.
15. Paint Bee Rocks with Yellow Stripes and Wings (Insect Educator)
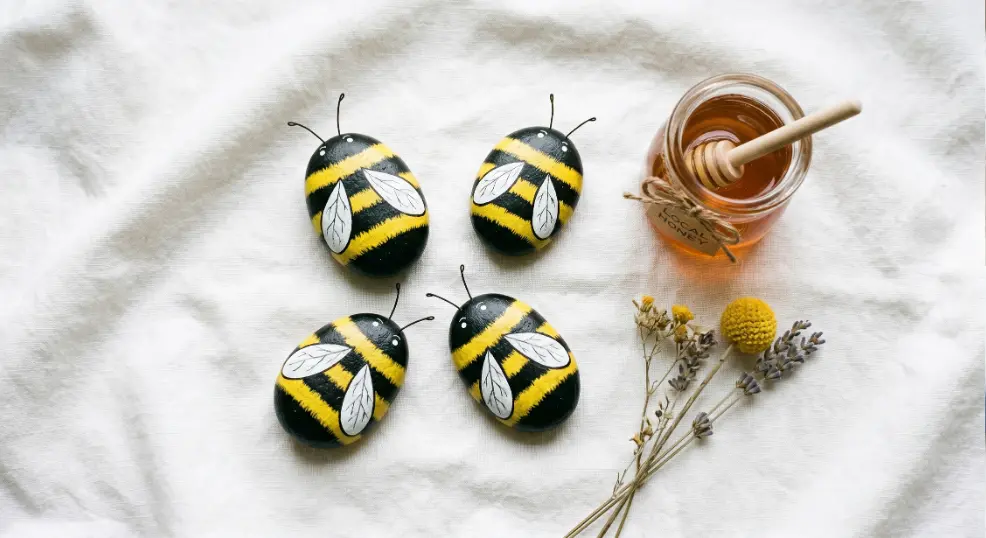
Bee rocks double as a natural conversation starter about pollination and why bees matter — which makes them a favorite in school and homeschool settings. Paint a black oval as the body base, then add three or four bold yellow stripes horizontally across the middle section. Two white or pale grey oval wings painted on the sides suggest the translucent wing texture without requiring any difficult technique, and a pair of thin black antennae drawn on with a fine marker finishes the design. The chunky stripe pattern is forgiving for younger painters; ages 4 and up typically wrap this up in about 15 minutes.
16. Design Snowman Rocks with Scarf and Hat (Winter Theme)

Three painted rocks stacked and glued together produce a snowman that looks three-dimensional and deliberate — a genuinely impressive result from a simple technique. Paint three rocks in graduated sizes completely white, then stack large-medium-small and adhere with strong craft glue or a hot glue gun (parent-operated). An orange painted nose, black dot eyes and buttons, and a red scarf painted in detail around the neck joint complete the figure. The stacked format means each individual rock is easy to paint; ages 5 and up manage the separate pieces well, with the assembly taking the most adult assistance. Budget 25 minutes total.
17. Paint Mars Rover Rocks with Wheels and Antennae (STEM Angle)
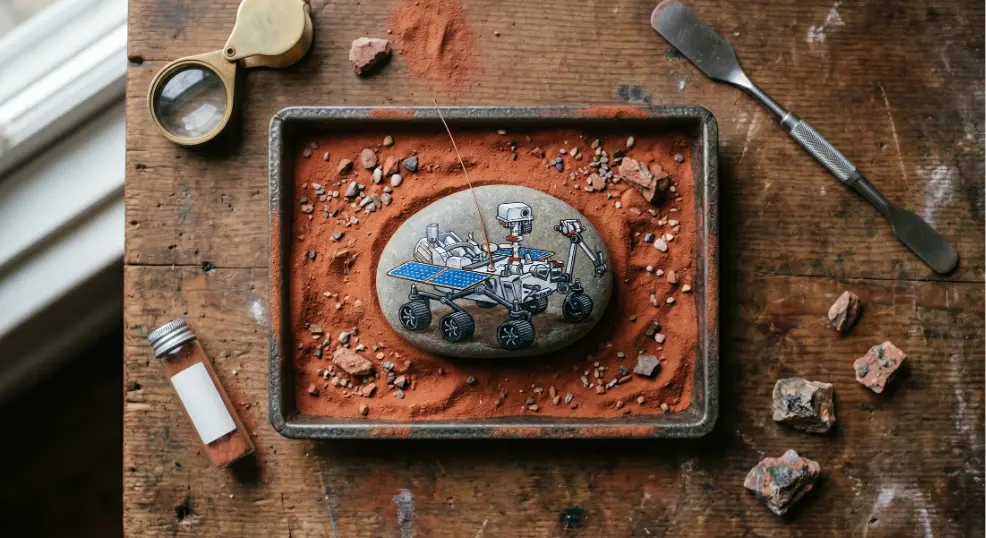
Mars rover rocks are the project that makes STEM feel tactile and exciting. Paint the main rock body silver or white, then add six black wheels — either painted directly onto the sides or shaped from air-dry clay and glued on for actual dimension. A solar panel (a flat rectangle in deep blue) across the top and a thin wire antenna painted in silver completes a recognizable Curiosity or Perseverance-inspired design. Ages 7 and up engage most deeply with the STEM conversation this project unlocks; allow about 30 minutes, and display the finished rover alongside some red-painted sand for full effect.
18. Paint Unicorn Rocks with Rainbow Mane and Horn (Fantasy Theme)

A unicorn rock starts with a white base coat that covers the entire surface, then a spiral gold or yellow horn painted rising from the top front gives the design its signature silhouette. The mane is where creative freedom really opens up — paint flowing stripes of pink, lavender, aqua, and yellow sweeping back from behind the horn, keeping the strokes loose and curved to suggest movement. Two large, gentle eyes with long painted lashes and a tiny pink nose complete a face that’s simultaneously easy to execute and genuinely magical-looking. Ages 5 and up finish this in about 25 minutes and rarely stop at just one.
19. Create Watermelon Rocks with Tiny Seeds (Summer Theme)
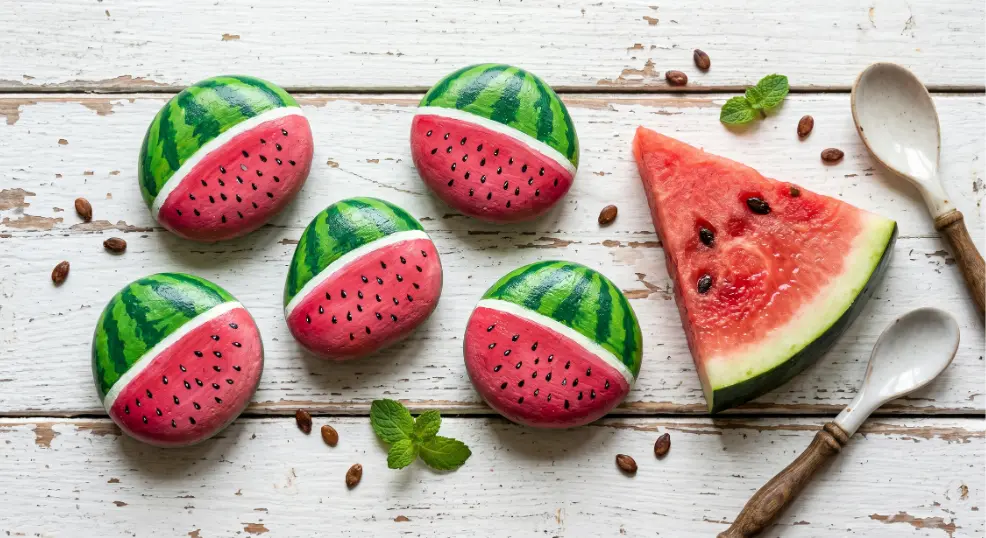
Watermelon rocks are nearly identical in technique to the strawberry project but produce a completely different feel — summery, graphic, and bold. Paint the top two-thirds of a round rock in bright green, then cover the bottom third in vivid red or pink, and add a thin white line at the border between them to suggest the rind. Tiny black oval seeds scattered across the red section complete the illusion in a way that always makes people do a double-take. The geometric color blocking is achievable for ages 3 and up in about 10 minutes, making this a high-reward quick win.
20. Paint Hot Air Balloon Rocks with Basket Below (Dreamy Decor)
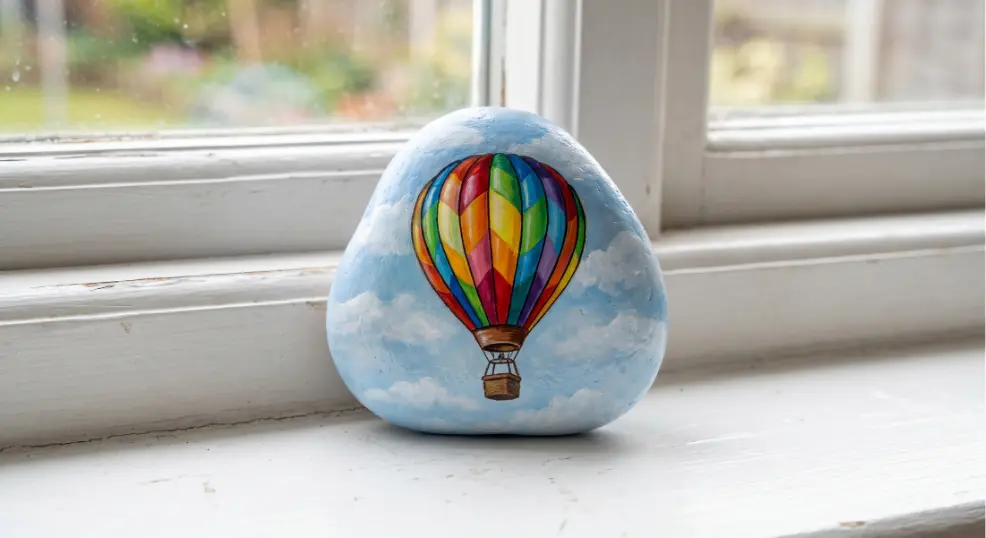
An oval rock naturally mimics the inflated balloon envelope, making hot air balloon rocks a project where the rock’s shape actively helps the design. Divide the balloon body into vertical panels in alternating bright colors — red, yellow, blue, orange — then paint a small brown rectangular basket hanging from the bottom, connected to the balloon with thin painted rope lines. A clear blue sky background painted around the balloon creates depth, and a few painted white clouds floating beside it makes the whole scene feel like a postcard from above. Ages 6 and up manage the panel divisions well in about 25 minutes.
21. Design Cat Face Rocks with Whiskers and Ears (Classic Crowd-Pleaser)
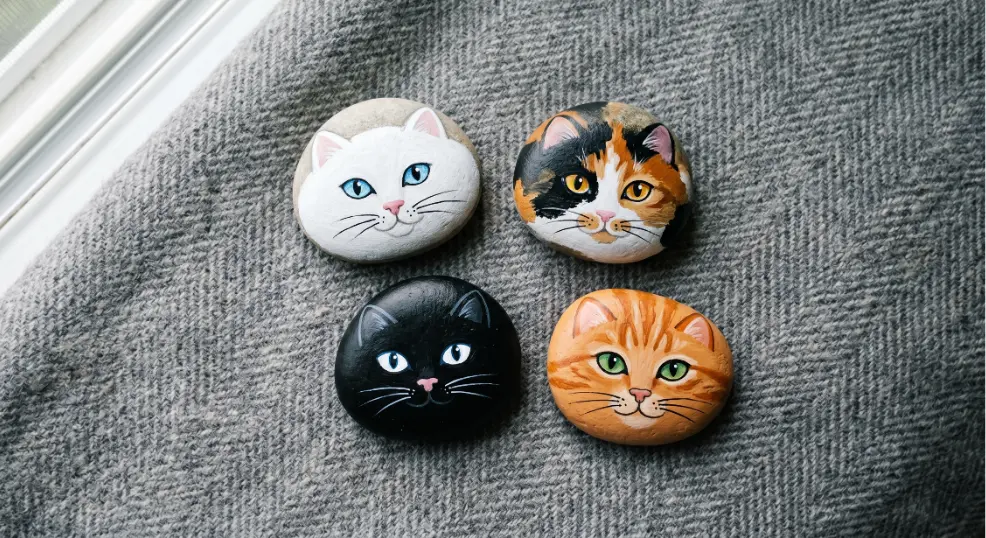
Cat rocks close this list because they are universally adored and endlessly customizable. Paint the full rock in any base color — classic black, orange tabby, snowy white, or calico patches — then add two pointed triangular ears in a slightly darker shade along the top edge. A small pink triangle nose, two almond-shaped eyes in vivid green or amber, and six thin whisker lines drawn in fine permanent marker on each side of the nose complete a face that requires almost no artistic skill to make look convincingly feline. Ages 3 and up can manage a simplified version, while older kids add detail like fur texture, eyelash strokes, and bib patterns. Allow 15–20 minutes for a finished piece.
Sealing and Displaying Your Finished Rock Paintings
The last step is the one most tutorials skip, and skipping it is the reason painted rocks fade after two rainstorms. For any rock that will live indoors — on a shelf, desk, or as a paperweight — two coats of Mod Podge brushed over the dry paint creates a durable, slightly glossy finish that protects the design and makes colors pop. For outdoor rocks (garden markers, pumpkin decorations, kindness rocks left in public), swap Mod Podge for a weatherproof sealer or a clear sealant spray rated for exterior use. Apply two light coats, letting each dry completely, and the paint will stay vivid through seasons of rain, sun, and curious hands.