Dull scissors are one of the most quietly frustrating problems in any craft room. They fray fabric, mangle paper, and strain your hands—but does the fix mean reaching for a sharpening stone or heading to the store?
The answer matters more than you think. Every pair of scissors you rescue from the landfill is a small, meaningful win for your wallet and the planet.
The Short Answer
Sharpen dull scissors if they just need routine maintenance. It’s cheaper, faster, and far greener for the vast majority of DIY cases.
Replace them only if the blades are chipped, bent, or the scissors are cheap, low-quality models that dull too quickly to be worth the effort. Here’s how to know the difference.
The Core Breakdown
Before you decide, run a quick assessment across three key factors. This takes less than two minutes and could save you $30 or more.
Labor Costs
DIY sharpening is surprisingly fast. Using common household items like aluminum foil, sandpaper, or a whetstone, you can restore a dull pair of scissors in 10 to 30 minutes—no special skills needed.
If your scissors are high-quality and you’d rather leave it to a professional, that’s a valid option too. Professional sharpening averages $20 to $50 per pair—still cheaper than buying replacements when you factor in the time lost shopping and the environmental cost of manufacturing.
Material Processing
Sharpening removes only a microscopic sliver of metal from the blade edge. Done correctly, it can extend your scissors’ useful life by 3 to 15+ years.
Replacing scissors, by contrast, means triggering an entire manufacturing chain: steel melting, blade forging, plastic handle molding, packaging, and global shipping emissions. The numbers are staggering—reusable scissors have 99% lower environmental impacts than disposables. Every sharpening session is a genuine act of sustainability.
Scarcity & Quality Degradation
Not all scissors are created equal—and this is where the sharpen vs. replace question gets nuanced.
- Budget scissors ($10–$20) dull after 1 to 2 months of heavy use and can only be sharpened a handful of times before the thin stamped metal gives out.
- Premium fabric shears ($60–$150+) can last 5 to 15 years with proper care before experiencing true edge degradation.
Over a 5-year ownership period, the real cost difference is striking: budget scissors cost $715 to $825 in total (replacements + sharpening + wasted materials), while premium shears cost $1,175 to $1,260 upfront but far less over time.
Can You Sharpen Scissors at Home?
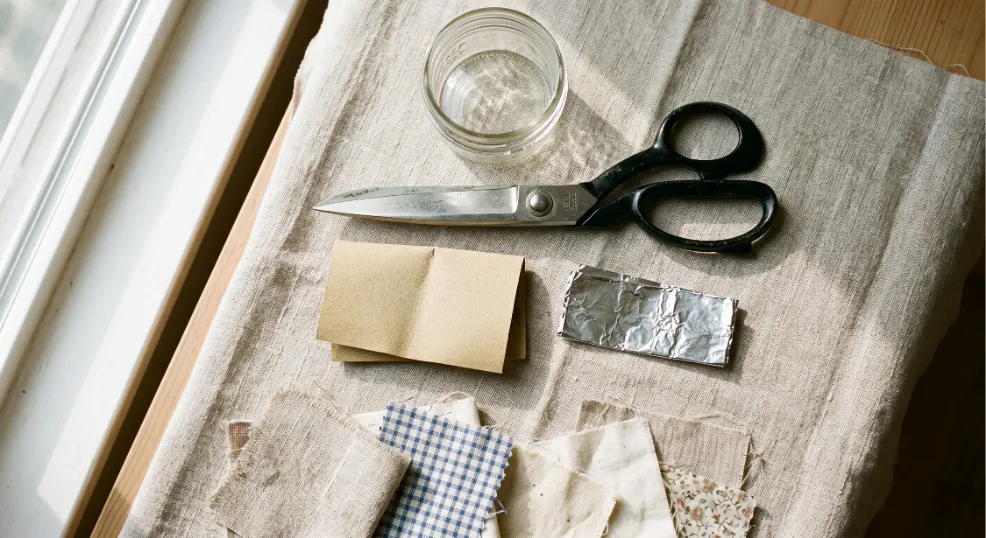
Yes—and it’s easier than you think. Three reliable DIY methods work for roughly 80% of dullness cases, using items you almost certainly already own.
The 3 Foolproof DIY Methods:
- Aluminum Foil: Fold a sheet 8–10 times into a thick strip. Cut through it with full, deliberate strokes 10–15 times. The foil gently abrades and realigns the blade edge.
- Sandpaper: Fold fine-grit sandpaper (150–220 grit) in half, rough-side out. Make 20 long, controlled cutting strokes from pivot to tip.
- Glass Jar Rim: Open scissors fully and draw each blade along the unglazed rim of a glass jar. This works like a ceramic honing rod—fast and surprisingly effective.
Before you start—safety checklist:
- Safety glasses on
- Blades fully open before each stroke
- Equal number of strokes per side
- Test on scrap paper or fabric after every 5–10 strokes
Pro tip: Always do a clean paper cut test after sharpening. A well-sharpened blade slices through in one smooth, clean stroke with zero tearing.
How Do You Know When Scissors Need Sharpening?
Most crafters wait too long. A 30-second scissor test tells you everything you need to know.
The 30-Second Dullness Test — Check for These Signs:
- Cuts paper jagged, folded, or torn rather than cleanly sliced
- Fabric frays, pulls threads, or requires excessive crushing force to cut
- Blades push the material apart instead of shearing through it
- You feel hand or wrist fatigue after just a few minutes of cutting
Visual signs to inspect:
- A dull, flat shine along the cutting edge (instead of a crisp reflective line)
- Tiny nicks or micro-chips visible in direct light
- A visible gap between the blades when closed at the tip
If you spot two or more of these signs, it’s time for scissor maintenance—not replacement.
When Should You Replace Scissors Instead of Sharpening?
Sharpening is a fix, not a miracle. There are four clear situations where replacement is the smarter, safer choice.
Replace immediately if your scissors have:
- Deep chips or cracks in the blades — sharpening grinds past a nick, but deep damage compromises structural integrity and can be a safety hazard.
- A loose pivot that won’t tighten — a wobbly pivot causes blades to misalign and no amount of sharpening fixes that core mechanical failure.
- Cheap stamped metal construction (not forged) — these blades lack the hardness to hold an edge and will dull again after just 1–2 sharpenings, making the effort pointless.
- Handles that cause discomfort — if extended crafting sessions are causing hand pain, an ergonomic upgrade is a genuine wellness investment, not an indulgence.
When in doubt, run the 30-second test again after one round of DIY sharpening. If the problem persists, it’s likely structural—not just dullness.
How Often Should Scissors Be Sharpened?
A consistent scissor maintenance routine saves you both time and money in the long run. Think of it like car maintenance—small, regular upkeep prevents major problems.
Recommended Sharpening Schedule:
| Scissor Type | Heavy Use | Light Use |
|---|---|---|
| Fabric / dressmaking shears | Every 3–6 months | 1–2x per year |
| General DIY & craft scissors | Every 4–6 months | 1–2x per year |
| Paper scissors | Every 6–12 months | Once yearly |
Weekly maintenance tip: Wipe blades with an isopropyl alcohol wipe after each session. This removes adhesive residue, lint, and buildup that accelerates dulling.
Monthly tip: Open the blades fully and look for early nicks in direct light. Catching them early means a quick touch-up instead of a full resharpening session.
What Happens If You Use Dull Scissors?
Many crafters push through with dull scissors without realizing the full cost. It goes beyond a frustrating cut.
The Real Costs of Ignoring Dull Scissors:
- Ruined fabric — fraying, pulled threads, and uneven edges destroy upcycling and sewing projects before they start.
- Hand and wrist strain — the extra force required puts repetitive stress on your joints, raising the risk of long-term injury over time.
- Wasted time and materials — botched cuts mean re-cutting, wasted fabric, and project restarts that cost you money and creative momentum.
The moment you notice your scissors are pulling rather than cutting, stop and sharpen. Catching dullness early is the single best scissor maintenance tip for protecting your projects—and your hands.
Eco-Friendly Crafter’s Decision Matrix
Use this quick-reference table to make your sharpen vs. replace decision in seconds.
| Scenario | Sharpen | Replace | Why |
|---|---|---|---|
| Light dullness, good blades | ✅ DIY ($0) | ❌ | Saves 99% of manufacturing emissions |
| Chips or cracks in blade | ❌ Won’t hold edge | ✅ New pair | Safety first—damaged blades are hazardous |
| Budget stamped-metal scissors | ✅ 2–3x max | ✅ Then upgrade | Better long-term ROI with quality replacement |
| Premium forged shears | ✅ Every 3–6 months | After 10–15 years | Extends lifespan and protects your investment |
| Loose pivot or bent blade | ❌ | ✅ | Structural failure can’t be sharpened away |
The green bottom line: The most sustainable scissors are the ones already in your hand. Sharpen first, replace thoughtfully, and buy quality when you do replace.
Final Takeaway
Dull scissors don’t have to mean a trip to the store. In most cases, 10 minutes and a sheet of aluminum foil is all it takes to restore your tools and get back to creating.
When you do need to replace, choose quality over cheapness—it’s the greener, smarter long-term investment. Your craft projects, your wallet, and the planet will all thank you.
Got a favorite DIY scissor sharpening method? Share it in the comments below—we’d love to hear what works in your workshop.