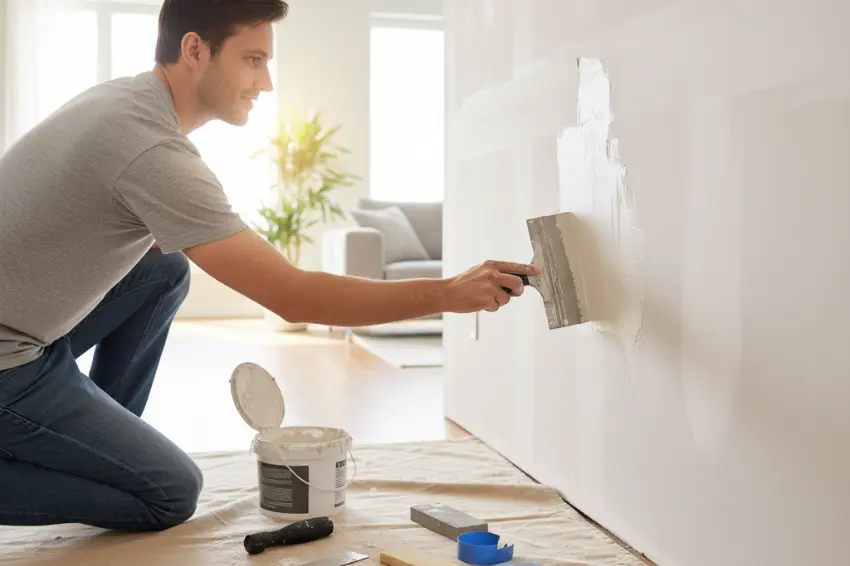
You know that moment when you’re moving furniture and—thunk—the doorknob just introduced itself to your bedroom wall? Or when you finally take down that gallery wall, only to discover your drywall looks like Swiss cheese? We’ve all been there. Here’s the good news: fixing those dings, dents, and holes isn’t nearly as intimidating as it seems, and you definitely don’t need to call in a pro for every little imperfection.
I’m genuinely excited to share these drywall repair techniques with you because they’ve saved me hundreds (maybe thousands?) of dollars over the years. Plus, there’s something deeply satisfying about looking at a wall you fixed yourself and thinking, “Yeah, I did that.” Let’s dive into the world of DIY drywall repair—no construction experience required.
Why Drywall Repair Is Actually Easier Than You Think
Drywall gets a bad rap for being difficult to fix, but honestly? It’s one of the most forgiving materials in your home. Unlike hardwood floors or tile, drywall is designed to be workable. The compound we use to patch it stays pliable while you’re working, and if you mess up, you can literally scrape it off and start over. That’s pretty forgiving if you ask me.
The real secret is understanding which repair method matches your specific situation. A tiny nail hole needs a completely different approach than a fist-sized crater. Once you know the right technique, you’ll wonder why you ever hesitated.
Understanding Your Drywall Damage: The Three Categories
Before we grab any tools, let’s identify what we’re dealing with. I like to think of drywall damage in three categories:
Small Holes (Under 1 inch): These are your nail pops, small dents, and picture-hanging casualties. Super quick fixes that take minutes.
Medium Holes (1-6 inches): Doorknob strikes, accidental furniture impacts, or spots where you removed an old light fixture. These require a bit more finesse but are totally manageable.
Large Holes and Significant Damage (Over 6 inches): Big accidents, water damage, or major renovations. These need backing support but follow the same principles.
Essential Tools for Drywall Repair (You Probably Own Half Already)
Here’s what I love about drywall repair—you don’t need a garage full of specialized equipment. Let me break down the actual essentials versus the nice-to-haves:
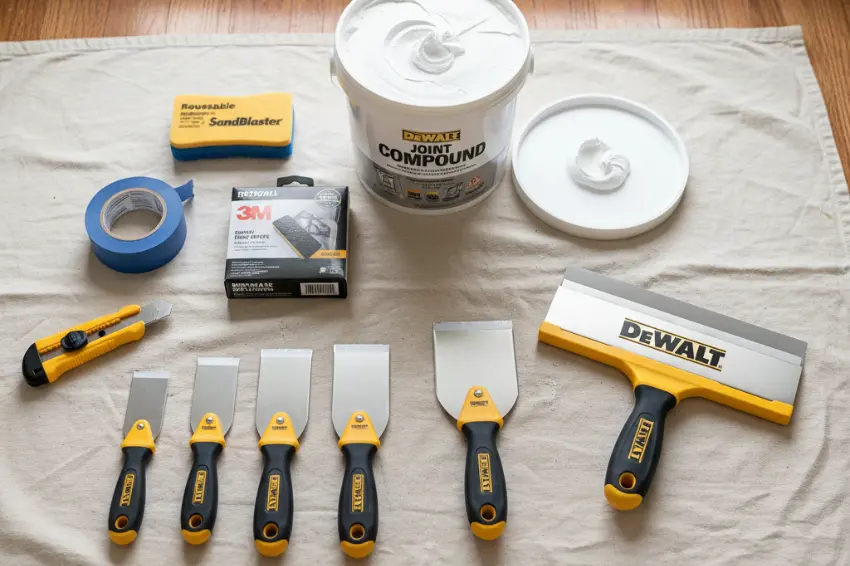
The Must-Haves:
- Putty knife or drywall knife (a 4-inch and 6-inch work for most repairs)
- Joint compound or spackle (I’ll explain the difference in a moment)
- Sandpaper or sanding sponge (120-grit for shaping, 220-grit for final smoothing)
- Utility knife for cutting and cleaning edges
- Primer (don’t skip this step—trust me)
For Medium to Large Repairs:
- Drywall patch kit or self-adhesive mesh patches
- Drywall tape (paper or mesh—more on this shortly)
- Mud pan (or just use a paper plate in a pinch)
- Dust mask (sanding drywall creates fine dust you don’t want to breathe)
My go-to setup includes the DEWALT Drywall Knife Set because having multiple sizes means I’m not constantly washing one knife between coats, and the 3M SandBlaster Drywall Sanding Sponge because it’s reusable and way easier to control than sandpaper sheets.
Spackle vs. Joint Compound: What’s the Actual Difference?
This confused me for years, so let me clear it up. Spackle is thicker, dries faster, and is perfect for small holes and quick fixes. It’s like the instant coffee of wall repair—convenient for small jobs. Joint compound (also called “mud” in the trade) is more versatile, creates a smoother finish, and is better for larger repairs or when you’re applying multiple coats.
Here’s my practical rule: For anything smaller than a quarter, I reach for DAP Drydex Spackling (it goes on pink and dries white, so you know exactly when it’s ready to sand—genius!). For everything else, I use 3M Drywall Joint Compound.
| Product | Best For | Drying Time | Shrinkage | Price Range |
|---|---|---|---|---|
| Spackle | Holes under 1″ | 30-60 minutes | Minimal | $5-$12 |
| Lightweight Joint Compound | Medium repairs | 2-4 hours | Moderate | $8-$15 |
| All-Purpose Joint Compound | Large repairs, taping | 24 hours | More noticeable | $10-$18 |
| Setting-Type Compound | Professional results | 20-90 minutes (varies) | Minimal | $15-$25 |
How to Patch Small Holes in Drywall: The 15-Minute Fix
Small nail holes are the gateway drug to drywall repair—they’re so easy that you’ll start looking for more things to fix. Seriously.
Step-by-Step:
- Clean the area. Use your finger or a damp cloth to remove any loose paper or debris. This takes five seconds but makes a huge difference.
- Apply spackle. Scoop a small amount onto your putty knife and press it firmly into the hole, slightly overfilling it. Think of it like icing a cupcake—you want a little extra.
- Smooth it out. Drag your knife across the patch at a slight angle to feather the edges. This creates a seamless transition with the wall.
- Let it dry. Wait the recommended time (usually 30-60 minutes for spackle).
- Sand lightly. Use fine-grit sandpaper or a sanding sponge in circular motions until you can’t feel the patch when you run your hand over it.
- Prime and paint. Don’t skip the primer—it seals the patch and ensures your paint matches perfectly.
Pro tip I learned the hard way: Always wipe away sanding dust with a slightly damp cloth before priming. Otherwise, you’re basically trying to paint over dust, and it shows.
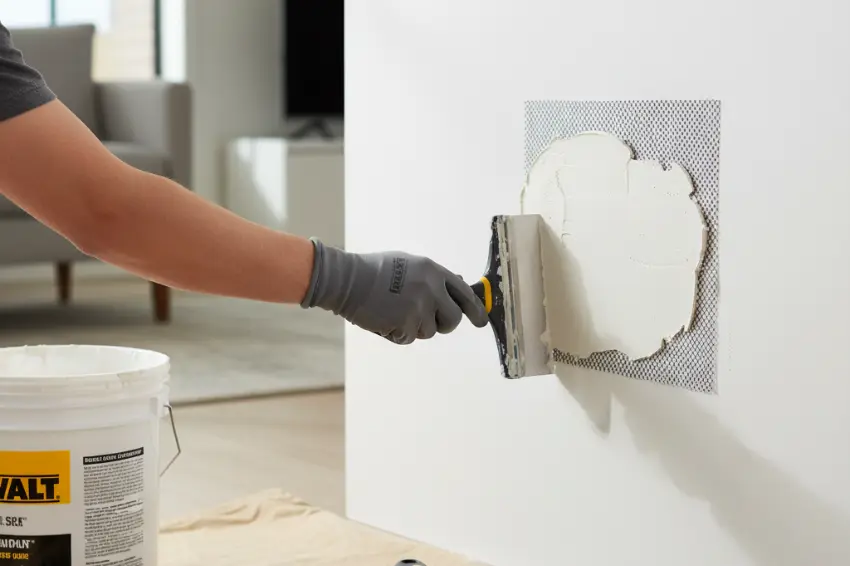
Fixing Medium Holes: When You Need a Drywall Patch Kit
For holes between 1 and 6 inches, self-adhesive patches are an absolute game-changer. The Homax Drywall Repair Patch has saved me so many times—they’re basically big, strong Band-Aids for your wall.
The Process:
- Prep the hole. Cut away any loose or damaged drywall with your utility knife. You want clean, solid edges.
- Apply the patch. Peel off the backing and stick it over the hole, centering it carefully. Press firmly so it adheres completely.
- First coat of compound. Using a 6-inch knife, spread joint compound over the entire patch, extending a few inches beyond all edges. You’re not trying to make it perfect—just get it covered.
- Second coat (after drying). Once the first coat is completely dry (usually overnight), apply a second, thinner coat with a wider knife, feathering the edges even further out.
- Optional third coat. For a truly seamless finish, a light third coat often does the trick.
- Sand, prime, paint. Same routine as before, but expect more sanding because you’re covering a larger area.
The key to making patches invisible is feathering—blending the edges of your compound so gradually that there’s no visible line between the patch and the wall. Think of it like blending eyeshadow (if you’re into that analogy) or creating a gradient in Photoshop.
How to Fix Large Holes in Drywall: Cutting and Backing
Okay, this is where it gets a bit more involved, but stick with me—you can absolutely do this. For holes larger than 6 inches, we need to actually cut out the damaged section and install a proper patch with backing support.
Materials Needed:
- Scrap piece of drywall (salvage from your garage or buy a small sheet)
- Two small pieces of wood (1×3 furring strips work great)
- Drywall screws
- Cordless drill (or Makita Cordless Drywall Screwdriver if you’re feeling fancy)
- Joint compound and drywall tape
The Method:
- Cut a square or rectangle. Use a drywall saw or utility knife to cut around the damaged area, creating clean, straight edges. Squares are easier than circles—trust me on this.
- Install backing boards. Insert your wood strips through the hole and position them behind the drywall on the top and bottom edges. Screw them in place through the existing drywall.
- Cut and fit your patch. Measure the opening and cut your new drywall piece to fit snugly. It should be almost perfect but slightly undersized (about 1/8 inch smaller) so it fits easily.
- Secure the patch. Screw the patch to your backing boards. Keep screws about 1/2 inch from the edges.
- Tape the seams. Apply USG Sheetrock Brand Joint Tape or Quickrete Mesh Drywall Tape over all seams, pressing it into a thin layer of compound.
- Apply multiple coats. This is a three-coat minimum situation: first coat to embed the tape, second coat to build up and smooth, third coat to perfect and feather far beyond the patch.
- Sand, prime, paint. You know the drill by now.
The hardest part? Patience. Each coat needs to dry completely, and rushing this step is how you end up with visible patches. I learned this after trying to paint a “dry” patch that was definitely not dry. It cracked within hours. Not cute.
Drywall Crack Repair: Why Cracks Happen and How to Fix Them Permanently
Cracks are tricky because they can come back if you don’t address the underlying cause. Most cracks appear where walls meet ceilings, in corners, or around door frames—places where the house naturally settles and flexes.
For Hairline Cracks: Use spackle and follow the small-hole method. Seriously, it’s that simple. Press the compound into the crack, smooth it out, sand, prime, paint.
For Wider Cracks:
- Widen the crack slightly. Yes, I know this sounds counterintuitive, but use your utility knife to cut a shallow V-groove along the crack. This gives the compound something to grip.
- Apply mesh tape. Press self-adhesive fiberglass mesh tape over the crack.
- Layer compound. Apply thin coats of joint compound, letting each dry completely. Two to three coats usually does it.
- Sand and finish. Same process—sand smooth, prime, paint.
Preventing Cracks from Returning: If a crack keeps coming back, there’s probably movement in that area. Using mesh tape instead of paper tape helps because it’s more flexible. For corners (especially prone to cracking), I swear by the combination of mesh tape and quality joint compound like Wakol Joint Compound, which has excellent adhesion.
Mesh Tape vs. Paper Tape: Which Should You Use?
I’ve used both extensively, and here’s my honest take:
Paper Tape (USG Sheetrock Brand) is stronger and less likely to bubble, but requires a bedding coat of compound underneath it and has a steeper learning curve.
Mesh Tape (Quickrete Mesh) is self-adhesive, easier for beginners, and more forgiving. It’s slightly more prone to cracking under stress, but for most DIY repairs, it’s perfectly adequate.
My recommendation? Start with mesh tape. Once you’re comfortable with the basic technique, experiment with paper tape for larger projects where you want professional-level durability.
Sanding Drywall Repairs Safely for a Smooth Finish
Let’s talk sanding, because this is where good repairs become great repairs—and where many people make a massive mess.
The Right Technique:
- Use the right grit. Start with 120-grit to shape and knock down high spots, then finish with 220-grit for smoothness.
- Sand in a circular motion. This blends the compound better than straight lines.
- Feel, don’t just look. Run your hand over the repair frequently. Your fingers catch imperfections your eyes miss.
- Use a sanding sponge. The 3M SandBlaster Sponge conforms to the wall better than flat sandpaper and doesn’t create hard edges.
Safety First: Drywall dust is incredibly fine and gets everywhere. Here’s my sanding setup:
- Wear a dust mask. Non-negotiable. I use an N95 or better.
- Ventilate the room. Open windows and use a fan.
- Cover nearby items. Drywall dust is insidious—it finds its way onto everything.
- Vacuum frequently. Don’t wait until you’re done; vacuum as you go to minimize airborne dust.
The biggest mistake people make is over-sanding, which can actually create a dip in the wall. Sand just until the repair is flush with the surrounding wall and feels smooth to the touch.

Priming and Painting Patched Drywall: The Final Step
This is the step people most often skip, and it shows. Fresh joint compound is porous and absorbent—if you paint directly over it, that spot will look flat and different from the rest of your wall, even if you use the exact same paint.
The Right Way:
- Prime the repair. Use a quality drywall primer like KILZ Drywall Primer. This seals the compound and creates a uniform surface.
- Let it dry completely. Usually 1-2 hours.
- Paint with your wall color. Now the paint will absorb evenly, and your repair will be invisible.
Pro tip: If you don’t have your exact wall paint anymore, bring a small chip of your wall color to a paint store. They can match it remarkably well.
Quick Drywall Repair Kits: Are They Worth It?
I’ve tried several all-in-one kits, and my favorite is the Bondo Drywall Repair Kit. It includes everything you need for a medium-sized repair: compound, tape, and a putty knife. For under $15, it’s perfect for beginners or for keeping in your utility closet for emergencies.
The convenience factor is real—you’re not buying full-sized containers of products you might use once a year. However, if you’re tackling multiple repairs or know you’ll be doing this regularly, buying individual components in larger quantities is more economical.
Special Situations: Textured Drywall, Water Damage, and Nail Pops
Repairing Textured Drywall: This requires an extra step. After your patch is smooth and primed, you need to recreate the texture. For light “orange peel” texture, a barely-damp sponge dabbed on thin compound works. For heavier textures, you might need a spray texture can (available at any hardware store) or a texture brush. Practice on cardboard first—I learned this after creating a weird smooth patch in the middle of my textured bedroom wall.
Fixing Water-Damaged Drywall: First, identify and fix the water source. Seriously, don’t patch water damage until you know where the water came from and have resolved it. Once dry, cut out any soft or moldy drywall (wear a mask for this—mold spores are no joke). Follow the large-hole repair method above. If the damage is extensive or you see black mold, call a professional. Some things are worth paying for.
Fixing Nail Pops: These are super common and super annoying. A “nail pop” happens when a nail backs out slightly, creating a bump in your wall. Here’s the fix:
- Drive the nail back in (or better yet, drive a drywall screw right next to it)
- Cover both with spackle
- Sand, prime, paint
The screw prevents the nail from popping again. I go through my house every few years and proactively fix nail pops before they become obvious.
Common Mistakes (That I’ve Totally Made)
Let me save you some frustration by sharing what NOT to do:
- Applying compound too thick. Multiple thin coats are always better than one thick coat. Thick coats crack as they dry and take forever to cure.
- Not letting coats dry completely. I know it’s tempting to rush, but wet compound under dry compound leads to cracks and failures.
- Skipping primer. We covered this, but it bears repeating. Just prime it.
- Using the wrong tool size. Your final coat should be applied with a knife wider than the repair—this creates that crucial feathered edge.
- Ignoring the underlying cause. If you’re repairing the same crack multiple times, something structural might be happening. At minimum, use more flexible mesh tape.
Your Drywall Repair Toolkit: What to Keep on Hand
After years of random repairs, here’s what I keep stocked in my “wall repair bin”:
- Small container of DAP Drydex Spackling
- Gallon of 3M Joint Compound
- Package of self-adhesive patches
- Mesh tape roll
- 4-inch and 6-inch putty knives
- Sanding sponges in multiple grits
- Drywall primer
- Dust masks
- Utility knife with extra blades
Having these supplies means I can fix any random wall damage within an hour of noticing it, instead of letting it become “one more thing” on my to-do list for months.
Making Your Repairs Last: Long-Term Tips
The best repair is the one you never have to redo. Here’s how to make your handiwork last:
- Address foundation issues. Persistent cracks often indicate settling or foundation problems.
- Control humidity. Excessive moisture causes drywall problems. Use dehumidifiers in damp areas.
- Be gentle with walls. Install door stops to prevent doorknob damage (I learned this after fixing the same bedroom wall three times).
- Use wall anchors. When hanging heavy items, proper anchors prevent future damage.
- Keep touch-up supplies. Store leftover paint and primer for easy touch-ups down the road.
The Satisfaction of DIY Drywall Repair
Here’s what nobody tells you about learning to fix your own drywall: it’s genuinely empowering. The first time you patch a wall and can’t even tell where the damage was, you’ll feel like a home improvement wizard. The money you save is great, but the confidence you gain is even better.
Start with a small repair—maybe that nail hole behind your bedroom door—and work your way up to bigger challenges. You’ll develop a feel for the compound, understand how different tools work, and build real competence. Before you know it, friends will be texting you photos of their walls asking for advice.
So grab that putty knife and give it a shot. Your walls (and your wallet) will thank you. And hey, if your first attempt isn’t perfect? That’s literally what sanding is for. We’ve all been there, and every professional you see on YouTube started with a lumpy, imperfect patch at some point.
What wall damage are you finally ready to tackle? You’ve absolutely got this.
Frequently Asked Questions
What’s the actual difference between all-purpose and lightweight joint compound, and when would I use each?
All-purpose compound is denser, stronger, and better for taping joints or repairs that need maximum durability—it’s the workhorse. Lightweight compound is easier to sand and creates less dust, making it ideal for finish coats where you want that final smooth surface. I typically use all-purpose for my first coat and lightweight for the finishing coats. The lightweight stuff is also less likely to sag on ceiling repairs.
How do I know if a crack is structural or just cosmetic?
Cosmetic cracks are usually hairline thin, stable over time, and appear in common stress points like corners. Warning signs of structural issues include cracks wider than 1/4 inch, cracks that are growing, diagonal cracks (especially near doors and windows), and cracks accompanied by sticking doors or uneven floors. If you’re seeing any of those red flags, get a structural engineer’s opinion before patching.
Can I use regular paint as a primer over joint compound?
Technically you can, but you’ll probably regret it. Paint doesn’t seal compound properly, so you’ll notice a flat, dull spot that’s obvious even with multiple paint coats. Real drywall primer (like KILZ) seals the porous compound and creates a uniform surface. The cost difference is minimal, and the result difference is huge. If you’re already buying paint, spring for the primer—it’s worth it.
What do I do if my repair is still visible after painting?
This usually means you needed more sanding or a wider feather on your edges. The fix: lightly sand the area, apply another thin coat of compound extending even further out, sand again when dry, prime, and repaint. Sometimes what looks smooth while you’re working becomes visible once paint hits it—especially under certain lighting. Don’t feel bad; this happens to everyone. Just add another layer.
How long should I actually wait between coats of joint compound?
The bag will say 24 hours, but in reality, it depends on coat thickness, humidity, and temperature. Thin coats in a dry, warm room might be sandable in 4-6 hours. Thick coats in humid conditions can take 48 hours. Here’s the test: press your finger firmly into the compound. If it feels cool, leaves an indent, or feels even slightly soft, it’s not ready. When it’s bone dry, hard, and the same temperature as the surrounding wall, you’re good to go. Patience here pays off massively.
Should I remove loose or bubbling drywall paper before patching?
Yes, absolutely. Loose paper will cause your patch to fail or look lumpy. Use a utility knife to carefully cut away any torn or bubbling paper, then seal the exposed gypsum with a coat of primer before applying compound. Trying to compound over loose paper is like icing a cake that’s falling apart—it might look okay at first, but it won’t last.
What’s the best way to match existing wall texture after a repair?
First, identify your texture type. “Orange peel” (the most common) can be replicated with a damp sponge dabbed in diluted compound. “Knockdown” texture requires spraying texture, letting it dry for a minute, then lightly flattening it with a knife. Popcorn texture usually requires a spray can from the hardware store. My advice: practice on cardboard first, and remember that exact matching is nearly impossible—aim for “close enough that nobody notices.” Good news: most people are way less observant than you think.
Is there a way to repair drywall without creating a massive dust storm?
Yes! Use a damp sanding sponge instead of dry sandpaper—this captures most of the dust immediately. Also, vacuum as you work (some people even tape a shop vac hose near the sanding area). For really dust-sensitive situations, consider wet sanding: keep your sponge quite damp and sand gently. It’s slower, but creates virtually no airborne dust. Seal off the room with plastic sheeting if needed, and definitely wear that dust mask regardless.