You know that feeling when you walk into a freshly painted room and everything just feels… new? The walls gleam, the color is exactly right, and you can’t help but smile. Here’s the thing: you don’t need to hire expensive professionals to get that magazine-worthy finish. I’ve learned (through plenty of trial and error—some of my early attempts looked more “abstract art” than “pro job”) that painting walls is one of those home improvements where a little knowledge goes a long way. And honestly? It’s kind of therapeutic once you get into the rhythm.
We’re going to walk through everything you need to know to transform your space with confidence. No jargon, no gatekeeping—just practical, budget-smart tips that actually work. Whether you’re tackling your first accent wall or refreshing your entire living room, I’ve got your back.
Understanding Your Paint Options: It’s Not All the Same
Before you grab any old can from the hardware store, let’s talk about what’s actually inside. Trust me, this isn’t boring—it’s the difference between a paint job that lasts years and one that starts looking tired in months.
Interior Wall Paint Types Decoded
Latex (water-based) paint is your best friend for most interior walls. It dries fast, cleans up with soap and water, and doesn’t smell like you’re living in a chemistry lab. I use it for about 90% of my projects. Oil-based paint is tougher and more durable, but it takes forever to dry and the fumes are intense. Save this for high-traffic trim and doors.
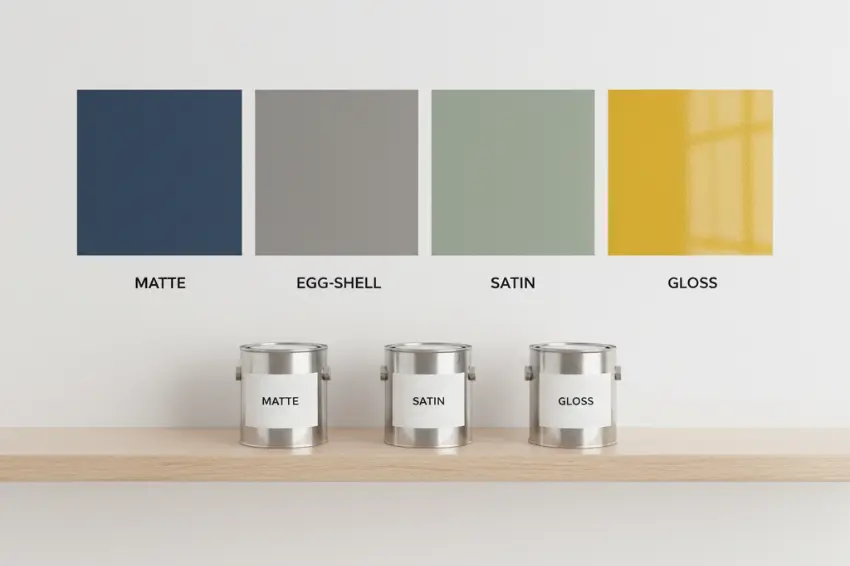
Now, here’s where it gets interesting—the finish matters just as much as the type:
Matte or flat finish hides wall imperfections beautifully (it’s like the Instagram filter of paint), but it’s harder to clean. Perfect for low-traffic areas like bedrooms or ceilings.
Eggshell has a subtle sheen and wipes down easily. This is my go-to for living rooms and hallways where you need that balance of elegance and practicality.
Satin is slightly glossier and super washable. Great for kitchens, bathrooms, or any room where sticky fingers might make an appearance.
Semi-gloss and gloss are your heavy-duty options—think trim, cabinets, and doors. They reflect light beautifully but show every tiny flaw, so your prep work needs to be spot-on.
The Low-VOC Revolution
Here’s something I wish I’d known earlier: traditional paints release volatile organic compounds (VOCs) that can give you headaches and aren’t great for the planet. Look for low-VOC or zero-VOC options like Sherwin-Williams Emerald or Nippon Paint Durafresh Solo. Yes, they sometimes cost a bit more upfront, but they’re healthier for your family and the environment. Plus, you can sleep in your newly painted room that same night instead of camping out on the couch for days.
Gathering Your Tools: The Smart Shopping List
Don’t let anyone convince you need a million specialized gadgets. Here’s what actually matters, with my favorite budget-smart picks:
The Essential Kit
- High-quality roller (Purdy White Dove is worth every penny—it doesn’t leave texture marks)
- Angled brush for edges (the Wooster Shortcut fits your hand perfectly)
- Painter’s tape (Frogtape is the only one I trust for crisp lines)
- Drop cloths (get the heavy-duty canvas ones—they last forever and don’t slip around)
- Paint tray with liner (the liners are genius—no cleanup!)
- Extension pole for your roller (your back will thank you)
- Sanding sponge (fine grit for smoothing)
- Handy Paint Pail for cutting in (this changed my life—no more awkward paint can balancing acts)
The Nice-to-Haves
A Wagner paint sprayer makes large rooms SO much faster, but it’s an investment. Start with rollers and graduate to a sprayer when you’re ready. For small rooms or accent walls, the traditional method works beautifully and gives you more control.
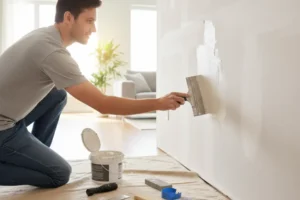
Wall Prep: The Secret Sauce of Professional Results
Okay, this is where most people want to skip ahead. Don’t. I learned the hard way that prep work is literally 70% of the job. That pro-looking finish? It’s mostly about what happens before you even open the paint can.
Step 1: Clear and Clean
Move everything away from the walls. Everything. Then wash your walls with a damp cloth and mild soap to remove dust, grease, and grime. We all have that mysterious kitchen wall film—it’s real, and paint won’t stick to it.
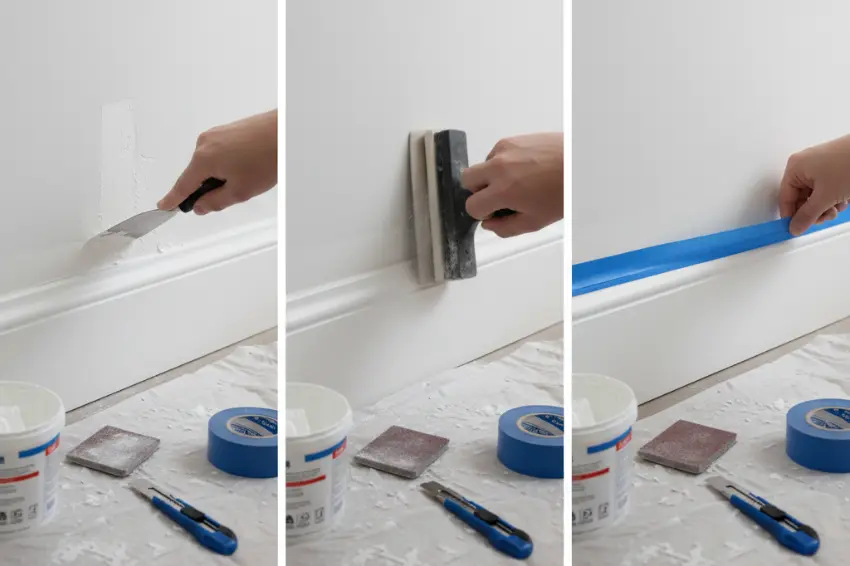
Step 2: Fix the Flaws
Walk around with your multipurpose wall filler and fill every crack, hole, and dent. Yes, even the tiny ones. Let it dry completely (usually 2-4 hours), then sand smooth with your sanding sponge. Run your hand over the spot—if you can feel it, sand more.
Step 3: Sand Like You Mean It
Lightly sand the entire wall surface, especially if you’re painting over glossy paint. This gives the new paint something to grip. Wipe away the dust with a slightly damp cloth. This step feels tedious, but it’s the difference between paint that bonds and paint that peels.
Step 4: Tape and Protect
Apply Frogtape along trim, ceiling edges, and anywhere you want a sharp line. Press it down firmly—I run my finger along it twice. Lay down your drop cloths and tape them in place if they’re plastic (canvas ones stay put better).
The Primer Question: Do You Really Need It?
Short answer: usually yes. Long answer: it depends.
You absolutely need primer if:
- You’re painting over dark colors with lighter ones (primer blocks the old color from bleeding through)
- Your walls have stains (water marks, crayon, grease)
- You’re painting new drywall (it’s super porous and will suck up your expensive topcoat otherwise)
- You’re making a dramatic color change
You can probably skip it if:
- You’re painting a similar or darker shade over existing paint in good condition
- Your paint is a “paint + primer in one” formula (like Behr Premium Plus)
My hack? I almost always use primer. It costs a bit more in materials, but you’ll need fewer coats of your topcoat, which evens out the expense. Plus, the final result just looks richer.
Use a stain-blocking primer for problem areas. It’s magic in a can for covering everything from smoke damage to that mystery stain that appeared after the last rainstorm.
Painting Technique: The Actual Fun Part
The Right Order Matters
Always paint in this sequence:
- Ceiling (if you’re painting it)
- Walls (starting from the top)
- Trim (last, so you can cover any wall paint splatters)
Cutting In: The Edge Game
Pour some paint into your Handy Paint Pail. Dip your angled brush about one-third of the way into the paint, then tap (don’t wipe) it against the side. Starting about 1-2 inches from your tape line, paint toward the edge, then carefully along it. Work in 3-4 foot sections.
Here’s the trick: use steady pressure and move at a consistent speed. Slow and controlled beats fast and sloppy every time.
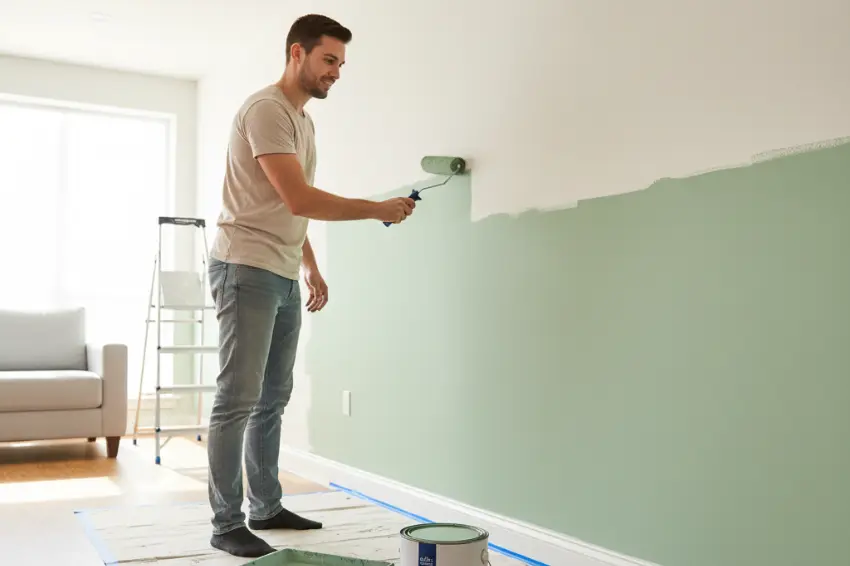
Rolling It Out
Pour paint into your tray, load your roller by rolling it back and forth in the deep end, then roll off excess on the ramp until it’s evenly coated (not dripping).
Use a W or M pattern: Roll a large W or M shape on the wall, then fill it in with horizontal or vertical strokes without lifting the roller. This distributes paint evenly and prevents those dreaded roller marks.
Key tip: Don’t press too hard. Let the roller do the work. And keep a “wet edge”—always overlap into the section you just painted before it starts to dry. This prevents visible seams.
How Many Coats?
Two coats is standard. The first coat seals and establishes coverage. The second coat gives you that uniform, professional color depth.
Wait time between coats: Check your paint can, but typically:
- Latex paint: 2-4 hours (I usually wait 4 to be safe)
- On humid days: Add an extra hour
- Touch test: If it’s cool to the touch or tacky, it’s not ready
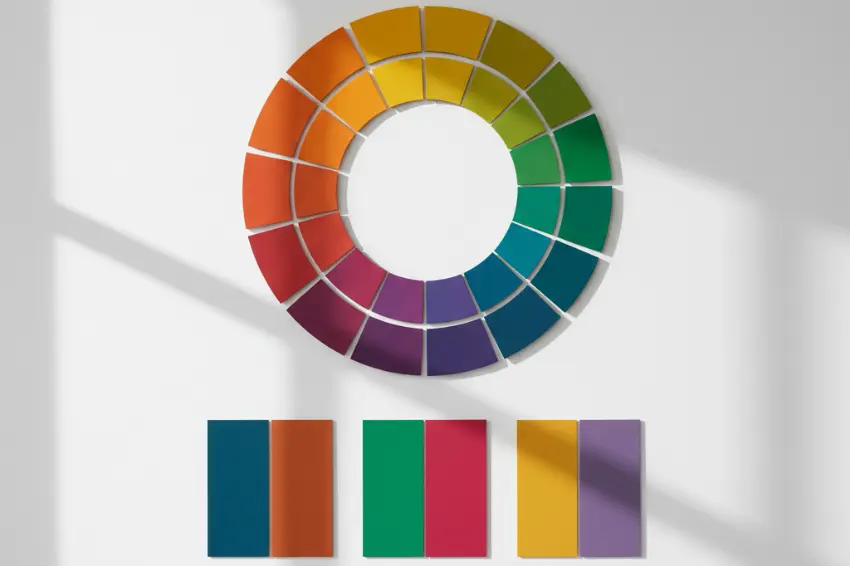
Choosing Colors: The Psychology of Paint
This is where you can let your personality shine. But here’s what I’ve learned about color selection:
For small rooms: Light, cool colors make spaces feel larger. Soft grays, pale blues, and warm whites work wonders. But don’t be afraid of contrast—a dark accent wall can actually add depth.
For large rooms: You have more freedom. Rich, saturated colors create cozy intimacy. Just paint a sample on a large poster board and live with it for a few days in different lighting.
The 60-30-10 rule: 60% dominant color (walls), 30% secondary color (furniture), 10% accent color (accessories). It’s a designer trick that just works.
My favorite hack? Most paint stores (Home Depot, Lowe’s, Benjamin Moore) offer sample sizes for a few dollars. Buy 2-3 options and paint large squares directly on your wall. Observe them at different times of day. The “perfect” color at noon might look completely different at 7 PM under artificial light.
| Room Type | Recommended Colors | Why It Works |
|---|---|---|
| Bedroom | Soft blues, sage green, warm grays | Promotes relaxation and sleep |
| Living Room | Warm neutrals, greige, soft taupe | Versatile and inviting |
| Kitchen | White, light gray, soft yellow | Feels clean and energizing |
| Bathroom | Light blue, seafoam, crisp white | Creates spa-like atmosphere |
| Home Office | Sage green, navy accent wall, gray-blue | Enhances focus and creativity |
Avoiding Common Mistakes: Learn From My Disasters
We all make mistakes. Here are the ones you can skip:
Mistake #1: Skimping on quality paint. That budget paint at $15/gallon requires three coats and looks streaky. The $35/gallon premium option covers in two coats and looks incredible. Do the math—you’re spending more on the cheap stuff.
Mistake #2: Not using enough paint per coat. Those thin, skimpy coats dry patchy. Load your roller properly and apply good coverage. You’ll use more paint per coat but need fewer coats overall.
Mistake #3: Removing tape at the wrong time. Remove your painter’s tape while the final coat is still slightly damp (about 30-60 minutes after painting). Wait until it’s fully dry and the tape pulls off your perfect paint line with it. Ask me how I know this.
Mistake #4: Rushing the edges. Cutting in takes time and a steady hand. Put on some good music, pour yourself something cold, and take your time. Messy edges ruin the whole look.
Mistake #5: Ignoring ventilation. Even low-VOC paint needs airflow. Open windows, run fans, keep air moving. Your lungs and your nose will thank you.
Special Situations: Problem-Solving Edition
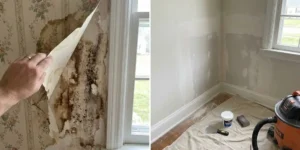
Can You Paint Over Wallpaper?
Technically yes, but honestly? I recommend removing it. Wallpaper can bubble or peel under paint, and you’ll be dealing with texture issues forever. Use a scoring tool, apply wallpaper remover solution, and scrape it off. It’s a weekend project, but future-you will be grateful.
If you’re committing to removal (which you should!), we have a complete walkthrough on how to remove old wallpaper easily to guide you.
If removal is absolutely not an option, make sure the wallpaper is solidly adhered, then use oil-based primer (the water in latex primer can loosen the wallpaper adhesive).
Painting Textured Walls
Textured surfaces (popcorn ceilings, orange peel walls) need more paint because they have more surface area. Use a thick-nap roller (3/4″ to 1″) and work the paint into all the crevices. Spray painting works beautifully here if you have a Wagner sprayer.
Dealing With Extreme Color Changes
Going from navy blue to soft yellow? Prime twice. Seriously. Or use a gray-tinted primer that’s closer to your final color. Benjamin Moore and Sherwin-Williams can tint primers—ask at the paint counter.
The Eco-Conscious Painter’s Guide
Since we care about being smart with resources, here are my favorite sustainable painting practices:
Buy the right amount: Most paint calculators overestimate. One gallon covers about 350-400 square feet. Measure your walls, subtract windows and doors, and buy accordingly. Leftover paint is waste.
Choose low-VOC or natural paints: Brands like Dixie Belle Silk All-In-One and Frenchic Chalk Paint are mineral-based with zero VOCs. They’re safe for kids’ rooms and better for air quality.
Proper disposal: Never pour paint down the drain. Let latex paint dry out completely (pour it into a cardboard box with kitty litter), then dispose of the solidified paint in your regular trash. Many cities have hazardous waste collection days for oil-based paints.
Reuse and share: Have leftover paint? Seal the can well by putting plastic wrap over the opening before hammering the lid shut. Store it upside-down to prevent a skin from forming. Or offer it free on community groups—someone always needs paint for a small project.
Invest in quality tools you’ll use again: Cheap brushes and rollers shed bristles and wear out. My Purdy roller is five years old and still perfect. That’s way better than buying disposable tools for every project.
Maintenance: Making Your Work Last
You’ve invested time and effort—make it last:
- Wait a full 30 days before cleaning painted walls (the paint needs time to cure completely)
- Use gentle cleaners—just warm water and mild soap for most marks
- Touch up thoughtfully—save a small container of your paint for inevitable scuffs
- Keep your space ventilated to prevent moisture damage
Your Fresh Start Awaits
Look, I’m not going to lie—painting walls takes effort. Your arms will be tired, you’ll find paint in places you didn’t know existed, and you might question your life choices around hour three. But when you step back and see your transformed space glowing in that perfect color you chose? Pure magic.
The best part? You did this. You saved hundreds (maybe thousands) of dollars, learned a valuable skill, and created a space that truly feels like yours. And next time? You’ll be the friend everyone calls for painting advice.
So grab that paint roller, put on your favorite playlist, and transform your space. You’ve got this. And hey, if your first attempt has a few imperfections, that just means it’s made with love and character. We’ll call it “artisanal.”
Now go make your walls beautiful.
Frequently Asked Questions
What if I don’t have high ceilings—will an extension pole actually help?
Absolutely! Even in standard 8-foot rooms, an extension pole reduces fatigue by letting you paint from a comfortable standing position instead of constantly reaching overhead. It’s especially helpful for the top third of your walls. You’ll finish faster and with less strain on your shoulders and neck.
Is it worth investing in a paint sprayer for just one room?
For a single small-to-medium room, probably not. Sprayers require more prep (masking everything), more cleanup, and there’s a learning curve. However, if you’re painting multiple rooms or plan to do more home projects, a Wagner sprayer can cut your painting time in half. Consider renting one first to test it out before buying.
How do I handle painting around outlets and switches without making a mess?
Turn off power at the breaker, then remove the outlet covers completely—don’t try to paint around them. Use your angled brush to carefully cut in around the outlet box itself. This gives you cleaner results than taping, which can leave visible lines. Replace covers only after paint is fully dry.
What’s the trick to preventing lap marks when the room is too large to keep a wet edge?
Work in manageable sections and paint one full wall at a time without breaks. If you must pause, stop at a natural break like a corner or doorway—never in the middle of a wall. Also, maintain consistent roller pressure and overlap each pass by 50%. Adding a paint conditioner (like Floetrol) can extend drying time slightly, giving you more working time.
Can I use the same roller for primer and paint, or do I need separate ones?
You can use the same roller if you thoroughly clean it after priming (rinse until water runs clear, then spin it dry). Honestly though? I keep separate rollers. Primers and paints have different textures, and a dedicated roller for each ensures optimal application. Plus, cleaning rollers is my least favorite task—worth having backups.
My first coat looks streaky and uneven—did I do something wrong?
Relax! First coats almost always look streaky, especially when covering dark colors or bare drywall. This is completely normal and why two coats are standard. The first coat is just establishing base coverage. Your second coat will even everything out beautifully. If your second coat still looks streaky, you might be spreading the paint too thin—load your roller more generously.
How do I prevent brush marks when cutting in with an angled brush?
Use a light touch and keep your brush at a slight angle rather than flat against the wall. Work in smooth, continuous strokes rather than short, chopky motions. Also, don’t overwork the paint—lay it down once and leave it. Going over the same spot repeatedly creates texture. Quality brushes with fine, tapered bristles (like Wooster or Purdy) make a huge difference here.
What should I do if I accidentally get paint on my trim or baseboards?
If it’s fresh, wipe it immediately with a damp cloth. If it’s already dried, use a plastic putty knife or old credit card to gently scrape it off, then clean with a damp cloth. For stubborn spots, a bit of rubbing alcohol on a cloth works wonders. This is way easier than trying to tape perfectly—I actually build in this cleanup step as part of my process.