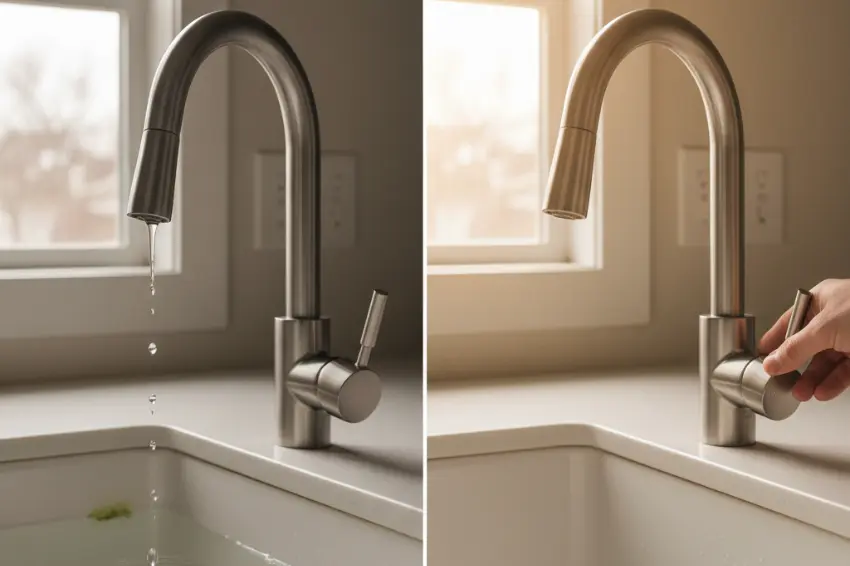
You know that sound, right? That constant drip… drip… drip echoing through your kitchen at 2 AM. It’s maddening. And honestly? It’s literally money going down the drain—up to 3,000 gallons of water per year from just one leaky faucet. But here’s the good news: you can absolutely fix this yourself, even if you’ve never touched a wrench before. Trust me, I was convinced I’d flood my entire kitchen the first time I tried this. Spoiler alert: I didn’t, and you won’t either.
Let me walk you through exactly how to tackle that annoying drip without calling a plumber (and without the $150+ service fee). We’ll figure out what’s causing the leak, gather the right tools, and get your faucet working perfectly again. Ready? Let’s do this.
Why Is Your Faucet Leaking? (The Real Culprits)
Before we start taking things apart, let’s play detective for a second. Most faucet leaks come down to a few common troublemakers:
- Worn-out washers or O-rings: These rubber seals create a watertight barrier, but they degrade over time from friction and mineral buildup. This is the #1 cause of leaks.
- Corroded valve seats: The valve seat connects the faucet to the spout. When minerals from hard water eat away at it, leaks happen.
- Loose or damaged parts: Sometimes a simple loose connection is all that’s causing your headache.
- Broken cartridges: In modern faucets, the cartridge controls water flow. When it fails, you get leaks.
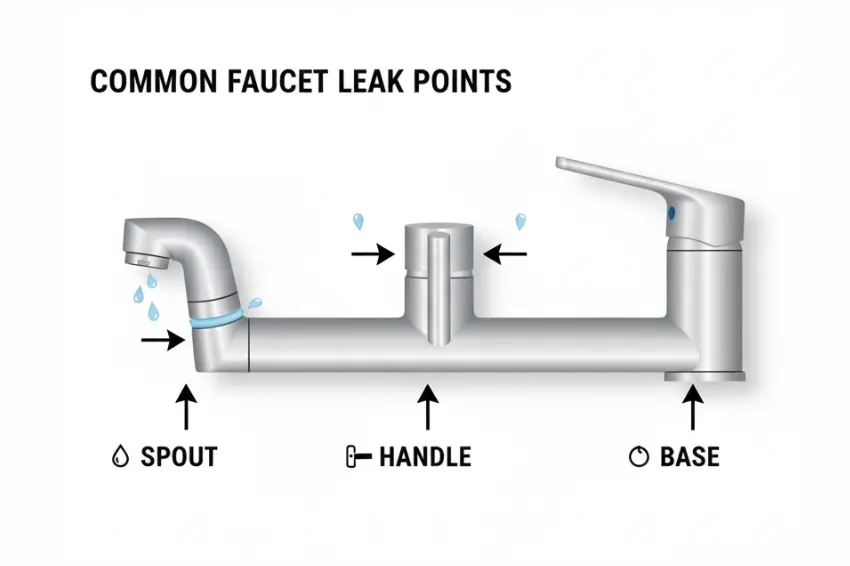
The location of your leak tells you a lot. Is water dripping from the spout? Probably a washer or cartridge issue. Leaking around the base or handle? That’s usually an O-ring crying for help.
Know Your Faucet Type (This Actually Matters)
Here’s something I wish someone had told me before my first repair: not all faucets are built the same. There are four main types, and each one has a slightly different repair process:
| Faucet Type | How to Identify It | What Usually Fails | Difficulty Level |
|---|---|---|---|
| Compression | Two separate handles (hot/cold), older style | Washers and O-rings | Easy—great for beginners! |
| Cartridge | Single or double handle, smooth operation | Cartridge itself | Moderate |
| Ball | Single handle, rounded cap on top | Springs, seats, or O-rings | Moderate to Hard |
| Ceramic Disc | Single handle, very durable | Ceramic cylinder or inlet seals | Moderate |
Don’t stress if you’re not sure which type you have. When you take off the handle (we’ll get there), the internal mechanism will make it pretty obvious. Or snap a photo and Google it—we live in the future, after all.
Essential Tools & Parts: Your Repair Arsenal
Okay, let’s talk tools. The beauty of this repair? You probably already own most of what you need. Here’s my go-to list:
Basic Tools:
- Adjustable wrench or Allen wrench set (for removing handles)
- Flathead and Phillips screwdrivers
- Needle-nose pliers (lifesavers for extracting tiny O-rings)
- Flashlight or work light (you’ll thank me when you’re peering under the sink)
- Bucket and old towels (for catching water)
Replacement Parts:
- Faucet washer assortment kit (like the Plumb Pak 36-piece kit—absolute game-changer)
- O-rings (the Moen O-Ring & Washer Kit is solid if you have a Moen faucet)
- Plumber’s grease (trust me on this one—it makes reassembly SO much smoother)
- Replacement cartridge if needed (match your faucet brand: Peerless, Kohler, etc.)
Pro tip: Take the old washer or cartridge to the hardware store with you. It’s way easier than trying to describe what you need to a confused sales associate. Been there, done that, got the wrong part.
Step-by-Step: Fix That Dripping Faucet
Alright, let’s get our hands dirty (not literally—the water’s turned off, remember?).
Step 1: Turn Off the Water Supply
This is non-negotiable. Look under your sink for the shut-off valves—they’re usually small knobs or levers on the pipes leading to your faucet. Turn them clockwise until they’re fully closed. No valves under the sink? You’ll need to shut off your home’s main water supply (usually in the basement or near the water heater).
Once closed, turn on the faucet to release any remaining water pressure. This step saves you from an impromptu shower.
Step 2: Remove the Faucet Handle
This is where people get nervous, but it’s easier than you think. Most modern faucet handles are held on with a small screw hidden under a decorative cap (look for a little plastic disc that says “H” or “C”).
Pop off that cap with a flathead screwdriver—gently, so you don’t scratch anything. Then use an Allen wrench or screwdriver to remove the screw underneath. The handle should lift right off. If it’s stubborn, wiggle it a bit. We’ve all fought with a stuck handle.
Step 3: Access the Valve Assembly
Now you’re looking at the guts of your faucet. What you see depends on your faucet type:
- Compression faucets: You’ll see a stem with a big nut at the top. Use your adjustable wrench to loosen and remove it.
- Cartridge faucets: There’s a retaining clip holding the cartridge in place. Pull it out with needle-nose pliers, then extract the cartridge straight up (a cartridge puller tool helps for stuck ones).
- Ball or ceramic disc: You’ll see springs, cam assemblies, or ceramic discs. Document everything with your phone before disassembly—seriously, future you will be grateful.
Step 4: Inspect and Replace the Washer or O-Ring
This is the moment of truth. Look at the bottom of the stem or inside the valve seat. See that little rubber washer? If it’s cracked, flattened, or just looks sad and worn out, that’s your culprit.
Remove it with needle-nose pliers and replace it with a new one from your kit. Make sure it’s the exact same size. While you’re at it, check any O-rings (the rubber rings around the stem) and swap those out too.
Before installing new parts, coat them lightly with plumber’s grease. This creates a better seal and makes future repairs easier. I can’t stress this enough—it’s like the difference between forcing a sticky zipper and one that glides smoothly.
Step 5: Clean the Valve Seat
Mineral buildup on the valve seat is sneaky. Even with new washers, a corroded valve seat will still leak. Use a damp cloth or a small wire brush to clean it thoroughly. If it’s heavily pitted or damaged, you might need to replace it (or call a professional—some battles aren’t worth fighting).
Step 6: Reassemble Everything
Time to put Humpty Dumpty back together again. Reverse the disassembly process:
- Install the new washer/cartridge/O-ring
- Reattach the stem or valve assembly
- Tighten everything firmly but not too tight (overtightening can crack components)
- Replace the handle and screw
- Snap the decorative cap back on
Step 7: Test Your Handiwork
Turn the water supply back on slowly and check for leaks. Turn the faucet on and off a few times. No drips? Victory dance time! Still leaking? Don’t panic—double-check that everything is seated correctly and tightened properly.
Fixing Specific Leak Types
Different leak locations need different approaches:
Leak at the Spout: This is classic washer or cartridge territory. Follow the steps above, focusing on replacing the washer or the entire cartridge.
Leak at the Base: Water pooling around the base usually means failed O-rings. You’ll need to remove the spout (it typically twists off) and replace the O-rings underneath. The Danco Complete Faucet Repair Kit has everything you need for this.
Leak from the Handle: Tighten the packing nut under the handle first. Still leaking? Replace the O-ring on the stem.
When DIY Isn’t Enough (And That’s Okay)
Look, I’m all about empowering you to fix things yourself, but sometimes you need backup. Call a plumber if:
- You’ve replaced everything and it’s still leaking
- The valve seat is badly corroded and can’t be cleaned
- You discover cracked pipes or major corrosion
- The entire faucet assembly is loose or damaged
- You’re dealing with a wall-mounted faucet (those are trickier)
There’s zero shame in admitting defeat. I once spent three hours on a ball faucet before giving up and calling in reinforcements. We can’t win them all.
Save Money, Save Water, Feel Accomplished
Here’s the real win: by fixing that leaky faucet yourself, you’re saving an average of $35-$50 per year in wasted water (more if you live in an area with high water rates). Plus, you just saved yourself a $100+ plumber service call. And honestly? There’s something deeply satisfying about fixing something with your own two hands.
The environmental impact matters too. That seemingly innocent drip wastes enough water to take more than 180 showers per year. By tackling this repair, you’re being a better steward of our resources. Pretty cool, right?
Your turn: Got a faucet that’s been driving you crazy? Grab your tools and give it a shot this weekend. You’ve totally got this. And hey, if you run into any hiccups or want to share your success story, I’d love to hear about it in the comments. We’re all learning together.
Frequently Asked Questions
What if I can’t find the exact replacement washer or cartridge for my old faucet?
This is super common with discontinued faucet models. Try taking a photo of the old part and showing it to a plumbing specialist at your local hardware store—they’re often wizards at finding compatible alternatives. Another option is universal cartridges or washers that fit multiple brands. Worst case? It might be time for a complete faucet replacement, which sounds scarier than it is (and honestly, modern faucets are way easier to maintain).
How do I know if my leak is from the faucet itself or from loose connections under the sink?
Dry off the entire faucet and the area under your sink completely. Put down paper towels under all the connections beneath the sink. Run the faucet for a few minutes, then check both areas. If the paper towels are wet but the faucet is dry, your issue is with the supply lines or connection nuts under the sink (which just need tightening with a basin wrench). If the faucet is wet, it’s the faucet mechanism itself.
My outdoor faucet (hose bib) is leaking—is the repair process different?
Outdoor faucets are actually simpler! They’re usually compression-style faucets. The process is nearly identical: turn off water, remove the handle and packing nut, replace the washer at the end of the stem, and reassemble. The main difference? Outdoor faucets are more exposed to weather, so their washers wear out faster. Also, make sure to winterize them if you live in a cold climate—a frozen outdoor faucet can crack and cause major leaks.
I replaced the washer but now the handle is really hard to turn. What did I do wrong?
You probably over-tightened the packing nut (the big nut under the handle). Back it off about a quarter turn. Also—and this is important—did you apply plumber’s grease to the new washer and O-ring? Without lubrication, everything binds up and feels stiff. Disassemble, add grease, and try again. The handle should turn smoothly with just moderate resistance.
Can I use regular grease or oil instead of plumber’s grease?
Please don’t. Regular oils and greases can actually degrade rubber washers and O-rings over time, making them brittle and causing new leaks. Plumber’s grease is specifically formulated to be compatible with rubber and plastic plumbing components. A small tube costs about $5 and lasts for dozens of repairs. It’s worth getting the right stuff.
The aerator at the tip of my faucet seems clogged and water pressure is weak. Could this cause leaks?
A clogged aerator won’t directly cause leaks, but it can create back-pressure that makes existing small leaks worse. Unscrew the aerator (use the Danco Aerator Remover if it’s stuck), rinse out any debris and mineral deposits, and screw it back on. This often improves both water pressure and reduces stress on your faucet’s internal seals.