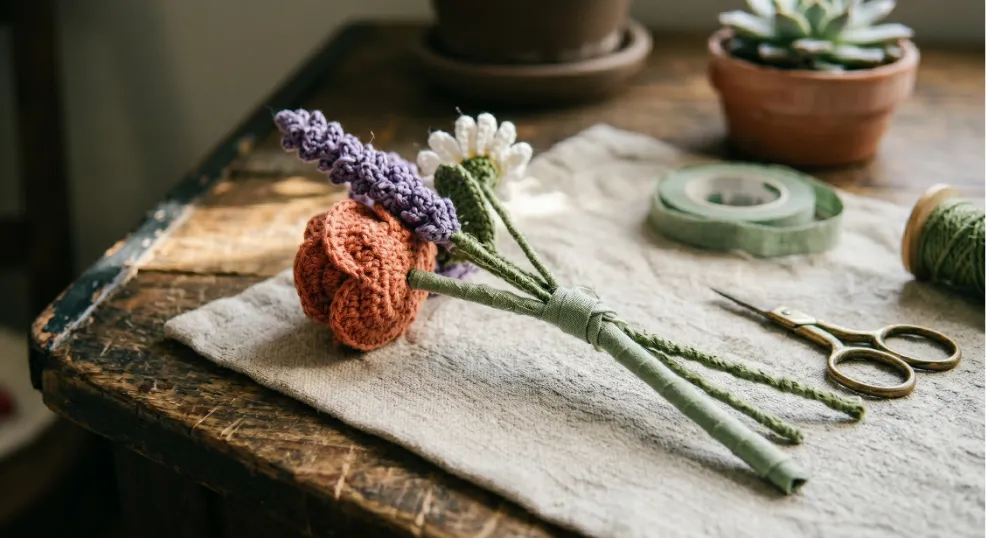
We’ve all been there — your crocheted blooms are absolutely charming, but the moment you try to bunch them together, the stems flop, the wrapping looks lumpy, and the whole bouquet feels more “craft table” than “gift-ready.” The good news? Sturdy, professional-looking stems are a household-supplies fix, not a specialty-store problem.
Why Thin Stems and Messy Wraps Trip Up First-Time Bouquet Makers
Most crochet tutorials stop at the flower itself, leaving you to figure out the finishing on your own. Without a solid internal structure, a wire-thin stem bends under the flower’s weight, and without a layered wrap, every knot and join shows through. That combination is what makes handmade bouquets look fragile — not the flowers themselves.
The fix is simpler than you think, and you can knock out each stem in under three minutes once you have the rhythm down.
Your Stem-Building Kit (No Craft Store Run Required)
Raid the junk drawer and the sewing box. Everything you need is probably already at home.
- Floral wire (18–20 gauge) or straightened paperclips for shorter stems
- Scrap yarn or cotton twine in a green or neutral tone
- Masking tape (the unsung hero of clean stem work)
- Ribbon, floral tape, or a strip of kraft paper for the final wrap
- Sharp scissors
- A tapestry needle and a dab of craft glue (optional, but helpful)
Building Stems That Actually Hold: 4 Steps Per Flower
Lay your finished flowers face-down on a flat surface and work through each one in the same sequence. Consistency here is what makes the whole bouquet feel cohesive when you finally bind them together.
1. Anchor the Wire So the Flower Can’t Pull Free
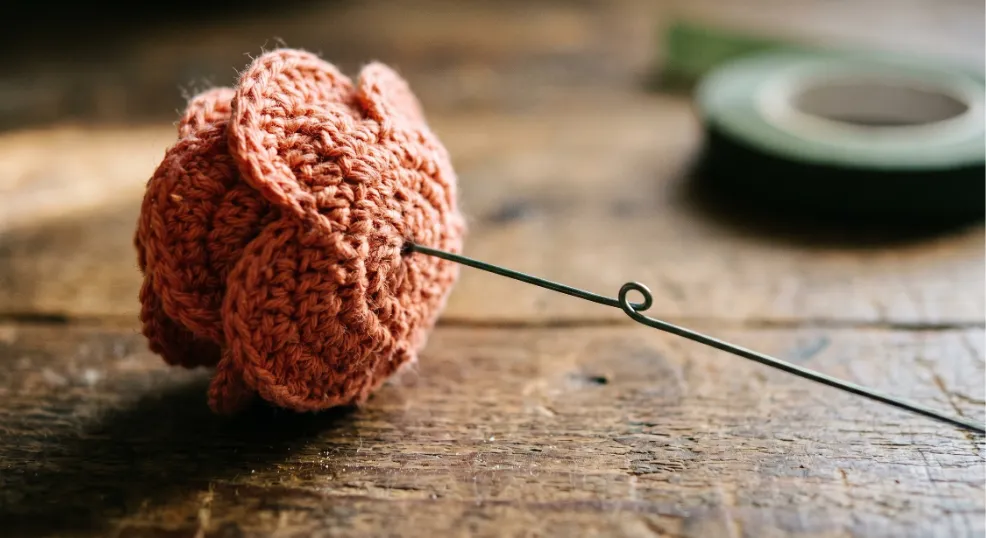
Bend a small hook or U-loop at the top of your wire, then thread the loop down through the center of the flower’s base using your tapestry needle or fingertip. Pull it snug so the loop sits flush against the back of the flower, then secure it with two or three tight whip-stitches through the base stitches — or a small bead of craft glue if sewing feels fussy. This invisible anchor is the difference between a stem that holds under gift-wrapping tension and one that slides loose the moment someone picks up the bouquet.
2. Build Natural Thickness with Yarn or Twine
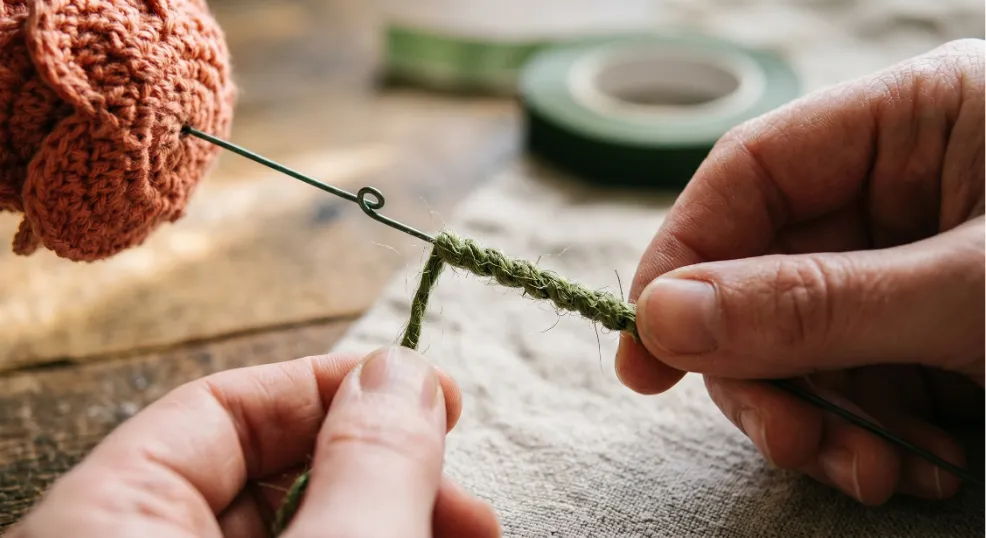
A bare wire stem looks spindly and feels cheap in the hand. Starting just below the flower base, wind scrap yarn or cotton twine tightly down the wire in close, overlapping spirals. The tension of the winding actually locks each layer in place — no glue needed at this stage. A green or mossy neutral reads instantly as a botanical stem; a contrasting color makes a stylistic statement. Either way, wrapping adds the tactile weight that makes the bouquet feel intentional rather than thrown together.
3. Smooth the Join with Masking Tape
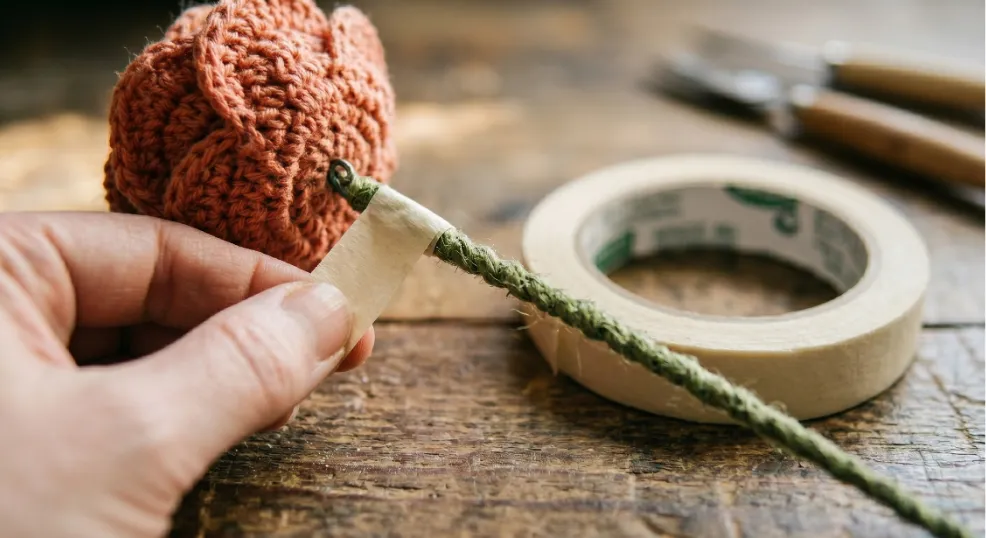
The point where stem meets flower is the messiest spot — yarn ends, wire bends, and any glue residue all congregate there. Tear a short length of masking tape and wrap it firmly over that join, pressing it flat as you go. The tape does two jobs at once: it locks down any loose ends so nothing unravels, and it creates an even, bump-free surface that your final decorative wrap will glide over cleanly. This step is the quiet workhorse of the whole process.
4. Finish with a Clean Overwrap
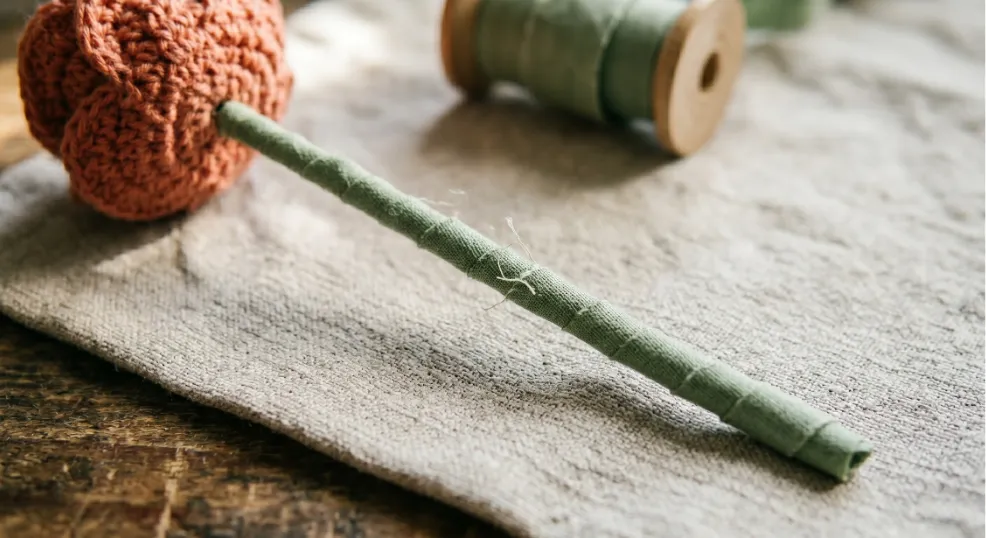
Now the fun part. Starting at the flower base and spiraling down toward the stem end, wrap the whole stem in your chosen finish — floral tape (which self-adheres as you stretch it), a coordinating ribbon, or even a strip of kraft paper for a rustic market-bouquet look. When you reach the bottom, tuck the tail end under the last two passes of the wrap and press it flat. No raw edges, no visible knot, nothing to unravel in transit. Trim any stray yarn ends flush with small scissors and the stem is done.
The Layered Concealment Secret That Makes DIY Look Boutique
Professional florists work in layers — and that same logic applies here. The wire loop is invisible. The masking tape erases every bulge and knot beneath it. The yarn wrap adds weight and color. The ribbon or kraft paper hides the seam where the wrapping begins. Each layer isn’t decorative on its own; it’s setting up the next layer to look effortless. When you commit to all four layers rather than skipping to the pretty ribbon at the end, the result stops looking handmade in the charming-but-rough sense and starts looking handmade in the deliberately-crafted sense. That’s the difference someone feels when they hold it.
Ready to Bundle and Gift
Once every stem is finished, you’re set to arrange and bind — whether that’s a small posy of three blooms or a full two-dozen statement bouquet. For large statement flowers like crocheted roses that need especially stiff support, check out 24 Easy Crochet Flower Bouquet Ideas for Beginners to match stem gauge to flower size. If you want the stem yarn to coordinate beautifully with your blooms, How to Choose the Best Yarn for a Crochet Flower Bouquet will walk you through fiber and color pairing. And when you’re ready to bring everything together into a final arrangement, How to Arrange Crochet Flowers into a Bouquet covers binding, shaping, and the finishing bow. Your bouquet is closer to gift-ready than you think.