We’ve all been there — you’ve crocheted a dozen beautiful flowers, laid them on the table, and the moment you try to bundle them together, something feels off. Too flat. Too random. Nothing like the lush, rounded bouquets you saved to your inspiration board. Here’s the truth: it’s not your flowers. It’s just the arrangement, and that’s a completely fixable problem that takes about three minutes to solve.
Your Flat-Surface Staging Kit
Before you reach for the floral tape, a quick dry-run layout is all you need to crack the code. The good news? You almost certainly have everything required already.
- Your finished crochet flowers (all sizes)
- A flat, light-colored surface (a table, cutting board, or sheet of white paper)
- Your phone, for overhead shots
- A small jar, cardboard coffee cup, or drinking glass (your secret weapon — more on this shortly)
If you’re still choosing which flowers to make, pop over to 24 Easy Crochet Flower Bouquet Ideas for Beginners for pattern choices and color inspiration before you continue. And when you’re selecting yarn, choosing the right yarn for texture and drape makes a bigger difference to the final silhouette than most people expect.
Four Steps to a Balanced Bouquet Layout (Do This Before You Bind Anything)
The key insight here is simple: treat your crochet flowers exactly the way a florist treats fresh blooms — sort first, build a core, then layer outward. Committing stems before you’ve tested the layout is where most first-timers lose time.
Here’s the sequence.
1. Sort Into Three Piles by Role, Not Just Color

Separate your flowers into focal (your largest, showiest blooms), fillers (medium-sized supporting flowers), and accents (your smallest or most textural pieces). This single step instantly transforms a scattered pile into a working vocabulary for your bouquet. Color grouping happens within these piles, not across them — which prevents the “polka-dot” look where similarly sized flowers in competing colors cancel each other out.
2. Build the Visual Core Off-Center
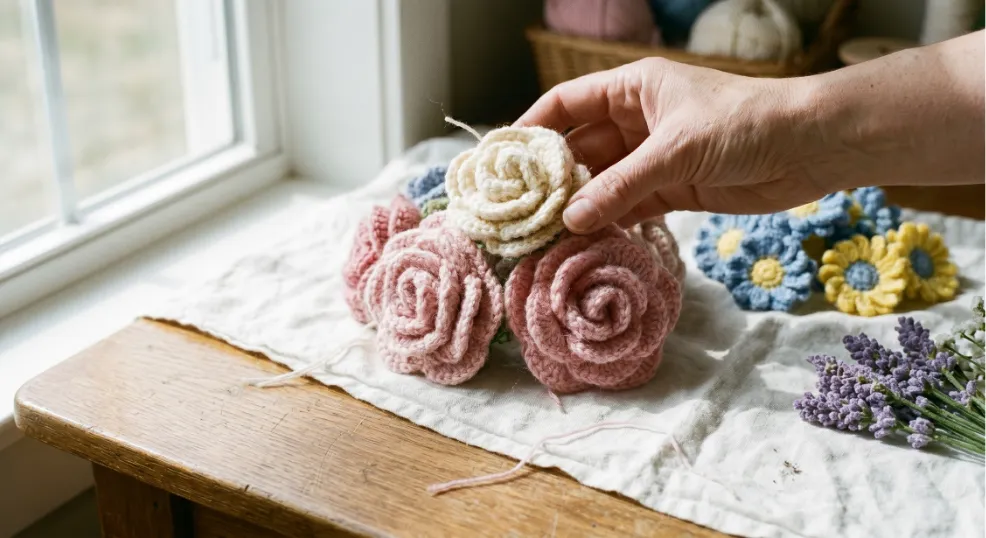
Place your one to three focal flowers slightly off-center on your flat surface. Dead-center arrangements read as stiff and symmetrical — a slight offset immediately gives the bouquet a natural, gathered-from-the-garden feel. This cluster becomes your anchor; every other flower will orbit it.
3. Create Depth with Staggered Stem Lengths
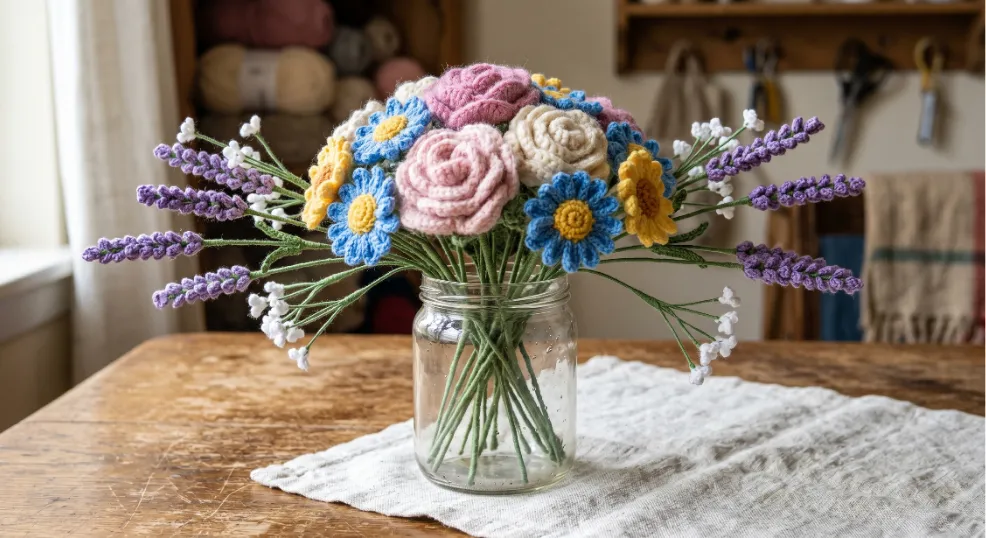
This is the step that creates the dome shape everyone loves. Slide your medium filler flowers in around the focal core, positioning them so their stems sit slightly shorter — they’ll nestle in closer to the core. Then ring the outside with your accent flowers on longer stems, letting them fan outward. Shorter inside, longer outside. This graduated layering is what separates a flat, hand-clutched bundle from a bouquet with genuine volume and depth.
4. Photograph Overhead, Then Adjust One Flower at a Time
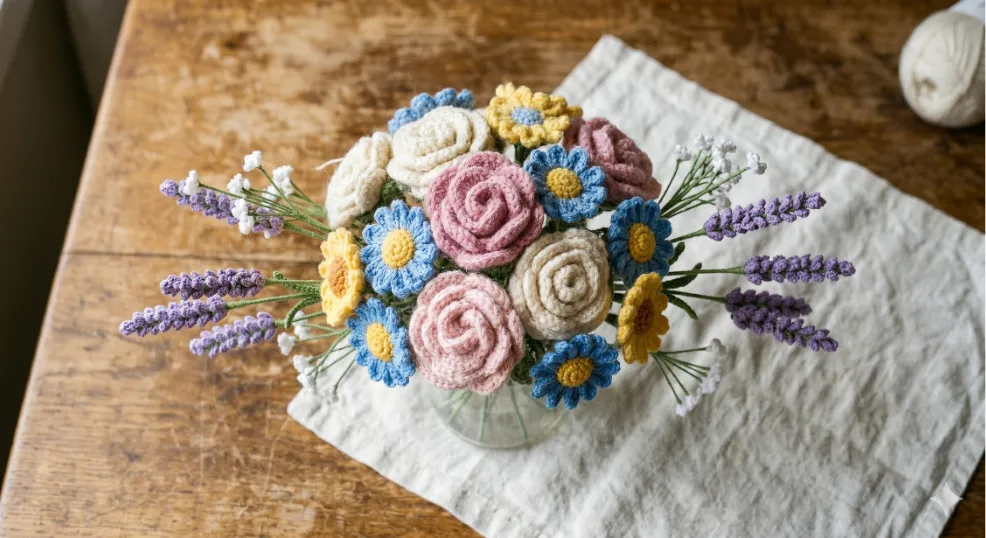
Hold your phone directly above the arrangement and take a photo before touching anything. The camera does something your eye at table-level can’t — it shows you exactly where the gaps, clumps, and color imbalances are. Move one flower at a time based on what you see in the photo, not what you think you see in real life. Once the overhead shot looks balanced, mark or hold the point where all the stems converge naturally. That’s your binding point.
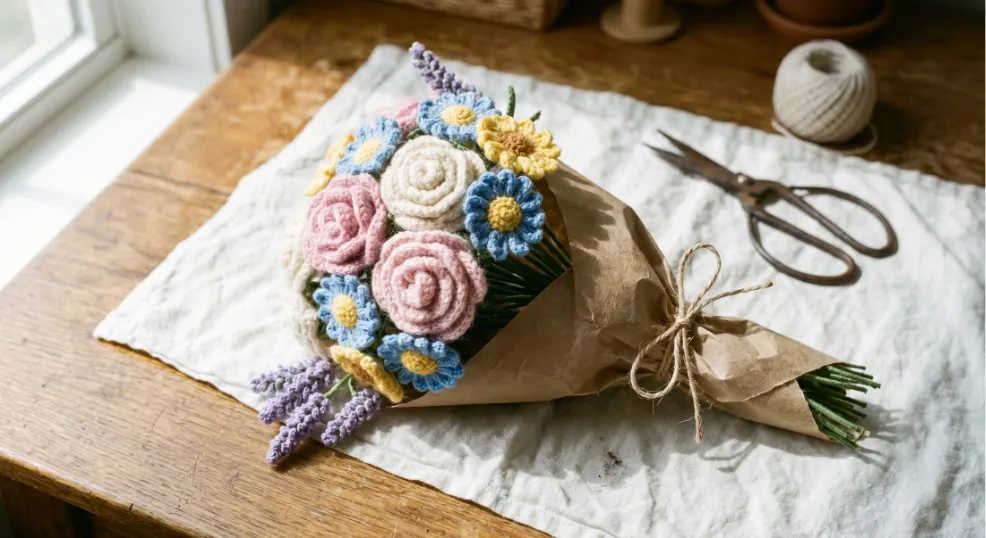
The Cardboard Cup Trick That Makes It Look Professionally Made
Here’s the one move that elevates a nice arrangement into something that holds its shape beautifully: before you bind a single stem, drop your bouquet into a small jar or cardboard coffee cup while you finalize placement. The vessel holds the dome silhouette in place so gravity can’t pull stems apart while you’re adjusting. You’ll immediately see how the finished bouquet will sit in someone’s hand — or in a vase — and you can keep tweaking without anything collapsing.
Once you’re happy with the arrangement, bind the stems at the exact point where they exit the cup. Floral tape wound tightly in a downward spiral locks everything together without slipping. From there, wrapping your stems neatly and making them secure with twine, ribbon, or kraft paper gives the whole piece a clean, gift-ready finish.
Your Bouquet Is Ready — Now Enjoy Giving It
Trust the process: sort, center, stagger, photograph. Four small steps and a coffee cup are genuinely all that stand between a scattered pile of beautiful flowers and a bouquet worth keeping forever. Now go bind those stems.