We’ve all been there—standing in the yard during a downpour, watching water cascade over the sides of your gutters instead of flowing smoothly through the downspout. That sinking feeling hits when you realize your gutters need attention, and then comes the sticker shock of professional repair quotes. But here’s the thing: most gutter problems are totally fixable with your own two hands, a free Saturday afternoon, and some smart material choices.
I’ll be honest—the first time I climbed up to inspect my gutters, I felt a little overwhelmed. But once I understood what I was looking at, the repairs turned out to be surprisingly straightforward. You don’t need to be a roofing expert or have a garage full of specialized equipment. What you do need is a willingness to get a little dirty, some basic safety awareness, and the right approach to tackle each issue methodically.
This guide walks you through everything from identifying what’s actually wrong with your gutters to completing the repair work yourself. We’ll cover leaks, holes, rust, sagging sections, and those annoying joint separations that seem to happen at the worst possible time. Plus, we’ll talk about how to do all this without breaking the bank—because smart spending is just as important as smart fixing.
Understanding What’s Wrong Before You Fix It
Before you grab any tools or sealants, take a careful walk around your house and really look at your gutters. Trust me, this step saves so much time and frustration later. You’re looking for specific problems, and each one has its own solution.
Common gutter issues you’ll spot:
- Leaks at seams or corners – Water dripping from joints where gutter sections meet
- Visible holes or cracks – Small punctures from rust or impact damage
- Sagging sections – Gutters pulling away from the fascia board or drooping
- Rust patches – Brown or orange discoloration, especially on older metal gutters
- Separated downspouts – Connections that have come loose or deteriorated
- Overflowing water – Often caused by clogs rather than structural damage
The key here? Don’t assume every problem needs a replacement. Most gutter damage is repairable, and honestly, repair materials have gotten so much better in recent years that a proper fix can last for years.
Essential Tools and Materials for DIY Gutter Repair
You probably already own half of what you’ll need. The rest? We’re talking about a modest investment that pays for itself the moment you avoid that first service call.
Your basic toolkit should include:
- Sturdy extension ladder (with a ladder stabilizer for safety—seriously, don’t skip this)
- Work gloves (the heavy-duty kind that protect against sharp metal edges)
- Wire brush set for removing rust and debris
- Putty knife for spreading sealants
- Silicone caulk gun for precise application
- Garden trowel or scoop for cleaning out debris
For the actual repairs, stock up on:
- Gutter sealant – Products like Flex Seal Liquid Rubber Sealant or Gorilla Waterproof Patch & Seal work wonders for leak repair
- Metal patch panels – Aluminum or galvanized steel pieces for covering larger holes
- Rust treatment – Rust-Oleum Rust Reformer converts rust into a stable, paintable surface
- Replacement brackets or hangers – DEWALT Gutter Hanger Brackets are affordable and strong
- Galvanized screws – Simpson Strong-Tie makes corrosion-resistant options perfect for outdoor use
- Waterproof tape – EternaBond Gutter Sealant Tape is excellent for quick fixes on joints
One smart move? Buy multi-purpose products. That Gorilla Waterproof Patch & Seal I mentioned? It works on aluminum, vinyl, and even PVC gutters, so one tube handles multiple repair scenarios.
Step-by-Step: Fixing Common Gutter Problems
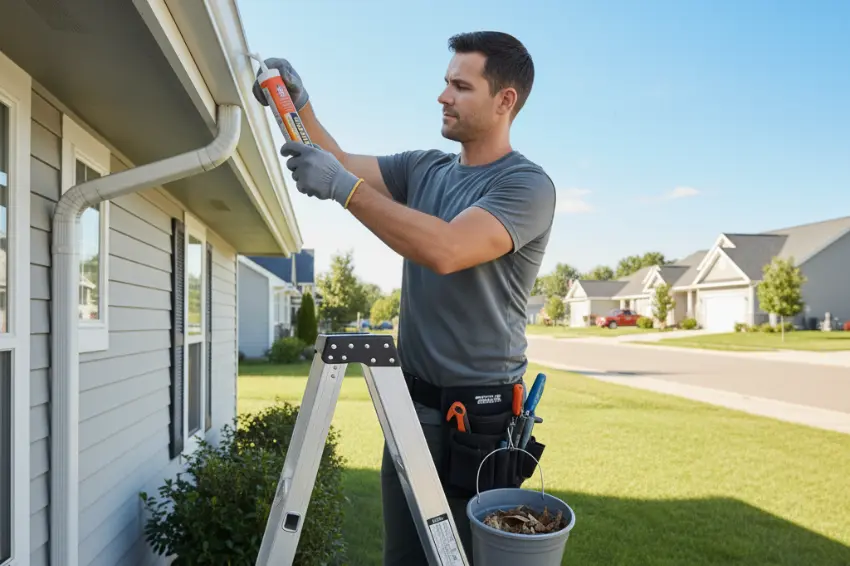
Repairing Leaks and Sealing Seams
Leaks are probably the most common gutter complaint, and they’re usually the easiest to fix. Most leaks happen at seams—the spots where two gutter sections connect—or at corner miters.
Here’s how to seal them properly:
- Clean the area thoroughly. Use your wire brush to remove all dirt, old sealant, and loose paint. A clean surface is absolutely critical—sealants won’t bond to gunk.
- Dry everything completely. Even if you’re using a “wet surface” sealant, you’ll get better adhesion on dry metal. Wait for a sunny day if possible.
- Apply your sealant generously. Products like 3M Marine Adhesive Sealant 5200 are flexible and waterproof—perfect for areas that expand and contract with temperature changes. Squeeze a continuous bead along the entire seam.
- Smooth and shape. Use your putty knife (or honestly, a gloved finger works great) to press the sealant into the joint and create a smooth finish.
- Let it cure fully. Most sealants need 24-48 hours to reach full strength. Don’t test them with the garden hose after just a couple hours—patience pays off here.
For downspout leaks, the process is similar, but you might need to disconnect the downspout first to access interior seams properly. It’s a bit more work, but the same principles apply.
Patching Holes and Cracks
Holes in gutters happen—from rust-through, storm damage, or that time a ladder slipped (we’ve all done it). The good news? They’re totally patchable.
For small holes (under 1 inch):
Simply apply a thick layer of Flex Seal Liquid Rubber Sealant directly over the hole. Build up several thin coats rather than one thick glob—it adheres better and looks neater. Each coat should dry before adding the next.
For larger holes or cracks:
You’ll need an actual patch. Cut a piece of metal patch panel (aluminum for aluminum gutters, galvanized steel for steel gutters) that extends at least 2 inches beyond the damaged area on all sides.
- Clean and dry the area around the hole
- Apply a layer of roofing cement or waterproof sealant around the hole
- Press the patch firmly into place
- Apply another layer of sealant over the entire patch, sealing all edges
- For extra durability, you can secure the patch with small screws before sealing (just make sure to seal over the screw heads afterward)
The Gorilla Waterproof Patch & Seal tape is another option here—it’s basically a heavy-duty adhesive patch that’s incredibly easy to work with. Cut it to size, peel, stick, and press firmly. Done.
Fixing Sagging or Loose Gutters
Sagging gutters are more than just ugly—they cause water to pool instead of flowing toward downspouts, which accelerates deterioration and can lead to more serious problems. This issue usually means your gutter hangers or brackets have failed.
Here’s your repair approach:
- Identify the problem spots. Sagging sections often correspond to missing, loose, or rusted-out hangers.
- Remove damaged hangers. If a bracket is bent or the fascia board behind it is rotted, you’ll need to address both issues.
- Install new hangers properly. Space them every 24-36 inches for proper support. DEWALT Gutter Hanger Brackets are a solid choice—they grip firmly without requiring complicated installation.
- Use the right fasteners. Those Simpson Strong-Tie Galvanized Screws are worth the few extra dollars—they won’t rust out in a couple years like regular screws.
- Maintain the proper slope. Gutters should slope about 1/4 inch per 10 feet toward the downspout. Use a level to check as you reattach sections.
Sometimes the fascia board itself is the problem—if it’s rotted or weak, even new hangers won’t hold properly. In that case, you might need to reinforce or replace sections of the fascia board first. It’s more work, but it’s still a DIY-friendly project if you take it step by step.
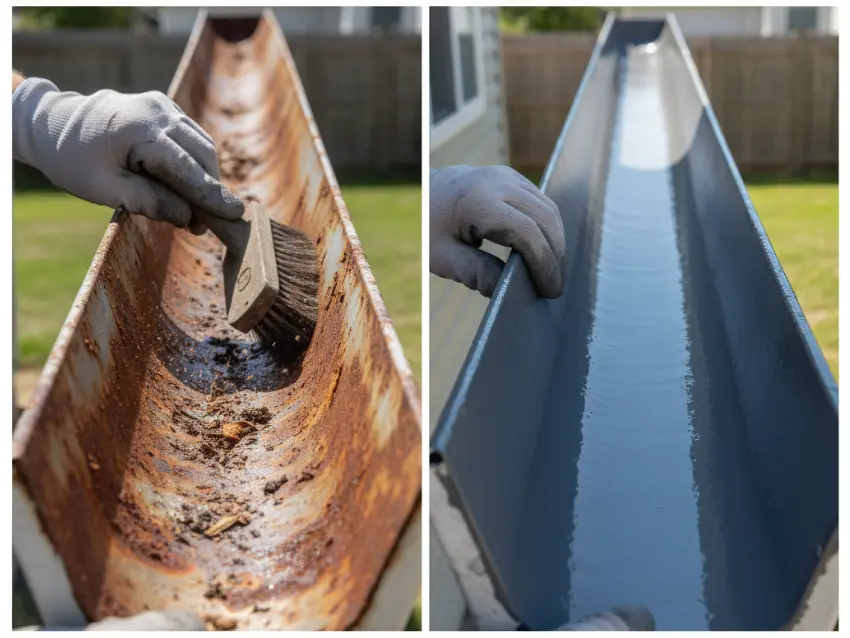
Dealing with Rust and Corrosion
Rust is the enemy of metal gutters, but caught early, you can stop it in its tracks and extend your gutters’ life by years.
Your rust-removal and protection process:
- Scrub away loose rust. Use your wire brush set aggressively—you want to remove all flaking, powdery rust down to solid metal.
- Apply rust converter. Rust-Oleum Rust Reformer is brilliant stuff—it chemically converts remaining rust into a stable, protective coating. Brush it on according to the package directions.
- Prime and paint. Once the converter has cured, apply a rust-inhibiting primer, then finish with an exterior metal paint. Rubberized Floor Paint actually works great for this—it’s durable and waterproof.
- Seal everything. As a final protective layer, you can brush on Liquid Roof Liquid Rubber over the painted surface. It creates a flexible, waterproof barrier that resists future corrosion.
If the rust has eaten completely through the metal, you’re looking at a patching job (see the section above) rather than just rust treatment. But for surface rust and early corrosion? This process works wonders.
Safety First: Protecting Yourself During Repairs
Let’s talk about the unglamorous but critical stuff. Gutter work means ladders, heights, and sometimes awkward positioning. A few safety precautions make the difference between a successful DIY project and a trip to the emergency room.
Non-negotiable safety measures:
- Use a ladder stabilizer. This simple device keeps your ladder from damaging gutters and gives you a much more stable working platform.
- Check your ladder’s condition. Wobbly legs, loose rungs, or cracked rails? Don’t risk it—borrow or rent a better ladder.
- Work with a spotter. Having someone hold the ladder base and hand you tools makes everything easier and safer.
- Wear heavy-duty work gloves. Gutter edges are sharp, and old gutters often have hidden burrs or rust spots that’ll slice your hands.
- Don’t overreach. Move the ladder frequently rather than stretching to access distant areas.
- Watch for power lines. Metal ladders and metal gutters near electrical lines are a dangerous combination.
- Wait for good weather. Wet gutters are slippery, and working on a ladder in wind is asking for trouble.
I know it’s tempting to rush through safety prep to get to the actual work, but trust me—taking an extra ten minutes to set up properly is so worth it.
Cost Comparison: DIY vs. Professional Gutter Repair
Let’s talk numbers, because that’s probably part of why you’re reading this guide in the first place.
Typical professional gutter repair costs:
| Repair Type | Professional Cost | DIY Cost |
|---|---|---|
| Leak sealing (per section) | $75-$150 | $10-$25 |
| Hole patching | $100-$200 | $15-$40 |
| Sagging gutter repair | $150-$300 | $30-$60 |
| Rust removal and painting | $200-$400 | $40-$80 |
| Full gutter cleaning and minor repairs | $150-$350 | $25-$50 |
These are estimates for typical residential homes. Your costs might vary based on gutter length, accessibility, and local labor rates. But notice the pattern? Even accounting for tool purchases, DIY repairs typically cost 70-90% less than professional services.
For a one-time repair, hiring a pro might make sense if you’re truly uncomfortable with ladders or if you have a particularly complex gutter system. But if you maintain your own gutters and tackle small issues as they arise? The savings add up fast. Plus, you gain the confidence and knowledge to handle future problems immediately instead of waiting (and paying) for a service appointment.
Common Mistakes to Avoid (Learn from My Errors!)
I’ve made plenty of mistakes with gutter repairs over the years. Here are the ones you can skip:
Using the wrong sealant. Not all caulks and sealants are created equal. That interior latex caulk from your bathroom project? It won’t hold up outside. Always use products specifically rated for exterior, waterproof applications.
Skipping the cleaning step. I cannot stress this enough—sealants need clean, dry surfaces to bond properly. That five minutes you save by not cleaning thoroughly? You’ll spend it redoing the repair in three months.
Over-tightening brackets. When you’re installing new gutter hangers, it’s tempting to really crank down those screws. But over-tightening can actually crack the gutter or strip out the fascia board. Snug is good; gorilla-strength is overkill.
Ignoring the slope. Gutters need to pitch toward downspouts to drain properly. If you reattach a sagging section without checking the slope, you’ve just relocated the problem, not fixed it.
Applying sealant in the rain. Yes, some products claim to work on wet surfaces, but you’ll always get better results working on dry gutters. Wait for good weather.
Forgetting about gutter guards. After you’ve done all this repair work, consider installing gutter guards to minimize future debris buildup. The 3M Super 77 Multipurpose Spray Adhesive works great for attaching mesh guards without drilling extra holes.
Maintaining Your Gutters After Repairs
You’ve invested your time and effort into fixing your gutters—now let’s keep them in good shape with some simple maintenance habits.
Twice-yearly cleaning schedule: Clear out leaves, twigs, and sediment every spring and fall. This is when most debris accumulates, and staying on top of it prevents clogs and standing water that accelerate deterioration.
Post-storm inspections: After major storms, take a quick walk around your house to check for new damage. Catching problems early means easier (and cheaper) repairs.
Monitor seals and patches: Keep an eye on any repairs you’ve made. If you notice a seal starting to lift or crack, reapplying sealant takes just minutes and prevents bigger problems.
Trim nearby trees: Overhanging branches don’t just drop leaves—they can physically damage gutters during storms. A little preventive pruning goes a long way.
Consider protective coatings: Once your gutters are in good repair, an annual application of a protective coating like Liquid Roof Liquid Rubber can extend their life significantly. Think of it as sunscreen for your gutters.
When to Consider Replacement Instead of Repair
Let’s be real—sometimes repair isn’t the smart move. If more than 30% of your gutter system shows significant damage, or if you’re constantly patching new holes and leaks, replacement might actually be more cost-effective.
Signs that replacement makes more sense:
- Extensive rust that’s eaten through multiple sections
- Gutters that are consistently pulling away from the fascia despite new hangers
- Cracks or separation at most seams and corners
- Visible sagging in multiple locations
- Age (gutters older than 20 years are often beyond economical repair)
That said, most gutter problems absolutely do not require full replacement. A few strategic repairs can give you many more years of service from an otherwise sound system.
Wrapping Up: You’ve Got This
Here’s what I’ve learned from years of DIY gutter maintenance: these systems are more forgiving than they seem. Yes, working at height requires caution and respect. Yes, using the right materials matters. But the actual repair techniques? They’re straightforward, logical, and totally within reach for anyone willing to take their time and follow the steps.
The confidence you’ll gain from successfully repairing your own gutters extends beyond this one project. You’ll start looking at other home maintenance tasks with a “maybe I can handle that” attitude instead of automatically reaching for your phone to call a contractor. That shift in mindset is incredibly empowering—and it saves a ton of money over time.
So grab your ladder stabilizer, stock up on some quality sealant, and give it a shot. Your first repair might take a whole afternoon. Your second will go faster. By the third time, you’ll wonder why you ever considered this intimidating.
Frequently Asked Questions
How do I know if my gutter needs repair?
Look for obvious signs during and after rainfall. Water overflowing the sides, dripping from seams or corners, pooling around your foundation, or staining on the exterior walls below gutters all indicate problems. During dry weather, visible rust, cracks, sagging sections, or gutters pulling away from the fascia board signal the need for attention. A simple test: run your garden hose into the gutter and watch how water flows—any leaks or irregular drainage patterns reveal issues.
What tools do I need for DIY gutter repair?
Your essential toolkit includes a sturdy extension ladder with stabilizer, heavy-duty work gloves, wire brush set, putty knife, caulk gun, and a garden trowel for cleaning. For fastening repairs, you’ll want galvanized screws and possibly replacement gutter hangers. The beauty of gutter repair is that these are mostly common tools you probably already own—the specialized items are just the repair materials themselves like sealants and patches.
How can I fix leaks in metal or PVC gutters?
Both materials respond well to modern sealants, though you’ll want to match your product to your gutter type. For metal gutters, clean the leak area thoroughly with a wire brush, dry completely, then apply a flexible waterproof sealant like 3M Marine Adhesive or Flex Seal Liquid Rubber. PVC gutters work best with PVC-specific cement or silicone-based sealants. The key for both: pristine, dry surfaces before application and adequate curing time afterward.
What materials do I need to patch holes in gutters?
Small holes under an inch need only a thick application of liquid rubber sealant or waterproof patch tape like EternaBond. Larger holes require metal patch panels cut to extend 2+ inches beyond the damage, secured with roofing cement and sealed completely around edges. Gorilla Waterproof Patch & Seal tape offers a middle ground—strong enough for moderate holes without requiring metal patches. Always match patch material to your gutter material when possible.
How do I re-align sagging or loose gutters properly?
First, identify failed hangers and remove them. Install new hangers every 24-36 inches using galvanized screws driven into solid fascia board—rotted fascia must be repaired first. The critical part: maintain a slope of approximately 1/4 inch per 10 feet toward the downspout. Use a level to check your work as you reattach sections. If hangers keep failing, the fascia board may need reinforcement or the gutter system might be improperly sized for your roof’s water volume.
Can I repair a split or cracked gutter without replacing it?
Absolutely—unless the crack is extremely long or the surrounding metal is severely deteriorated. Clean the cracked area down to bare metal, apply a base layer of waterproof sealant, then cover with EternaBond tape or a metal patch panel extending well beyond the crack. Seal all edges thoroughly. For cracks at corners or seams, sometimes adding an internal brace (a small strip of metal secured inside the gutter) provides extra reinforcement before sealing.
How do I remove rust and protect gutters from corrosion?
Scrub loose rust aggressively with a wire brush until you reach solid metal. Apply a rust converter product like Rust-Oleum Rust Reformer, which chemically stabilizes remaining rust into a paintable surface. Once cured, prime with rust-inhibiting primer, then paint with exterior metal paint. For maximum protection, finish with a rubberized coating or liquid rubber sealant. Regular inspections and quick touch-ups prevent small rust spots from becoming major problems.
What safety precautions should I take when working on gutters?
Never work alone—have a spotter stabilizing your ladder. Always use a ladder stabilizer to prevent gutter damage and improve stability. Inspect your ladder for defects before climbing. Wear heavy-duty gloves to protect against sharp edges. Reposition your ladder frequently rather than overreaching. Stay clear of power lines. Work only in good weather—wet or windy conditions dramatically increase risk. If you’re uncomfortable with heights or your gutters require particularly awkward positioning, hiring a professional isn’t admitting defeat—it’s smart risk management.
How much does it cost to DIY gutter repair versus professional service?
DIY repairs typically cost 70-90% less than professional services. Simple leak sealing might cost you $10-25 in materials versus $75-150 for a pro. Patching holes runs $15-40 DIY compared to $100-200 professionally. Even accounting for tool purchases on your first project, you’ll likely save $100-300 on typical repairs. The cost advantage multiplies if you maintain your own gutters regularly—professionals charge similar rates for each service call, while your material costs drop significantly after the initial tool investment.
What are common mistakes to avoid when repairing gutters myself?
The biggest error is using non-exterior-rated sealants that fail quickly outdoors. Skipping surface preparation—especially cleaning and drying—causes even good sealants to fail. Over-tightening new brackets can crack gutters or strip fascia screws. Forgetting to check and maintain proper slope toward downspouts creates drainage problems that undermine your repairs. Attempting repairs during rain or on wet surfaces reduces adhesion significantly. Finally, ignoring overall gutter condition—if you’re constantly patching problems, full replacement might actually save money long-term.